With homebuilding down in most parts of the country, concrete contractors are looking for ways to expand their businesses. Many are adding decorative concrete to their line-up of services or expanding their current decorative offerings. Before venturing into uncharted territory you should attend a training session through a product manufacturer or by other means to obtain basic knowledge about the products and services they offer. Overselling your performance capabilities can be hazardous!
To keep decorative work profitable and to maintain a high level of quality, you need to know what you're doing. A lot of defects that don't show up in gray concrete stand out in decorative concrete. And because customers pay a premium price for decorative concrete, they expect a premium product.
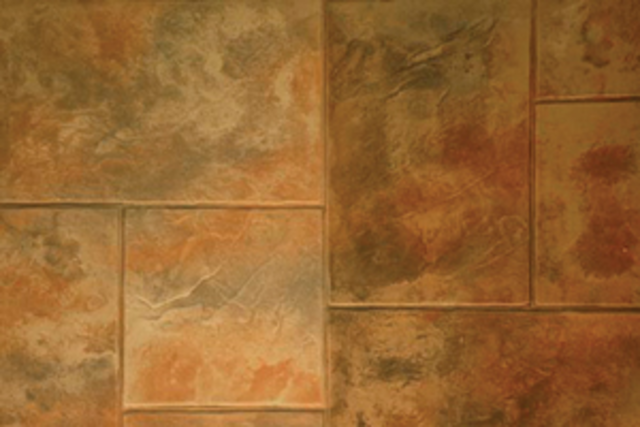
One of the pitfalls for many contractors branching out into decorative concrete is difficulty with sealers. Sealers can be tricky, but if you're aware of the problems that can arise and why those problems happen, you'll be able to avoid them. This article will help you seal it right the first time.
Minimize your risk
Before you even pick up your sealing roller or sprayer, there are a couple things you can do to minimize your risk when it comes to your decorative concrete jobs. One thing I suggest all contractors do is keep a job log. I use a spiral-bound notebook to record details about every job I perform. Write down the names of your colors, stamp patterns and sealers you use. Record the workers who performed each job, the weather conditions and anything else that might affect the results of your project. If problems with a job do occur, a job log can help you determine the cause of any problem.
Determine the type of sealer you are going to use on your job - waterborne or solventborne. Some important considerations to keep in mind: Will the odor from a solventborne sealer be an issue? Is a pigmented sealer required? Will there be a maintenance program? Glossy or matte finish? What are the owner's expectations?
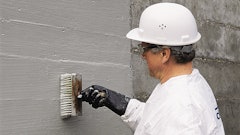
Always follow your manufacturer's recommendations for the sealer you're using. It will tell you if it should be spray or roller applied and the application rate for the type of concrete you're sealing. If the manufacturer suggests an application rate of 1 gal. per 300 to 400 sq. ft., measure that area on your job and make sure you're getting the correct amount of sealer down in that area.
It's all about the cure
Curing and sealing go hand in hand. One of the most frequent mistakes contractors make with some types of decorative concrete is they don't cure it properly. Remember, it is still concrete. It should be cured according to the type of finish and conditions. Some manufacturers offer a cure coat, a sealer or a product that does both. Most people call all these different products "sealers," but really the curing comes first.
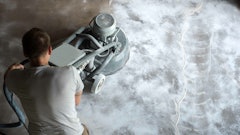
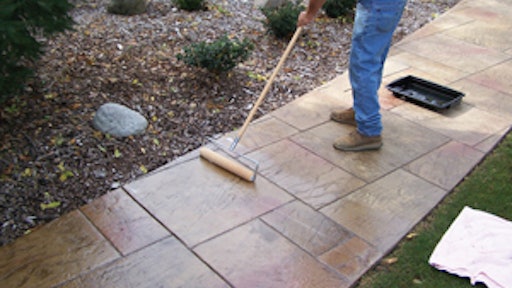
The best time to cure concrete is right after the finishing process. After your tools are clean and trucks are loaded, check to see if you can walk on the slab without marring the surface and then apply your first coat of sealer or curing compound - some contractors use a pump-up sprayer; however, I prefer an airless sprayer.
This coat doesn't necessarily seal the surface, but allows the slab to hydrate properly so the concrete gets stronger as time goes on. Many manufacturers suggest contractors apply this curing coat on the same day as the pour and return to the job 28 days later to apply a sealing coat. Different manufacturers require different processes, so check the label on your product.
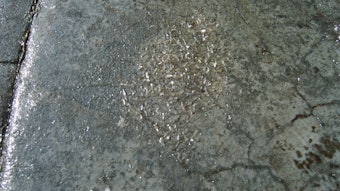
Avoid milky sealers
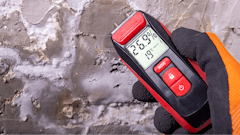
Contractors commonly have problems with sealers turning white or milky. This can happen in a couple different situations, but usually occurs where there is an excess of moisture.
If you apply a heavy coat of sealer on top of a slab that hasn't cured properly, it can trap moisture in the slab, creating the milky appearance.
Another situation that can cause your sealer to whiten is when you don't follow your manufacturer's recommendations and apply a sealer coat too thickly. Usually water-based sealers put on too thickly will whiten, while solvent-based sealers get blotchy, delaminate or won't bond with the surface.
You can also see your sealer appear to whiten or turn cloudy if it rains on your seal job before it has a chance to skin over, or cure. With a solvent sealer, this excess moisture from the rain causes delamination. The best way to avoid this is by keeping your eye on the weather report.
Burst your bubbles
Air bubbles or blisters are more common with solvent sealers. They can occur when the solvent in the sealer evaporates, or flashes off, too quickly. This evaporation can happen if the concrete temperatures are too hot or if you're sealing in direct sunlight. Windy conditions and blowing air from fans or air conditioners can also cause solvents to prematurely flash off. Try sealing in the morning or evening, and ensure fans and air conditions are turned off or not blowing directly on the surface you're sealing.
If you find yourself with a bubbly solvent sealer or a milky surface, you may be able to fix it with xylene. Apply xylene to the sealer with a pump sprayer, let it re-emulsify and soften the sealer, and while it's still wet use a roller to flatten the bubbles. This process is easier if you can identify the problem before the bubbles harden. Remember that the xylene will thin out the sealer, so after your bubble-free coat is dry you'll most likely need to apply an additional coat of sealer. This process may not be practical (or legal) in states with low-VOC compliance rules, so check your local regulations.
No strings attached
Most times it's necessary to apply two coats of sealer in succession. If you don't wait for the first coat to adequately cure before applying the second coat, you might find yourself with a cobwebby mess of fine strings pulling up from the concrete onto your roller. The best way to avoid this mess is to ensure your first coat has properly dried.
These strings can also occur when applying sealer to concrete with a high surface temperature. The hot pavement can absorb the carrier and leave the resin from the sealer to make a stringy mess. Again, avoid sealing in the heat of the day and in windy conditions.
Avoid fish eyes
Fish eyes can occur when a contractor tries to seal over oil. The sealer pulls away from the oil, usually in a series of ½-in. or so spots shaped like fish eyes. This most often occurs on stained interior floors. Oil can make its way onto your pavement in a number of ways, including via a plumber using a pipe threading oil or someone's tuna fish sandwich.
The easiest way to avoid fish eyes is by ensuring your surface is clean before sealing. And watch out for potential sources of oil spillage in your work area, including machinery or stray salad dressing on a lunch break.
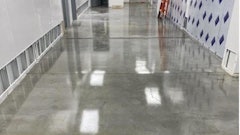
No more streaks
A sealer is the icing on a decorative concrete cake. It makes colors pop and brings a finished look to your project. A real disappointment and distraction is looking at a finished job and seeing wand marks or streaks in the sealer. This can happen for a number of reasons.
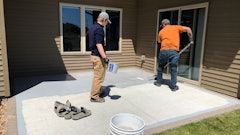
Pump-up sprayers work well when you've got a lot of pressure, but when you start losing pressure you get differentials in the thickness of sealer. When using a pump-up sprayer, it is a good idea to have someone backroll right behind the sprayer. Noticeability of application pattern can also occur with a roller-applied job if you switch out workers applying the sealer in the middle of a job. I suggest sticking with the same person throughout a sealer application for mil consistency and roller or spray pattern.
Sealer removal
Sometimes a botched seal job is unsalvageable and there's nothing you can do but remove it. This happens most often on an acid stained floor where the stain residue has not been properly removed. When this happens it's often a good idea to check with your sealer manufacturer for a product or recommendation for removal of their sealer.
Water-based acrylic sealers are fairly easy to remove, and contractors can often use a non-toxic stripper from the manufacturer or an orange-based stripper for the job. Sealer manufacturers often offer a solvent-based stripper for solvent-based sealers, but because of their toxicity those products shouldn't be used in all situations. If you require a low-odor stripper for a solvent-based sealer, look for one of the soy-based products on the market - many work extremely well.
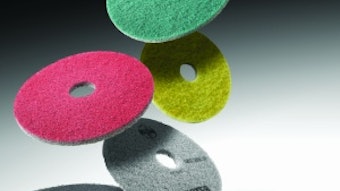
After successful removal of sealer, make sure you thoroughly clean the surface before resealing. Use an autoscrubber, and then get down on your hands and knees with a towel to clean corners and edges. If you don't clean properly you take the chance of the sealer failing again.