Most commercial paving and driveway paving jobs run into problems long before the crew ever arrives to start work. That's because contractors, in their haste to complete a bid, in their efforts to be awarded the bid, or simply because they don't know any better, take shortcuts or make decisions that affect both the work itself and the profit of the job.
Here are 20 essential elements contractors need to consider to make sure they do a quality job and receive a reasonable profit.
- Measure the lot. Using a measuring wheel and 100-ft. tape measure, confirm all blueprint figures. Measure from the edges to all the various structures. Also identify the locations and distances between structures such as light poles, islands, and sewer caps. These measurements will form the basis of your bidding and planning.
- Determine where to start paving. As you'll see, this is closely tied to other planning issues, but you need know both where you will start to pave and which direction you will pave. This is often dictated by other factors, but in the early stages bring the crew – the people who are running the screed, the roller, the paver – into the discussion.
- Determine paving widths and number of passes. This is called "lining out the job." Are you going to have 10- , 12- , or 18-ft. passes with the paver? To some extent this is determined by the paver you are using but it is more effective and efficient to determine it based on the layout of the lot and the measurements you took. Once you've taken the initial measurements you might realize that the first three passes have to be 10-ft. wide, while the next passes can be wider. You might even have to pave in a different direction initially to get the correct number and widths of passes. Once you've decided where your passes are going to be, mark each pass with spray paint.
- Determine what size paver you will use on the job. If you have more than one paver to choose from, make sure to match the size to the project. Selecting between an 8-ft. paver that extends to 15 ft. and a 10-ft. paver that extends to 19 ft. will significantly alter some of the other decisions you have to make.
Also, job quality is an important consideration in deciding which paver to use. You don't want to extend your pavers too wide because you want to work within the limitations of your screed so you can control the head of material. If you have to pave a 30-ft. width, for example, you might be better off using three 10-ft. passes instead of two 15-ft. passes.
Also, will your paver be track or rubber tired? If the subgrade is soft you might not be able to use a rubber-tired paver.
- Determine your yield for each pass. Once you have figured out how each pass will be made, you can begin determining how much mix you will need for the job. Start this process by determining the material needed for each pass. For example, a 10-ft. pass might run 100 feet long, and at a 2-in. mat thickness you can figure out exactly what the yield is for that pass. (Yield = length x width ÷ 9 = square yards x depth = tonnage for that pass.) Complete this step for each planned pass.
By adding up the total yield for all planned passes you can accurately estimate the total tonnage for the job.
Knowing the tonnage of each pass and the total tonnage of the job also provides you with a way to measure progress. If a parking lot calls for 100 tons of mix and after three passes you've placed 20 tons, you know you are 20% done with the job and you know how much mix to tell the plant you need.
- Bid the job properly. Commercial paving is designed for the loads it's going to take. Don't reduce mat thickness to be competitive.
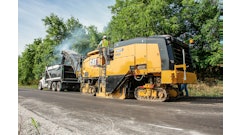
- Evaluate trucking options. Trucking dictates much of what happens on a job, and it's paving's most costly item. So when you first arrive at the site spend a few minutes determining how the trucking is going to come into the site. If the trucks have to sit and wait that will cost the contractor a lot of money, so it's best to get the trucker on and off the jobsite as quickly as possible. So determine where the trucks are going to come in, paying special attention to the subgrade they'll drive over as trucks can really tear that up.
- Determine what kind of trucks to schedule. You want to keep mix flowing to the site, you want to keep your crew busy, you want to keep production on pace, and you don't want to have any trucks sitting for too long. So are you going to schedule six wheelers (which hold 10 tons of mix), 10 wheelers (18 tons), or tri-axle trucks (24 tons)?
As you make your decision remember that bigger is not always better if your crew can't handle the production or if the way the job is planned doesn't need large trucks. Also remember that smaller trucks cost more money because they require extra trips to the plant. In many cases the best approach is to use a combination of truck sizes, so look at the job before you're paving so you can best plan which combination of trucks to use.
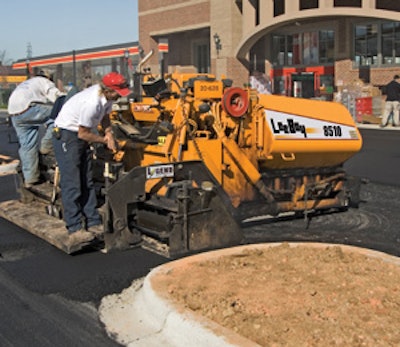
- Determine how much hand work is required. Can all the work be done by the paver or will you need a mix of dumping and using a wheelbarrow and hand work? You need to know this in advance because that all affects the rate of production.
- Know how many people it will take to do the job. If you need a paver operator, a screed operator, two roller operators, and two hand workers, you better have them or your rate of production and even job quality will suffer.
- Factor your crew into your bid. When you bid the job you have to know how trained your personnel is and you have to know their capabilities.
If your crew is experienced and works fast, you will be on the job for a shorter time. If your crew is slow or inexperienced it will likely take longer to produce a quality job. Factoring this information into the bid will assure a more accurate appraisal of both the time the job will take and its profit potential.
- Determine the hourly rate of production on each specific job. This takes into account the length and number of passes, the capabilities of the crew, the production rates of the equipment you're using, and the expected amount of hand work that will be required. Determining the hourly production rate not only gives you a better sense of how to bid and profit, but it helps you know how many trucks you need to reach that tonnage per hour – because you need to tell the plant what you need and when you need it.
- Pay attention to site-specific details. Every job is different and the differences can cost you money if you aren't aware of them. Make sure you know if it's a one- or two-lift job. And notice how many structures or other impediments there are on the property. The more impediments, the longer it will take to pave.
- Pay close attention to time constraints. Make sure you know when you can pave. If you bid a job assuming you can pave from 6 a.m. to 6 p.m. and the job will take 10-12 hours, but you find after you've got the bid that you can only pave from 9 a.m. to 3 p.m., your one-day job just turned into a two-day job and your profit will decline substantially.
- Consider adding a skid steer or backhoe loader to your fleet. These versatile pieces of equipment can be excellent tools for paving parking lots and driveways. They are maneuverable, can often fit into areas not accessible by the main paver, and can save on manpower. They can be used at the end of a pass to cut the pile off, pick it up, and put it back into the paver. They also can pick up mix and place it into areas the paver can't reach so the person raking, luting, and shoveling can get the material where he needs it.
- Consider adding other support tools to each paving crew. Plate compactors, hand rollers, hand tamps, and tamp shoes not only improve production rates but also improve job quality. Plate compactors enable you to compact around structures a hand roller or ride-on roller won't reach. Tamper shoes and hand tamps are effective around sewer caps and other areas where the plates can't reach. A propane torch can reheat cooled mix so it can be re-luted and re-compacted. A pump and hand sprayer easily applies a biodegradeable product – no diesel fuel! – on top of sewer caps so the mix is easy to remove when they are paved over.
- Select the best roller or roller combination for the job. What size roller depends on the size of the job. Use a smaller roller on driveways and consider using several size rollers on parking lots of medium size or larger. Also consider a pneumatic (rubber-tire) roller for small jobs and for jobs where the base isn't sound.
Regardless of the job, a rubber-tire roller is like a secret weapon out there. The secret is it can manipulate and polish the mat. It kneads the material and brings the fines to the surface, though the mat still needs to be finished with a static roller.
- Pay attention to water issues. As you get into the planning you might realize the water on half the lot has to flow left; water on the other half has to flow to the right. That will affect how you pave and possibly in which direction you pave. If it's flowing to the right, try to pave high side down or low side up. If you pave low side up the joints need to be perfect so they don't trap water.
- Make sure all equipment is working. Nothing reduces production rates like a broken down paver or roller.
- Create your own punch list. When you've done a job, whether it's a parking lot or a driveway, the customer is not going to ask "Did you get the 95% compaction I wanted?" Instead, he's simply going to look at the job. Did the paving butt properly to the road? Does it butt smoothly to any concrete? Is the mat texture different from one area to another? Are there any visible dips in the surface? Quality is key.
John Ball, Top Quality Paving, is a nationally recognized paving consultant and a regular presenter at National Pavement Expo and National Pavement Expo West. Reach John at P.O. Box 4398, Manchester, NH 03108; [email protected].


