Whether it’s the stucco on your home, terracotta roof tiles or your residential driveway, color can be the most immediately noticeable and the least expensive element during the building process.
Having said that, some contractors have a hard time developing the confidence to use it properly, especially when choosing a variation of color combinations to complement surrounding structures. If one chooses color combinations from the existing structure and incorporates them into the stamp work, the project will blend harmoniously.
An example of this would be to start with your base color selection. This color may be a beige or buff color which matches your siding or stucco color. Choosing your next accent color may come from the trim around your windows or from the roof tiles.
Having an understanding of color theory is a valuable tool to include in your toolbox, but knowing which products to use to achieve these color combinations can be an art of its own. Let’s review the most commonly used methods of coloring your stamp work.
Integral color
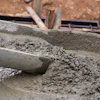
Integral color is easy to use because it is typically mixed into the concrete at the batch plant to achieve uniform, homogeneous color. Integral colors are available in powdered, granular or liquid forms, and sometimes contain admixtures, referred to as a colored admixture.
A big advantage of using integral color is labor savings. You don’t need to float the color into the surface during finishing, as you do with shake--on hardeners. Another plus is that the color is permanent because it extends throughout the entire matrix of the concrete. So even if the slab surface is accidentally chipped, scratched or abraded, the integral color will remain, unlike with surface--applied treatments.
A disadvantage with integral color is that the hues are more subtle and less vibrant than what you can achieve with color hardeners. You’re generally limited to soft earth tones, such as muted browns, reds and tans. Although you can obtain pastel hues with integral color, such as blues or greens, doing so is usually cost prohibitive. To achieve good color intensity with these lighter hues, you would need to use a white cement and a high dosage of pigment, resulting in a significant increase in concrete costs. For that reason, stamping contractors often use integral colors in conjunction with surface--applied treatments — such as color hardeners and chemical stains — to create layers of color.
Dry--shake color hardeners
For brighter colors, dry--shake color hardeners give better results and come in an unlimited range of color options. The hardeners are broadcast onto the fresh concrete and then floated into the surface before imprinting. To work properly, the color hardener must “wet out,” or absorb some moisture from the slab. Because these products contain fine aggregate and cement, as well as other ingredients, they actually densify the surface and make it less permeable, so some surface strengthening can be expected.
While dry--shake hardeners are more labor--intensive to use than integral coloring, they are comparable in price overall with integral color because you’re not coloring the whole matrix of the concrete. Hardener is applied only in the quantity needed to color the top 1/8 to 3/16 in. of the slab. Most seasoned stamp professionals prefer the color hardener option because of the range of color that can be obtained, but also they claim you can achieve a cleaner imprint since you’re imprinting a layer of paste as opposed to the course aggregate typically found in ready--mix concrete.
Release agents
Pigmented powdered or liquid release agents serve dual purposes: They act as bond breakers to prevent the stamping mats or skins from sticking to the concrete and disturbing the imprint texture, and they impart subtle color to the concrete that enhances the intregal or dry--shake color, resulting in an antiquing effect.
A popular technique is to start with a light concrete base color (whether an integral color or a color hardener) and then apply a much darker release agent for contrast. Although about 70 to 80 percent of the powdered release is washed away after the concrete hardens, the remaining release becomes depressed into the surface paste during stamping, which creates the subtle color accents.
Powdered release agents are more traditionally used by stamping contractors because they offer more color selections. However, they do have disadvantages. Because these very fine powders are dusted onto the concrete surface, they create airborne dust particulates, so workers must wear dust masks to prevent inhalation. On windy days, the airborne powder can stain nearby buildings, existing concrete flatwork, and landscaping, making it necessary to mask off adjacent areas with plastic or paper sheeting. Because of these concerns with powdered releases, more contractors are using clear liquid releases and tinting them with a powdered release (see the tip below). This method is quite effective and eliminates the disadvantages of using a powder alone.
I’m from the old school, though, and believe you can obtain a much more realistic look using a straight powder release. It’s often a trade--off: Powders require more cleanup and masking of adjacent surfaces, but they produce greater contrast than a liquid release.
Tip: Generally, one cup of powdered release is needed to tint approximately 5 gal. of liquid release. A helpful hint: Add the powder in increments, maybe 1/2 cup at a time, until the tint level you want is achieved. Mix the powder with the liquid release, and then dip a clean rag, sponge, or brush into the tinted liquid and drag it across a piece of white paper to check the color intensity of the tint. If you decide you need to intensify the tone, add another small dose of powder. It’s much easier (and less wasteful) to build up the tint level this way than to add more liquid release to soften a tone that’s too bold.
Stains
Some stamping contractors like to achieve color variegation by applying chemical stains to the concrete after it has cured. Acid--based stains react chemically with the concrete and produce a mottling effect that gives your stamping work a sense of realism. If you’re trying to mimic the color variations of natural stone, an acid stain will allow you to achieve interesting highs and lows. Most stains can be diluted to achieve varying degrees of color transparency. You can also apply stain randomly to individual stones in the stamped design — something that would be impossible to do with color hardeners or releases that are worked into the concrete surface.
Another reason to use a stain is to mask blemishes. No matter how careful you are, it is difficult to produce a blemish--free stamp job. There will always be some subtle color imperfections. For example, maybe the pigmented release didn’t take completely in one area. You can use a stain to accent the color in that spot and disguise the flaw.
Dyes and tints
Dyes can be used in conjunction with stains to achieve greater color intensity. They can produce bright, vibrant colors, and you can mix your own custom colors on the jobsite to broaden your palette.
Unlike stains, dyes are not chemically reactive with concrete. Instead, the fine coloring agents in dyes penetrate the concrete surface. Keep in mind, however, that dyes will fade somewhat (generally 5 to 10 percent) when exposed to ultraviolet light. They are not as UV--stable as acid stains.
Tints, which are generally diluted color washes, can be used to add hints of color and produce some interesting faux finishing effects. There are several methods of creating tints. Probably the most popular is to mix a pigmented powdered release with a solvent--based acrylic sealer, so your sealer itself acts as a color wash. A word of caution: This method won’t work with water--based products; you need the solvent to break down the particles in the powdered release.
I’ve also seen contractors make tints by mixing several handfuls of color hardener with water in a pail. The heavier solids in the hardener settle to the bottom of the pail while the pigments color the water. The tinted water can then be applied to the concrete by spray or sponge. Keep in mind, however, this type of tint is not as permanent as a stain or color hardener. You will definitely need to lock in the color by applying several coats of sealer.
Explore your coloring options to find out which products and techniques will best suit your specific applications in your environment.
Bob Harris is the founder and president of the Decorative Concrete Institute in Douglasville, Ga., which provides hands--on training seminars in architectural concrete. He has personally placed or supervised the placement of more than 3 million sq. ft. of decorative concrete and has authored two best--selling books, Bob Harris’ Guide to Stained Concrete Interior Floors and Bob Harris’ Guide to Stamped Concrete. He can be reached at (877) DCI--8080.