Think about the consequences if the wheel comes off one of your company’s dump trucks or heavy-haul tractors while it’s hustling down a freeway at 50+ mph. This 200-lb. unguided missile has enough energy to virtually destroy other vehicles sharing the road, especially if that vehicle is headed at 60+ mph in the oncoming direction. If you have any doubts, check out the video produced by Michelin Tires and the Tire Industry Association at http://bit.ly/1Fh35xR.
The good news is there are several steps you can take to drastically reduce the risk of a wheel-off incident. The first is training. OSHA Regulation 29 CFR 1910.177 requires training for all employees that service truck tires and wheels. This includes removal and installation of the wheels for common repair of brakes or suspension repair. For more information on these requirements, contact [email protected].
Use Proper Tools and Techniques
The two major causes of wheel-off incidents include a loss of clamping force on the wheels and bearing failure.
Improper installation that results in a loss of clamping force is the most common cause. “Most wheel-off accidents are caused by improper torque or improper installation,” says Kevin Rohlwing, senior vice president of training, Tire Industry Association. “Improper torque mostly relates to insufficient torque where the wheels become loose, but it can also be over-torque, where the studs are overstretched and eventually fail.”
Using the incorrect tool for installation is a common problem. “Most of these situations are the result of using an impact wrench to tighten the fasteners,” says Rohlwing. An impact wrench is not a proper torque control device; it cannot be used as a substitute for a torque wrench. “A calibrated torque wrench is the best tool for ensuring proper torque, and it should be checked at every regular maintenance interval.”
Tire Mounting to Improve Performance
Make sure to tighten bolts in the correct pattern. “Always tighten and torque wheel nuts in a star pattern starting at the 12 o’clock position. Stud-piloted systems have a dry torque and hub-piloted systems have an oiled torque,” says Rohlwing.
But just using a properly calibrated torque wrench is not enough to ensure correct torque. “Improper installation is typically associated with using a torque wrench to apply the correct amount of force to each fastener, but the wheel mating surfaces are not cleaned,” says Rohlwing.
Proper cleaning is vital to correct wheel installation. “The wire brush is probably one of the most important tools when preventing wheel-off accidents,” says Rohlwing. “All of the mating surfaces should be cleaned so any foreign material is removed. Brake cleaner is another good tool for cleaning studs and drum/hub surfaces.”
Caution should be used when using paint and metal primer. “Using a metal primer on the mating surface of a wheel is dangerous because excessive paint can cause a wheel off,” says Rohlwing, “The maximum paint thickness on mating surfaces is 3.5 mils, which is hard to consistently apply with a spray can.”
Technicians need to understand proper installation technique. “The person installing the wheels must know which mating surfaces need to be cleaned and how to inspect the components,” Rohlwing emphasizes. “The next area to look at is the actual installation, especially the proper torque. Just focusing on the torque wrench is a bad idea because proper torque leads to improper clamping force when the wheel installation procedures are not followed.
“Contractors need to either make sure their technicians are properly trained or ensure that the vendor doing the work is properly trained,” he continues. “Finally, the wheels need to be checked after installation (50 to 100 miles) to make sure none of the fasteners have lost torque.”
Identify the Wheel End Type
Two popular types of wheels are stud mount and hub piloted.
Stud mount wheels are designed to be centered by the nuts on the studs. Chamfered nuts seat against chamfered bolt holes in the rim to center the wheel.
Hub-piloted wheels center on the hub at the center hole of the wheel. This requires a close tolerance on the center hub. They are secured with two-piece flange nuts. Hub-piloted wheels generally have straight through-bolt holes with no chamfer.
The distinction between these wheels is very important since each type requires a different procedure to obtain the proper torque.
“Hub-piloted wheel systems (also called unimount) require motor oil on the studs and flange nuts,” says Rohlwing. “Motor oil is the only suggested wheel lubricant and it should only be applied to hub-piloted systems.”
To achieve the proper torque, it is important to use 30-weight oil and in the right quantity. Only a couple of drops are needed. “Using the correct torque and failing to apply oil to the stud and flange nut will result in insufficient clamping force, which leads to a wheel-off incident in most cases,” Rohlwing cautions.
On the other hand, the nuts and studs on stud mount wheels should never be lubricated. Snug up the nuts in the proper order and then torque the nuts in order to achieve the proper torque.
It is also important to never mix and match nuts or wheels. Chamfered nuts should never be used on a hub-piloted wheel and flange nuts should never be used on a hub-piloted wheel. By the same token, never use a wheel designed for a hub-piloted system on a stud mount axle, or vice versa.
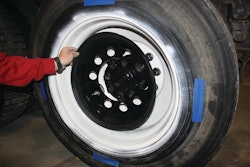
Inspect for Defects
Be sure wheels and hubs are in proper operating condition prior to installation. When inspecting a wheel, look for any evidence of shifting components or loose lug nuts.
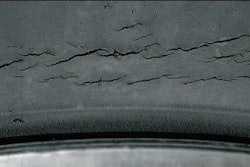
Elongated or damaged bolt holes are not common when you consider the number of wheels on the road, but it does happen. “And there is no way to repair the wheels after they are damaged,” says Rohlwing. The only option is to replace any damaged components.
Wheel bearing failure is the other portion of the wheel-off incident equation. Carefully inspect the wheel hub. “Look for the proper oil level in the hub cap,” advises Rohlwing. “Spin the wheel and listen for any grinding sounds.” Keep a close eye on tell-tale signs of bearing failure. “In most cases, the signs are smoke emitting from the wheel end after a long drive or a grinding sound when spinning the wheel.”
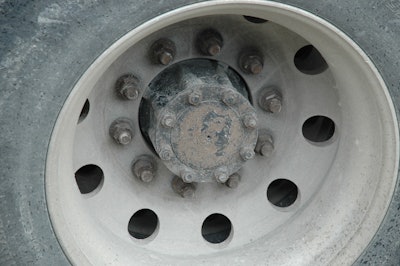
When you inspect wheel studs, look for damaged or worn threads. “If the nut doesn’t easily spin on the threads, it’s a sign that something is wrong,” says Rohlwing. “The best way to determine if the studs need to be replaced is to check the torque 50 to 100 miles after installation. If the wheels are properly installed and torqued, the torque check can identify any studs that have been fatigued or damaged as the result of previous over torque.”
There is no set lifespan for wheel nuts and studs. “If they are properly installed and torqued, it’s measured in decades,” says Rohlwing. “Studs and nuts should be replaced when they can no longer maintain clamping force after installation.”