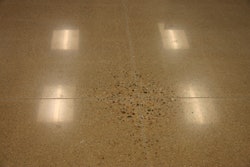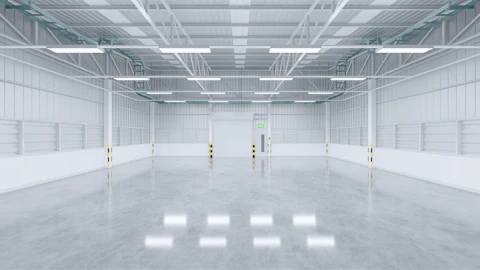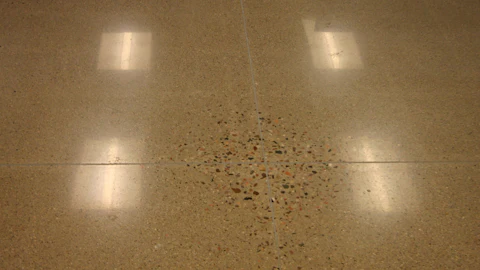
Ben Franklin is credited with the adage… “By failing to prepare, you are preparing to fail.” This has never been more evident than in the world of polished overlays specifically and all floor coatings in general. Polishable concrete overlays represent the pinnacle in comprehensive floor repair and stand on the cutting edge of the polished concrete industry. Ongoing advancements in polishable overlayments have continued to turn weathered and beaten concrete floors into beautiful finished floor surfaces. However, if the end goal is a fantastic finished product it had better start at the very beginning.
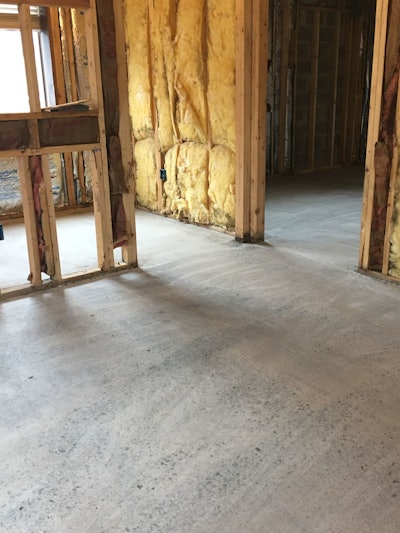
Polishable concrete overlayments are generally not considered for great existing floors which means that an existing floor surface is probably full of residual damage as a result of its former use. Floors being considered are often pocked with holes and cracks. They may have existing flash patching from previous floor coverings. They may have or have had ceramic tile or vct or layers of one or the other. All in all, the existing floors being considered for polished overlays are in rough shape.
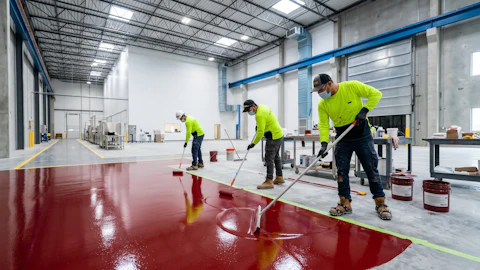
All polishable concrete overlayments start with epoxy. The epoxy serves as a primer for the concrete overlay. As an epoxy floor is the first step to a successful overlay, it’s best to remember that standard industry guidelines to epoxy placement are no less critical in polishable overlayments than in traditional epoxy flooring. CTS’s Rapid Set TXP Fast is one such epoxy primer, and the TXP line is a fantastic starting point. Rapid Set TXP Fast is a fast setting two component alkali resistant epoxy primer which is the initial building-block for CTS’s Rapid Set Tru PC (Polished Concrete). The technical data for TXP Fast clearly stipulates standard industry guidelines related to epoxies…”TXP FAST is used on properly prepared concrete. Surface must be dry, porous, clean, sound, and free of grease, oil, curing compounds, dust, mastic and other contaminants or bond breakers.” Every epoxy manufacturer states some variation of this standard language related to proper epoxy placement.
The term “sound” is a catch all in the epoxy world, but that catch all is critical. Sound concrete needs to be free of cracks, spalling, delamination, scaling and blisters. For the surface to be sound, all previous flash patching or sealers need to be completely removed. Additionally, spalls or cracks need to be properly repaired.
Another looming item in the epoxy world deals with moisture transmission through concrete floor slabs. Even existing concrete can still suffer from moisture permeating from underneath and through the concrete. If moisture is permeating through the slab that moisture may result in epoxy failure as the moisture collects between the epoxy and the concrete. Moisture transmission is measured through Moisture vapor emission rates (MVER) and categorized under ASTM F1869. Traditionally most epoxy primers call for acceptable substrates to have an MVER less than or equal to 10 lbs./1000 sq. ft per 24 hours and relative humidity less than or equal to 100%. There are hundreds of independent testing agencies which can test the MVER on a given surface. This is a critical step in floor preparation and should not be overlooked.
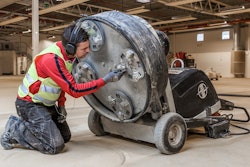
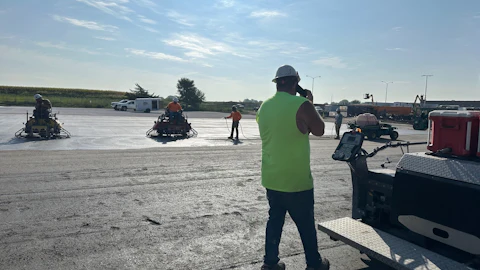
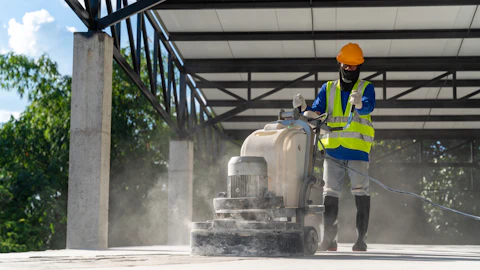
Most epoxy manufacturers require an abraded floor surface prior to epoxy installation. Abrading the floor surface can be accomplished through either shot blasting or properly tooled concrete grinders. This process results in huge variations in the concrete floor surface, and these variations or peaks and valleys allow the epoxy to grip the existing concrete. Mechanical abrasion may also be critical in achieving a “sound” substrate as well.
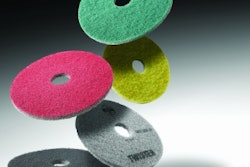
The International Concrete Repair Institute led the charge in standardizing abraded surfaces through the development of the CSP, or Concrete Surface Profile, scale. The CSP scale ranges from a one (very smooth) to a nine (extremely rough), and most floor coverings will call out the scale in their technical data or bulletins. CTS’s Rapid Set TXP Fast specifically calls for a 3-5 on the CSP scale in order to achieve proper adhesion. ICRI does sell a series of chip samples for the CSP scale through their website. The chips are indispensable in abrading concrete floor surfaces when the feel of the surface profile is critical to success.
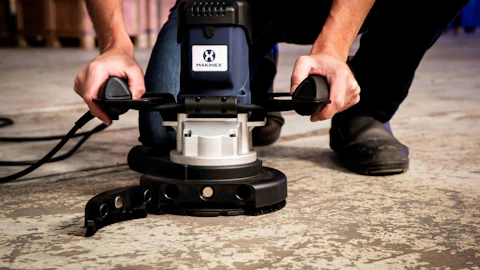
In order to reach the required CSP of 3-5 mechanical means are necessary. “Mechanical means” means specialized equipment. Acid etching the floor surface should not be considered a viable means in creating the required concrete surface profile. Traditional shot blasting equipment has always been the gold standard in achieving deep surface profiles and is more than adequate to achieve the required 3-5 CSP. However, planetary head grinders are also adequate if tooled aggressively. Diamond tooling manufacturers have created dozens of variations of removal and/or profiling tooling in recent years. This is critical for the contractor as it minimizes the total equipment required on site to achieve a finished product. The SASE company recently released Bush Hammer tooling for planetary head grinders. The tooling plate mounts to standard grinding equipment and hosts hundreds of tungsten pins which abrade the floor surface. Proper tolling of this type will create a 4-5 CSP and is rapidly becoming the go-to for knowledgeable contractors.
Once the MVER test is complete, spalls and surface imperfections have been repaired, and the surface has been adequately abraded it’s time for the epoxy primer. A single coat of epoxy primer is generally recommended; however, each case may differ and it’s best to work within the confines of the manufacturer’s instructions. Traditionally epoxy primer will rely on a single coat at a thickness of 10-12 mils through a standard squeegee and back-roll application. The back-roll process should be perpendicular to the squeegee process and should require the use of a ½” nap roller.
As a primer for concrete overlayments the next step is crucial and requires a sand broadcast into the epoxy immediately following the back-roll as established above. The sand creates a bonding agent for the concrete overlayment to follow. The sand broadcast should use clean, dry silica sand and technical data for the epoxy primer should always stipulate that the sand broadcast is to the point of rejection. Rejection should mean exactly that. Sand should be broadcast into the epoxy until it is dry on the surface. The epoxy literally rejects additional sand. #20 or #30 mesh dry, silica sand is adequate for sufficient bonding of the concrete overlayment. Following the applicable cure time of the epoxy primer, excess sand should be vacuumed from the surface and the resulting surface should be a beach.
Concrete overlayments are taking the world by storm, but correct preparation is imperative to a finished floor surface. All these steps are critical to the long-term success of any concrete overlayment and cannot be overlooked or shortcut. In fact, these are similar steps that are imperative to any great concrete coating. If a polished concrete overlay is to be a quality alternative in redeeming aging concrete floor slabs, it’s best to remember and abide by Ben Franklin’s words… “By failing to prepare, you are preparing to fail.”
Ed. Note: C.T. “Chip” Marshall is the executive vice president of Industrial Caulk and Seal Inc.. An award winning, large scale decorative concrete and concrete repair contractor, Industrial Caulk and Seal operates throughout the Mid-Atlantic and Northeast. Both Chip and Industrial Caulk and Seal can be reached through their website www.industrialcaulkandseal.com.