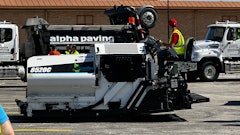
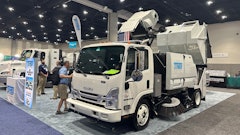
Ideally suited for sweeping construction debris and granular materials like millings or gravel, mechanical street sweepers are built to tackle some of the toughest road conditions. To keep a mechanical sweeper performing productively over time and extend machine life, it’s important to follow simple maintenance tips on a regular basis.
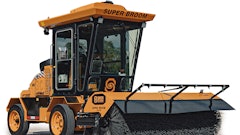
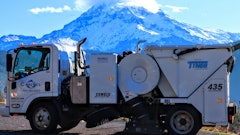
Mechanical street sweepers are defined by the mechanical device on the sweeper that moves street debris from the brooms into the hopper. In the case of Elgin Sweeper’s mechanical sweepers, for example, debris is moved from the brooms to the hopper via a chain and squeegee elevator or a conveyor belt and rollers. Regardless of the conveyor configuration, there are two key areas of maintenance on a mechanical sweeper: the conveyor system and the brooms. Since mechanical sweepers contain more moving parts requiring routine maintenance or replacement, the maintenance requirements for mechanical sweepers are different than those for regenerative air and pure vacuum sweepers.
Conveyor system
Prior to performing any adjustments on a mechanical sweeper’s conveyor system, all the safety stands must be installed and the manufacturer’s recommended safety practices should be carefully followed. Consult your sweeper’s operator and service manuals for location and proper use of safety equipment associated with your mechanical sweeper.
Current models with conveyors use a “modified chevron” design belt which features V-shaped cleats, as opposed to flat cleats. The chevron cleat angles the outer 12 to 14 inches of the cleat to move debris to the center of the belt as it travels up the conveyor frame. Consequently, more debris is moved into the center of the hopper for a more even distribution of the dirt in the hopper. In addition to the modified chevron cleats, more pronounced ribbing between the cleats is used to capture finer dirt. This raised ribbing prevents rollover of the large debris. The result is a cleaner sweep, with less spillage.
The rubber composition is heavier and thicker, with improved textile reinforcement to reduce stretching. This results in fewer adjustments and truer belt tracking once the belt is properly trained. The back side of the belt is textured or dimpled, which eliminates sticking once the conveyor system has been washed down at the end of the sweeping shift.
Belt training. Belt training is an important adjustment for belt longevity. Allowing the belt to track to one side will cause gradual wear of the conveyor frame and can potentially cause the belt to rip or jam. Conveyor systems have adjusters, usually at the top, where tensioning of the belt and tracking adjustments are made.
Lower the conveyor to operating position and allow the belt to run for several minutes until it has warmed to operating temperature. Once the belt is warmed and pliable, adjust the belt to proper tension. If the belt sags too much, the cleats will contact the metal pan under the conveyor, which can damage the belt. In severe cases, this contact with the cleats can also damage the pan itself. The proper tension will allow the belt to travel without contacting components. If the belt is tensioned too tight, the bearings that support the rollers will experience accelerated wear and early failure.
Once the correct tension has been established, the next adjustment is to the belt tracking. To get the belt to track in the center of the conveyor frame, it must be lowered into the operating position, with the sweeper pulled forward about 10 feet to allow such components as dirt deflectors and dirt shoes to assume their operating positions. The belt must be observed as it travels. If the belt moves to the right or left, the appropriate tensioner should be tightened.
Elgin Sweeper’s top roller (drive roll), for example, uses two spiral-wound bands designed to keep the belt centered and prevent slippage. Side-to-side tension variation can cause the belt to track towards the side with the least amount of tension. When the belt starts moving in one direction, a tensioning bolt should be chosen and adjusted accordingly. If the belt is moving to the street side, the tensioning bolts on the street side need to be tightened one half-turn, while loosening the curb-side bolts the same amount. This keeps the tension at the proper adjustment.
The belt should be observed for movement. If the migration is slowed but continues to move to the street side, both sides should be adjusted another quarter-turn, and the belt movement observed again. If the movement is to the curb side, tighten the curb-side bolts while loosening the street-side bolts. This adjustment procedure is somewhat of a trial-and-error process, but after some practice, most technicians can have it running true in short order.
If the belt appears to be stationary, applying a contrasting paint from a spray can to both sides will highlight the edge of the belt and roller. If the belt continues to move, the contrasting paint will reveal the movement more easily than watching the black belt and the end of the roller. If the belt will not train, a thorough inspection of the conveyor components must be performed. Worn bearings, broken rollers or seized components will have an adverse effect on belt training.
Cleaning the conveyor system. Some mechanical sweepers are equipped with conveyor wash-down functions. On the Pelican sweeper, for example, once the water tank is full, water will overflow onto the belt. Running the belt while overfilling the tank will clean the belt surface. Truck-mounted sweepers with the conveyor system have a valve to direct water either to the tank or the conveyor wash-down.
The lower roller area is the most important area to clean on a conveyor system. Located at the bottom of the conveyor, debris will tend to collect in the lower roller area. Flushing that area thoroughly will keep debris from building up between the lower roller and the scraper or belt, which will eventually cause damage.
Once the conveyor is clean, the conveyor should run for about five minutes to dry the belt and reduce the possibility of sticking to the conveyor frame.
Chain and squeegee elevator assembly
The chain and squeegee design features rubber flights sandwiched between two strips of metal used to mount the assembly to the chains. As with the conveyor belts, the chains need to be observed and adjusted when the chain sag allows the strands to rub together, which can warrant an adjustment to prevent extreme wear.
Elgin Sweeper’s chain and squeegee-type elevator system uses two hydraulic grease cylinders to maintain and establish proper chain tension. A special grease zerk adapter is placed on the end of the grease cylinder. Using a hand grease gun, two pumps should be applied per side, alternating left and right to expand the cylinders. The chain strands will become more taught. The proper sag is 3-5/8 inches between the strands. Using a high-pressure shop grease gun is not recommended as it will result in over-tensioning of the chains. Over-tensioning can cause rapid chain and bearing wear, as well as shaft failures.
When making chain adjustments, the sag should be decreased by tightening chains by no more than 1 inch at a time, alternating left and right until the proper sag of 3-5/8 inches is achieved. As the chains stretch, it may be necessary to take a full link out of both chains and replace them with half links. With the installation of the half links, the adjustment procedure starts at a renewed distance. Once the half link has been added and the adjusting cylinders have once again reached the end of their travel, the chains will require replacement.
The second adjustment will be the introduction of the flight into the lower elevator pan. The flight must make contact with the lower radius of the pan as the flight meets the pan. The lower housing that supports the lower shaft has a radius cast into the housing that accomplishes this adjustment. The clearance of the flight should be adjusted 1/16 inch to allow the flight assembly to make gradual contact with the elevator pan as it comes over the lower roller shaft.
The third adjustment is for the flight at the upper elevator pan. The rubber flight has a clearance of 1/16 inch, allowing it to leave the pan without dropping off the edge. The upper shaft adjustment is made at the bearings mounted in the elevator housing. Once the attaching hardware is loosened, a long pry bar should be used to lift the upper shaft until the flight-to-floor clearance is correct.
When adjusted properly, the rubber flights will travel up the elevator pans in a vertical relation to the pan itself. If the rubber flight ascends at an angle, debris escapes and wear is accelerated on both components.
Another approach to a chain and squeegee elevator assembly requires slightly different adjustments. One example is Elgin’s Broom Bear in which the chain tension should be measured from the elevator pan to the top of the upper chain strand. The recommended tension is set at a measurement of 12 ¼ to 12 ½ inches. This measurement is established using two push bolts at the top shaft. The jam nut should be loosened and the push bolt screwed in until the proper measurement is attained. The jam nuts should be retightened to ensure the adjustment does not change during operation. The flight clearance at the lower elevator pan is set at 1/16 inch. Flight-to-floor clearance that is too tight will eventually damage the lower pan; set too loose, it will cause poor elevator performance, spilling debris under the flights. The upper flight clearance at the upper shaft should be set the same as the lower clearance.
Cleaning the elevator. As with the conveyor belts, chains and squeegees should be washed with the sweeper at the end of every shift. A wash-down function is available on truck-mounted sweepers with elevators, using a valve to direct water to either the tank or elevator wash-down. Debris can hold moisture, which can lead to rust. Debris wrapped around flights or shafts can also cause blockages and damage. Daily cleaning is an integral part of any sweeper’s care and longevity. A clean sweeper is easier to operate. And when service is performed daily, equipment failures are easier to identify and correct.
Broom contact patterns
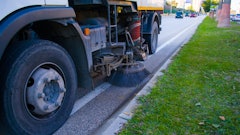
The other important adjustments are the broom contact patterns. When set properly, broom contact patterns will increase broom life dramatically, ensuring a clean, superior sweep, without any debris left behind. The side broom area of contact will display a crescent pattern on the sweeping surface that will remove debris from the curb and bring it into the path of the pickup or main broom. This is referred to as the three o’clock and ten o’clock positions on the curb side.
It’s essential that the side broom contact pattern shows debris will be released in front of the main broom, rather than outside the main broom. If the side broom is out too far, debris will be released outside the area the main broom sweeps, causing a debris trail.
Coning. The main broom contact pattern will exhibit a pattern that is 4 to 6 inches wide from the right side to the left side. Any variations from that would indicate a coning issue. For example, after a broom pattern was performed, if the right side measured 4 inches and the left side measured 6 inches, the main broom would be coning to the heavy, or left, side. A coned broom cannot be recovered, so replacement is recommended. Observing the main broom’s wear closely after repairs will indicate whether the coning issue has been resolved.
Broom down pressure. Broom down pressure is a key component of contact patterns. Too much down pressure on the side brooms will extend the termination points of the crescents, flaying out the bristles and accelerating bristle wear. This is true for main brooms as well as side brooms. With the main broom, excessive down pressures will widen the contact pattern 8 to 10 inches in extreme cases.
Excessive down pressure effectively lays the bristle over, causing the bristle to mop debris into the pavement, wearing the bristle at an acute angle and shortening broom life. This acute angle can be identified easily. A uniform water mark higher than 1 ½ to 2 ½ inches (38.1 to 63.5 mm) up the side of the bristle indicates too much down pressure. Correct main broom down pressures allow the tips of the bristle to “flick” debris up onto the elevator/conveyor. Bristle tip contact with the appropriate down pressure will extend broom life.
Autumn maintenance for leaf pickup
Make sure you remove or tie up the conveyor or elevator curtains or centerboard that may obstruct the flow of leaves. Check elevator or conveyor height to assure leaves will easily pass below those components on the way back to the main broom. Be sure to use water to help ensure easier pick up of leaves. Damp leaves will pick up easier and take up less room in the hopper. Adjust engine RPM or broom speed for best performance.
Generally, lower broom speeds will allow a smoother flow of leaves onto the conveyor or elevator. It’s important to return the curtains and conveyors to the factory setting once leaf season is over.
Conclusion
As with any equipment, upkeep and maintenance comes down to the people who use and care for the machine. Educating operators and service technicians on proper operating and maintenance habits will make a world of difference when it comes to extending the life of a mechanical street sweeper.
Steve Dunning is technical training instructor for Elgin Sweeper, whose products are sold and serviced through a network of more than 100 dealer locations worldwide. Elgin Sweeper products are available for a variety of general street maintenance, special industrial and airport applications for municipalities, contractors and industries, using the latest sweeping technologies—mechanical, pure vacuum, regenerative air, alternative fuel and waterless dust control. Elgin Sweeper is a subsidiary of Federal Signal Corporation’s Environmental Solutions Group. For more information, visit www.elginsweeper.com.