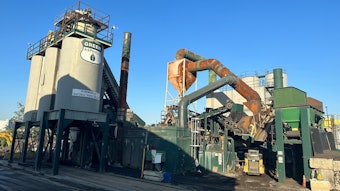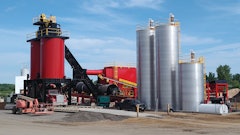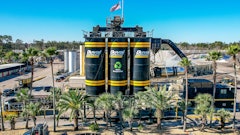
As I’ve said before, the Burner tuning procedure is complex and exacting, but the results are well worth the effort. In addition to reducing emissions you can expect improved fuel efficiency over a poorly tuned burner. Kinda like blowing $100 bills out the stack. Not to mention polluting the air for our kids to breathe.
By necessity I will have to repeat some of the things I talked about in previous writings. Last month I discussed the how to set-up and tune your burner for Recycled Fuel Oil. This month I want to talk about tuning for Natural Gas.
I apologize that this gets repetitive considering that I have covered large parts of this in earlier installments dealing with Diesel and RFO. But I don’t want my readers to have to take the time to go chase down an earlier issue of the Asphalt Contractor Magazine to re-read that information. So at the risk of boring some readers, I will repeat the instructions here.
As I said in previous issues, I’m the Authorized Honeywell Representative for Hauck Asphalt products in Texas, Louisiana, Oklahoma, most of the Northwest including Alaska and all of Canada west of Manitoba so I will be concentrating on Hauck products. Just remember, with very few changes, the exact same procedures apply to any make and model burner. Best advice I can give is to always read and follow the instructions that came with your burner when you got it.
Now again, as I mentioned in earlier installments, I am hoping you took my advice and bought a Portable Gas Analyzer (PGA). With any luck you have read and understood the method of sampling your stack gas. We will need a port to check the exhaust air. We drill our test port just above the fan right below the damper so the exhaust air will actually be pressurized a little bit. This makes it a lot easier for our PCA to pull in the air to be analyzed.
Again, for calibration reasons I recommend that you turn on your PGA well away from any exhaust gasses from the stack, hot-oil heater, exhaust from your vehicle, etc.. Once your Analyzer is warmed up and ready, it is time to take some readings. With your asphalt plant running and stabilized insert the PGA Probe in the hole you drilled, then press “Run” on the meter. Allow your meter to run for about 5 minutes or until all the readings are stabilized. There is a “Save” button on your PGA. I usually save 5 or 6 runs about 5 minutes apart. Then press “Hold” on your meter and put it aside where it can cool off. DO NOT shut the meter off until it is thoroughly cooled off and completely away from any source of combustion gasses. This is important. If the PGA is not cooled out and in clear air it is possible to damage the N0x, O2 and CO2 sensors. This is a lesson I had to learn the hard way. I will tell you that them little dudes be expensive.
If you bought the Bacharach PCA-3 235 I recommended you can download the combustion data directly to a laptop computer. You can compare all your readings side by side to average them. When you have the data it is time to make adjustments. The following instructions are out of the Star-Jet setup manual published by Hauck/Honeywell and shared with their permission. This data and adjustments apply to any burner.
Please see the chart for interpretation of Gas Readings. This chart is Courtesy of “Honeywell Thermal Solutions” formerly “Hauck Burners”.
NOTE: Typically some CO and combustibles will always be present. I try to target less than 125 for the CO2.
How you adjust your burner depends on which one it is and what type of Burner Control you have. The Star-Jet or Eco-Star by HAUCK they use a single Positional Actuator which follows your commands to take the burner from Idle to Full Fire. The Mega-Star and Nova-Star use either Dual Positional Actuators, one for the Air, one for the Fuel. Or they use a variable speed motor drive to control the air flow and a Positional Actuator for the fuel. With this style of burner the adjustments are all controlled by the Burner Control’s settings. Reading the manual explains this action in great detail, so I won’t go into that set-up.
If the burner is wildly out of tune, say 5,000 CO2 and the Combustibles are also way high, say 5% or 6% then I always go back to basics and set the burner up from the start.
For the single actuator control, the Air and the Fuel are controlled by a single arm which has a piece of adjustable linkage to the air butterfly and another adjustable piece of linkage to the fuel modulating valve. Last month I talked about adjusting your burner for RFO. This month let’s talk about setting up your burner for Natural Gas.
Natural Gas
The very first thing I do is check and be sure that the Gas Pressure is set to the factory specifications listed in your Burner manual. Generally this is 3 to 4 # of Gas pressure. I usually start out on the Natural Gas (NG) burner the same as I do a Diesel burner, by establishing Stroke. This means the amount of travel in the Linkage. Some Burner Controls allow you to run the burner up and down without the burner firing or any motors running. If yours will not, you will need to take the cover off your EA-57 Actuator and look in the top at the Round terminal strip. Terminals X, 2 & 3 are what we will use to run the burner up and down. Remove the wires off terminals 2 & 3. Make sure they do not ground out. They are not Voltage but it is best to insulate them and remember where they go. With NG we need a bit more Air at idle. So with the Air stroke I want the linkage to start just about “.5” (about 1/2”) then as we increase the actuator to 100% I want the Air to be fully open. You will need to use a short jumper wire and momentarily jump “X” to “2”. The burner should begin to stroke upward. Go ahead and run it to its maximum travel, then look at the Air Butterfly Pointer on the burner housing. It should be exactly on 100%. If it is way past 100% you will need to shorten the travel of the linkage. This is done by moving the linkage pivot on the arm of the EA-57 closer to the center of the pivot. Obviously if it doesn’t quite go all the way to 100% you will need to INCREASE the travel by moving it further away from the center shaft of the EA-57. Small changes are recommended.
Now, when you make this change, the “Closed” position will be off. Jump “X” to “3” and the burner will drive shut. Check the position of the Butterfly indicator. It should be adjusted to be about 1/2” above “0”. If you look at the Pivot that you moved earlier it has a rod with a set screw. Loosen this set screw and set the closed air where you want it. Now run the burner up again. If the Air is not at 100%, repeat the adjustments until it is at 100% at high and where you want it at low. Don’t be in a hurry. Sometimes it will take five or six evolutions to get the linkage where it needs to be. Patience is you friend.
Once you have the air set correctly it is time to focus on the fuel. The stroke of the Fuel Modulation Valve is very dependent on Altitude. I will talk about adjusting it for Sea-Level, than at the end offer some advice for higher altitudes.
The process for adjusting the fuel stroke is essentially the same as adjusting the air. For NG I want the Fuel Modulation Valve to start just barely above “1.5” (about 1”) then as we increase the actuator to 100% I want the Fuel Valve to go up to around 9.5 on the position plate. As you did before you will need to use a short jumper wire and momentarily jump “X” to “2”. The burner should begin to stroke upward. Go ahead and run it to its maximum travel, then look at the Fuel Modulation Valve Pointer. It should be on 9.5 or so. If it is either short of that or past that you will need to change the travel of the linkage. Again, this is done by moving the linkage pivot on the arm of the EA-57 closer to the center of the pivot or further away depending on if you want it to travel more (farther out) or less (closer in). As before, small changes are recommended.
Now, when you make this change, the “0” position will be off. Jump “X” to “3” and the burner will drive shut. Check the position of the Mod Valve Position indicator. It should be adjusted to be about 1/2” above “0”. If you look at the Pivot that you moved earlier it has a rod with a set screw. Loosen this set screw and set the closed fuel where you want it. Now run the burner up again. If the Fuel is not where you want it, repeat the adjustments until it is where you want it both low position and the high position. Don’t be in a hurry. Sometimes it will take several evolutions to get the linkage where it needs to be.
The only changes I make in relation to altitude is that I restrict the maximum Fuel Modulation Valve stroke to around 7.5 rather than higher because there is less oxygen at higher altitudes.
The last thing to do now is to make sure that the burner fuel pressure is at the factory recommended pressure. Once you have done this it is time to fire the burner and put it to work. Your best representative results will be when you are running at you normal pace, about 30 minutes or more after you start up.
Follow the earlier instruction to get your reading in the range you want. Like I said, I target 125 CO and around 12.5 O2 readings. Don’t forget that adjusting the fuel pressure will also adjust the CO & O2 readings.
As always, if you are having problems feel free to call and I will do my best to help. Next month I will talk about burning Liquid Propane. Stay tuned……..