Part one of this series focused on slab preparation and sub-base installation. In the article, we learned the importance of a well compacted and smooth subgrade, as well the proper installation of formwork, jointing, vapor barriers and other reinforcement. This article will discuss the next steps to placing, finishing, sawing and curing medium to large concrete slab on grade.
Pre-Planning and Scheduling Slab Placement
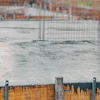
Rate of placement and screeding method are baseline decisions that must be made prior to start of placement. Placing/finishing concrete is time sensitive and susceptible to environmental conditions. Ideally you want to work within an 8- to 16-hour window for place, finish and cure/saw cutting operations. Uniform mix batch to batch and slab edge boarded.Chad White
Major considerations when scheduling concrete and planning day of placement activities include:
- Interface of equipment during placing operations. Whether pumping, buggies or tailgating planning is required. Type of screed, placing method used and placement configuration will normally dictate placement path. Leading edge of concrete during placement should seldom exceed 150 feet. Pay close attention to how you are going to close out the placement. Every time you change direction of placement or screeding you lose time and levelness of slab.
- Labor crew required and sequencing. Staggered shifts are recommended with the intent to ensure adequate personnel during the place/finish, saw and cure operations.
- Environmental conditions and start times. Hot weather conditions will often require night time concrete placements. Off hours batch plant availability/low traffic will also dictate start time.
- Impact of mix design on place/finish means and methods. Place/finish characteristics and set time is of primary concern. Ideally, you would like to see float pans in 3-4 hours and slab finish 6-8 hours from time of placement.
Planning Tips
- Pre-Slab Coordination Meetings, internal and external. Build it conceptually before you place it.
- Review of Submittals and Specifications. Your placing foreman should know the mix design and plan details pertinent to placement.
- Try to source all concrete from one batch plant if possible, to minimize differential set times. If more than one batch plant must be used try to maintain separate areas of placement for each plant instead of randomly placing trucks during placement.
- Establish communication protocol for canceling or changing start times of placements. “Go, hold, no go”.
Placing and Strike-Off of Concrete Slabs
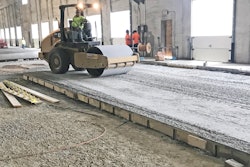
For the purpose of this article we will be discussing concrete placement rates of 60-200 cubic yards per hour and strike-off rates of 4,000–8,000 square feet per hour. Formwork and strike-off will dictate the FL numbers. Uniformity of slump and rate of placement will greatly influence FF numbers and panning/finishing processes. Roller tamp attachment to laser screed.Chad White
FF60/FL40 is the new norm for warehouse and open slab placements. Automated raking and screeding of slabs will result in higher production rates and flatter floors.
Major considerations when placing concrete include:
- Lighting; most placements start in the early am hours, and adequate lighting is critical.
- “I will do no damage.” Minimal disruptions to subgrade, vapor barriers, reinforcing and penetrations.
- Truck routes and staging areas. It is in everyone’s best interest to get concrete to the site and off-loaded in a timely fashion. Every placement will require clear access to edge of placement and staging for testing/truck prep and wash-out. The most efficient operations I have seen utilize a driver foreman, (usually provided by Redi-Mix Producer) to direct trucks and manage delivery of order. If not provided by supplier this responsibility defaults to placing foreman/designated flag man. Insist on participation by concrete supplier in your daily placements.
- Managing slump. Strive to maintain a maximum 2-in. slump variation load to load throughout placement. I’ve always thought that 6-in. max slump is a good guideline for conventional slab mixes. Sometimes you must reject.
- Consolidation at slab edges and penetrations. Enhances burnish uniformity and consolidation. Just good concrete construction practice.
- Leading edge of concrete. How wide do you go? Manage uniformity of slump and placement area. You should tailor your placing methods to delivery rate, access and the screeding methods available.
- Manage environmental factors: evaporation rate, direct sunlight, rain.
Installation Tips
- Check, check and recheck formwork and FF elevation during placement.
- Insist that all trades with work affected are present during placement to monitor their work as concrete is placed.
- Smooth delivery of concrete to point of placement is important. Try not to place concrete over 2 in. above FF elevation ahead of screed. Excess concrete at end of screed pass slows placement.
- Use evaporation retarders correctly. They need to be applied after initial float pass and not worked into the surface as a finishing aid. This can become an issue when applied directly from laser screed head then floated in using channel float or check rod.
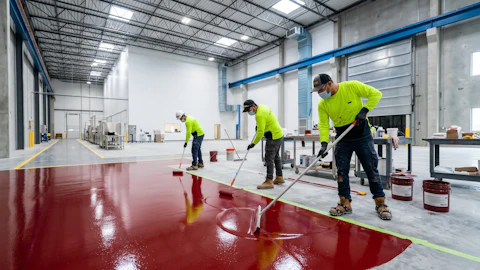
Finishing Slabs from Strike-Off to Final Burnish
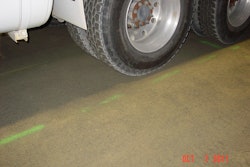
Finishing floors is all about flatness, burnish and attention to detail. Timing of finishing steps is a critical factor and must be judged in real time.  Blending edge burnish.Chad White
Major considerations for finishing concrete slabs include:
- Initial floating after strike-off. Standard practice is to follow laser screed strike-off with either check rod or channel float. Key issues are smoothness, seal and consolidation of aggregate.
- Panning — bigger is better. Having experienced the revolution in power floating from float shoes on 36-in. walk behind trowels to 12-ft. panning machines it is obvious that the bigger machines produce flatter floors. Use the largest pan machines that are practical for the placement. An 8-ft. pan machine can give you satisfactory FF numbers on most placements, and the move to larger pan machines should be based more on productivity requirements and efficiency.
- Combination blades: the unsung hero of flat, blemish-free floors. Combination blades are recommended for the initial troweling of the slab surface due to their larger size and less downward pressure being applied versus a typical finish trowel blade. This is the first troweling of the slab and is the dominant factor affecting smoothness and number of holes or blemishes in the floor.
- Trowel blades — plastic or steel? The trend is light 8-ft. ride-on trowels equipped with plastic blades for final pass and finish.
- Hand work. How much edge work and detail required? The proper use of edge troweling machines will save labor and improve the overall finish.
Tips for Finishing
- Edge machines, finishing slicks and plastic blades work.
- Reducing footprints in slab surface during finishing will improve cosmetics.
- Long trowel machine passes, minimize turning machines. Always run as flat and as slow as conditions allow.
- Board the edges.
- Strive for uniformity in burnish edge to edge.
- Limited or insufficient equipment resources is a poor excuse for an inadequate finish.
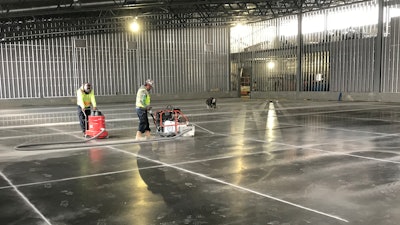
Sawing & Curing
Curing is either spray-on membrane or wet cure with blankets. There are pros and cons to both systems, and individual project requirements may dictate choice. The important thing with curing is timeliness and adherence to manufacturers and project specifications. Installing wet cure blankets.Bob Simonelli
Timing is probably the key coordination factor with saw cutting operations. A skilled crew and good equipment are required. There is nothing worse than having a great looking finish marred by crooked or spalled cuts.
Major considerations for installing control joints and curing include:
- Control joint lay-out and reentrant corners. Every reentrant corner is a potential crack.
- Interface with floor flatness testing. Before or after?
- Blade matched to local aggregate. Understand blade break-in protocol.
- Dust control and disposal.
- Water source for wet cure operations.
- Understanding application rates for membrane cures and have qualified personnel to install.
Tips for Sawing/Curing
- Understand the joint lay-out at the field level.
- Pay attention to the last five feet of the saw cut and dropping the blade into an existing cut.
- Dust control and disposal game plan is essential.
- Spray equipment for membrane curing. Learn to do the maintenance and cleaning or plan on replacing equipment regularly.
- Wet curing operations are particularly hard to mesh into a general-trades work flow schedule due to limited access to slab area during curing process for personnel.
Slab Protection and Housekeeping
Control and conditions of access during the placing/curing period is probably the biggest component to a slab protection plan and the hardest to police. Ensure slab protection plan is communicated to all trades. Advocate for daily cleaning by floor scrubber during construction. Ensuring that a spill kit is available while the slab is being used by other trades is a must and a major component of daily housekeeping. Scratches, gouges, spills and edge destruction are major concerns when slab is being used as a work platform by general trades.
Major considerations for slab protection include:
- Jobsite posting of a slab protection plan and adherence to it.
- Entry and exit points for other trades access, equipment and personnel defined and managed. Slab edge protection primary consideration.
Execution Tips
- Pick your projects wisely. Owners and general contractors that understand slab protection are much easier to work with.
- End of shifts clean-ups per trade strongly advised.
- Plenty of dumpster space and trash bins.
Chad White has been involved in all aspects of concrete construction from craftsman to concrete subcontractor and is a founder of WL Concrete. White has personally been involved with design and construction of many industrial slabs, including shake-on hardeners, defined traffic super flats and high tolerance random traffic floors. He is the author of numerous articles regarding concrete slab on grade installation and a speaker at World of Concrete.