The cost of operating a hydraulic hammer varies widely depending on tool selection, operating practices and maintenance. Before you even pick up the hammer, make sure you have selected the best work tool for the task at hand.
A variety of tools exist, ranging from the standard chisel to the post driver. "The largest tool range is available for most all 1,000-lb. breakers and down," says Keith Becker, product development specialist, Atlas Copco. Three types are commonly found on larger breakers: blunt, moil and chisel. "The larger breakers can produce much more power and destroy other types of tools or material that they are being used on. Plus, special designs for the larger breakers could get very expensive."
Tool choice will be driven by whether your application involves impact breaking or penetration breaking. The difference is how energy is distributed to the material.
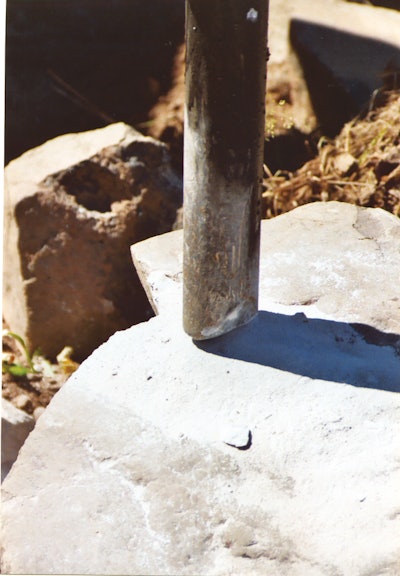
Impact breaking is used to break oversize material (boulders) in a quarry or for flatwork (sidewalks, driveways and concrete floors) at demolition sites. "A blunt tool needs to be used because the operator is trying to apply the maximum power onto the material," notes Becker. "This type of material is usually easy to break. By using the blunt tool, it increases the productivity and makes it easier for the operator to place the tool on the material."
The bigger surface area of the tool is used to transfer force over a large area of work. "Blunt, super blunt and elephant foot type tools are impact breaking tools," says Blake Albritton, product support engineer, Brunner & Lay. "Burden is uniformly reduced to smaller fragments. Not precise, it is well suited for large-scale demolition or primary sizing of aggregate."
With penetration breaking, you want to concentrate the energy on a smaller area. The chisel tool is most commonly used for this process. It penetrates and removes a large piece of material. "The tool is trying to split the material very similar to a hammer and a wood chisel," says Becker. "It is generally used in trenching. Some quarries use a chisel to make rip rap for erosion applications."
The small surface of the tool transfers force to a small surface area of the material and breaks with a wedging action. "Point, chisel, pyramid point and square point are penetration breaking tools," says Albritton. "Large objects are re-sized by breaking off material in chunks. More precise than impact breaking, it is suitable for trenching, selective demolition, utility work and day to day breaking."
The type of tool required is determined by the material and hardness. "There are some materials that you would assume a chisel would do the best job, but find out that a blunt or moil point will be the most productive," says Becker. "It is really case by case."
The moil point is the most common universal tool, and can be used for most jobs. "Blunts are used for breaking slabs and other large-scale demolition work," says Albritton. "Chisels are used for trenching, mining and slab demolition. Asphalt cutters are used to score tarmac."
The moil point is designed for demolition of heavily reinforced concrete. "This tool can penetrate through the rebar and wire that is found in concrete buildings, bridges and other structures," says Becker. "This tool will allow the operator to be very precise in his breaking. The moil point could be used for trenching, as well."
Prevent common failures
Once you select the right tool, you need to use and maintain it properly.
"When a demolition tool has apparently failed to give satisfactory service, one of the reasons is that typical fractures are caused by blank firing and/or twisting of the tool due to a worn or damaged retainer pin," says Greg Smith, marketing communications manager, Allied Construction Products. "Other causes could be typical fractures that are caused by excessive bending/leveraging of the demolition tool, or a high stress fracture usually caused by using the tool as an anchor to 'pull' the carrier."
Pry failures are the most common and preventable failures. "The tool should not be used to scrape, drag, position, lift or pivot," Albritton emphasizes. "It should always engage work perpendicular to the work surface, never askew."
There are two main causes of pry failures. "The one everyone thinks of first is like a typical pry bar," says Becker. The tool gets stuck in thick concrete. Human nature is to push or pull the tool to try to get it released. This can create a stress fracture that results in a break.
"The second pry break is where the operator is attacking the material at an improper angle, or the work dictates that the material is trimmed away while trying to stay inside a certain dimension," says Becker. The tool skips off or alongside the material, which places side load stress on the tool.
Chipping and mushrooming of the tool are other common failures that indicate operator misuse. "Chipping is caused by working with chisels or blunt tools with a bad engagement to the work," says Albritton. Try to ensure that the majority of the tool's available surface area is in contact with the work. For example, a chisel should not be used on its corner, and a blunt tool should not be used on its edge. Chipping can also occur when a very cold tool is put into use without first being warmed up. A low-velocity propane torch should be used to preheat tools before use in environments less than 40° F.
Mushrooming is caused by hammering on a single location with no penetration. "The tool pulverizes the available work to dust, which then acts as a cushion, preventing the tool from transferring any energy to the work," says Albritton. "The result is heat buildup in the tool, which can lead to overheating, softening and mushrooming. The tool should be repositioned every 15 to 30 seconds."
Fractures also cause premature tool failure. "Fractures are caused by fatigue, damage or both," says Albritton. "As the tool becomes galled and scarred from use, the likelihood of fatigue crack propagation and tool failure increases. A fatigue crack is caused by a disruption of the energy traveling through the tool. This will typically look like it was cut almost straight across. There will be a chevron where the crack initiated and there may be a slight lip on the final side to fail."
A fatigue crack can be caused by inadequate/incorrect lubrication, which causes frictional burning or welding of the tool to the bushing. "This creates the nicks and gouges where these cracks occur," says Albritton. "One of the best ways to prevent this is correct lubrication. Check the bushing regularly and replace if worn. Do not re-insert a worn and galled tool in a new bushing or a brand new tool in a worn and galled bushing. Never weld on a tool for any reason."
Dry firing a tool against the retainer pin in the hammer creates failures in the retainer slot area. "Keep the tool properly engaged with the work and limit unproductive piston strokes," says Albritton. "Check retainer pins regularly and replace if worn, damaged or deformed." Also prevent side loading or twisting the tool.

