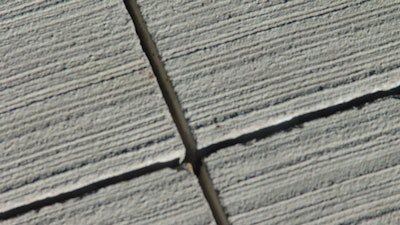
Contraction joints (sometimes called control joints) are used in unreinforced and lightly reinforced slabs-on-ground to minimize random cracking.
By creating straight-line weakened-planes in concrete, contraction joints “control” the cracking location by inducing cracks at predetermined locations. As slabs shrink due to cooling and drying, shrinkage or tensile stresses start building and cracks form at contraction joints because the concrete is weaker or thinner at these locations. (Fig. 1, below).
 Figure 1: Sawcut creates weakened plane inducing crack below sawcut.Kim Basham
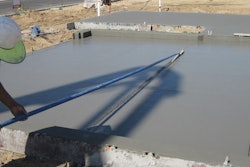
Contraction joints are typically installed with jointing tools while the concrete is still plastic or by sawing after the concrete has been finished with either a wet-cut saw or more commonly, an early-entry dry-cut saw. For either method, follow these jointing rules to minimize the risk of random or out-of-joint cracking.
Layout
Joint design including the layout is the responsibility of the slab designer. For a specified project, the engineer or architect is responsible for designing the joint layout but for unspecified work, the concrete contractor typically becomes the designer.
Rule #1: Panels formed by contraction joints should be as square as possible. The joint layout should divide a large slab into relatively small, square shaped panels. Avoid long and narrow panels, L-shaped and T-shape panels. The long side should never be larger than 1-1/2 times the short side. For better crack control, limit the length of the long side to 1-1/4 times the short side (Fig.2).
 Figure 2: Keep jointed panels as square as possible and limit length of long side to about 1.25 x short side for better crack control but absolutely no more than 1.5 x short side.Kim Basham
Rule #2: Contraction joints should be continuous, not staggered or offset. Due to stress concentrations that occur where joints (i.e., cracks) terminate, cracking will continue into the unjointed concrete. If discontinuous joints cannot be avoided, insert two or three #4 x 3 feet reinforcing bars in the next slab to intercept the crack that will grow from the discontinuous joint (Fig. 3). Use reinforcing chairs to hold the bars in place in the top 1/3 of the slab.
 Figure 3: Avoid discontinuous joints. If unavoidable, use 2 or 3 #4 x 3 ft. to intercept and control discontinuous joint cracks.Kim Basham
Rule #3: Identify and address re-entrant corners. If re-entrant corners are unavoidable, locate contraction joints to control cracking that starts at re-entrant corners or place “corner” reinforcing bars diagonally in front of re-entrant corners to intercept cracks (Fig 4). Corner rebars should hold re-entrant corner cracks tight together and help prevent them from traveling across the entire slab.
 Figure 4: Avoid re-enterant corners. If unavoidable, use 2 or 3 #4 x 3 ft. rebars to intercept and control re-enterant crack.Kim Basham
Rule #4: Install contraction joints at locations where slabs typically crack. Implementing this rule takes experience or inspection of existing flatwork. When walking around town, inspect concrete slabs for cracking. With time, a better understanding of typical crack locations will become apparent. For example, place a contraction joint about three feet from the end of a triangular-shaped slab because that is the location where cracks typically occurs (Fig. 5).
 Figure 5: Place contraction joints where shrinkage cracks are likely to occur.Kim Basham
Maximum Joint Spacing
Historically, the maximum recommended distance or spacing in feet between joints has been two to three times the slab thickness in inches. For a 6 in. thick slab, this recommendation yields a maximum joint spacing between 12 and 18 ft. In general, the two to three times the slab thickness recommendation has produced acceptable results if some panel cracking is acceptable. In fact, up to three percent of floor slab panels formed by a combination of saw cutting and construction joints may crack at locations other than the contraction joints.
Rule #5: For better crack control keep the maximum distance between joints in feet at 2 to 2.5 times the slab thickness in inches. For a 6 in. thick slab, the maximum joint spacing should be limited to 12 to 15 ft. Exceeding a joint spacing of 15 ft. for a 6 in. thick slab will increase the potential for random or out-of-joint cracking. In general, reducing the joint spacing or panel size reduces the risk of random cracking.
Also, reducing joint spacings will reduce crack widths within contraction joints which increases the aggregate interlock. Increasing aggregate interlock improves the load transfer capacity and helps maintain better vertical alignment across joints.
Rule #6: For sidewalks and driveways, space transverse contraction joints at intervals about equal to the slab width. For 4 in. thick sidewalks and driveways wider than about 10 ft., add a longitudinal contraction joint along the center and keep the panels as square as possible.
More On Controlling Cracks in ConcreteDon't Ignore Cracks and Joints Underneath Decorative Overlays - Fix these imperfections before applying a decorative concrete overlay to avoid future surface problems.
How To Reinforce Concrete Slab on Ground to Control Cracking - Steel reinforcing bars and welded wire reinforcement provide crack width control in nonstructural slabs-on-ground.
How to Evaluate & Troubleshoot Concrete Cracks - Cracks may represent the total extent of damage or the first signs of serious trouble. Some recommendations for troubleshooting concrete cracks prior to designing or performing repairs.
Concrete Slabs-on-Ground Crack Control Options - When it comes to slabs-on-ground, you can either control the location of cracking or the width of cracks.
Joint Depths
Contraction joints must be deep enough to ensure they are truly weakened planes that crack before random or out-of-joint cracking occurs. If weakened planes or thin slab sections other than the contraction joints exist, random cracking may occur.
Rule #7: For tooled or grooved joints, depth of the contraction joint should be 1/4 of the slab thickness. For interior floors, specify a 1/8 in. edge radius for the top of the groove or joint. Specify an edge radius of 1/4 to 1/2 in. for exterior slabs.
Rule #8: For wet-cut sawcut joints, depth of the contraction joint should be 1/4 the slab thickness or a minimum of 1 in. To ensure joint activation or cracking, sometimes a sawcut depth of 1/3 the slab thickness is specified. However, there will be less aggregate interlock with a deeper joint. The depth tolerance for sawcut joints is ± 1/4 in.
Rule #9: For joints installed with an early-entry dry-cut saw, joint depth should be 1-1/4 in. with a ± 1/4 in. tolerance for slabs with thicknesses up to 9 in. For thicker slabs, the saw cut depth should increase to ensure joint activation. Also, saw cut depths are typically increased for fiber reinforced slabs. Fibers increase the tensile capacity of the uncut concrete beneath saw cuts so deeper saw cuts are typically required to create a weakened plane. For fiber reinforced slabs, contact the fiber technical representative for recommended saw cut depths to insure joint activation.
Sawcut Timing
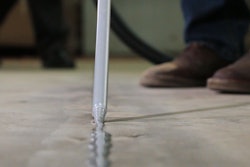
In addition to depth of contraction joints, saw cut timing is critical to minimize random cracking. In general, saw cut joints should be installed as soon as the concrete is sufficiently hard to resist tearing and raveling and before random cracking occurs.
Early-entry dry-cut saws are more popular because joints can be installed sooner (one to four hours after finishing) than joints installed with wet-cut saws (four to 12 hours after finishing). Early-entry dry-cut saws allow the installation of the contraction joints before the concrete starts to cool and before shrinkage stresses become too large or exceed the tensile capacity of the concrete.
Rule #10: Start saw cutting as soon as joint raveling (loss of aggregate particles) no longer occurs. However, some minor edge raveling is acceptable to ensure joints are installed before the concrete shrinkage stresses become too large.
References
Craftsman Workbook Publication CP-10(10), American Concrete Institute, www.concrete.org
ACI 302.1R-15 Guide to Concrete Floor and Slab Construction, American Concrete Institute, www.concrete.org
ACI 360R-10 Guide to Design of Slabs-on-Ground, American Concrete Institute, www.concrete.org
This article was originally published on April 17, 2018.