It’s not always easy to figure out what type of surface-prep equipment tools to own. Even for an experienced pavement marking contractor, putting together the right mix of prep-before-marking removal equipment takes thought, time, and inevitably, money.
As a striping professional, you want to make sure the investment you’re making in surface-prep tools is a good one, especially if you are aiming for quality products where costs can quickly add up.
But there are some standards that every striper should have in his toolbox. The following 7 surface-prep tools are the building blocks upon which you can actually get your marking installations to perform better, erase existing markings without a trace, and get paid for doing this essential value added work.
Whether you’re a striping newbie just growing your business, or a pavement-marking veteran ready to ditch your inefficient tools, take a quick look and see what's currently missing from your surface-prep arsenal:
1. Basic Push Broom
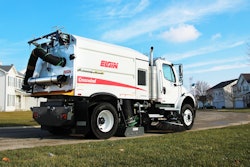
Why you need it: A simple low-tech standard. You will need a few basic push brooms just to move the loose dirt from under your stripe. Without them, you’ll never get your stripe to stick to sandy roads. A high-tech luxury option is a sweeper broom truck that will sweep, vacuum, and collect dirt and debris in a single action.
How to use it: Come on, you know how to work a broom! If you haven't pushed a broom, you're in the wrong business. Use as a backup to your blower – which may be too loud for the work environment, or inoperable prior to striping.
2. Air Blower
Why you need it: Blowers are a reliable surface-cleaning tools. A quality hand-held, backpack, or push-style blower serves as a utilitarian essential. Great blowers are low maintenance, and are one of the most important tools to quickly clear loose dirt and debris.
How to use it: You know how to blow; just aim that big nozzle under your feet until the dirt flies away.
3. Power Washer or Blaster (water/sand/shot)
Why you need it: After sweeping or blowing away the loose dirt, you still may need to get deeper into the surface pores and cracks on older pavements. You also may need to remove stubborn stains, oils, and grease. Newer style waterblasters that apply more pressure with less water volume allows for less dry time on hot days. However, you'll need to check the stability of the surface – especially the fines and binder when ultra-high pressure water blasters are used. These expensive rotary jet discs quickly cause asphalt pavement rutting and micro-cracking on portland-cement concrete. Many stripers own a variety of these blasters that can mix with sand, soda, or beads, depending on the working surface and the materials to remove.
How to use it: The use of low-pressure water systems is not rocket science, although working with ultra-high pressure systems may require a post-graduate degree in physics to get the surface just right.
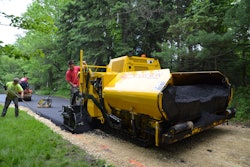
4. Drum-style Scarifier (Groover/Shaver/Planer)
Why you need it: You’ve seen these machines used to grind down trip hazards on sidewalks, or scratch up the surface when removing paint, planing off old asphalt, or diamond shaving or grinding down concrete surfaces. If you ever followed the wrong stripe out of your lane in a work zone, you fell victim to a stripe removed by a drum-style scarifier, planer, or groover. Since stripers normally own just one style of marking remover, it’s typically the drum-style scarifier. Commonly called a “grinder,” it removes the stripe by cutting a groove into the surface until the marking is gone
How to use it: The drum-style scarifiers, planers, groovers and shavers are best used for prep-before-stripe applications. When scarifiers are used to eradicate surface contaminants with a scratching method, it leaves the perfect profiling pattern to mechanically lock the new pavement marking material to the surface. In snow country, a drum-style diamond shaver is the preferred tool to prepare a controlled slot groove prior to embedding liquid or tapes below the snowplow blade.
5. Rotary-style eraser
Why you need it: Not every stripe-removal job calls for permanent stripe removal. Some may allow for cover-up paint, or any scarring device to take off thermoplastics, epoxies, or tape that will be soon resurfaced with new asphalt. But if stripes will be removed and replaced in a new location, then it would be inappropriate to leave a deep scar or mark behind with a scarifier when there are far better tools – like no-scar rotary erasing.
How to use it: The best part of owning a rotary eraser is knowing it will only remove as deeply as you set it, and the removal pattern will be bevel-edged since the stripe will be pushed aside and not into the surface. The rotary eraser abrades and scrapes markings off the surface like a polisher, and when you properly use one, you’ll meet all DOT non-scarring requirements.
6. HEPA Dust Extraction
Why you need it: Any removal method can create harmful silica dust. A HEPA dust extractor is the best possible tool for removing dust and debris from the job site. It’s also the law.
How to use it: Simply attach the collection hose to the vacuum port of your scarifiers, planers, groovers, shavers, or erasers for dust-free removal.
Pro tip: own a separate vacuum broom truck for your large removal or surface-prep projects that will follow behind the removal operation. Your future self will thank us during your next striping project.
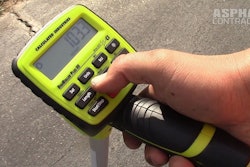
7. Inspection tools, ASTM, SP 1-10 Pads
Why you need it: Surface conditions can be crazy, and staying objective without work stoppage can be difficult when there are many eyeballs inspecting every detail of the job. The use of a visual inspection guide (like the SP 1-10 surface profile pad or SP chart) where a reference number helps all parties agree on achieving the actual surface profile conditions before and after the surface preparation work.
How to use it: Before the road is striped, use the SP inspection tool to determine the current surface conditions for the new coating, sealer, or marking to be installed or removed. Then select the best representative pad or profile number for the required surface-prep profile finish. During application, your prior SP# agreement with the inspector will be one of the best assets you have before commencing your prep-before-marking work.
Information provided by the Smith University Xtreme Removal team. © 2017 Smith University. For more information on marking removal equipment contact Graco Inc., www.Graco.com or smithmfg.com