Once you truly understand how to use infrared technology for your asphalt repair projects, you will reap the benefits on a daily basis.
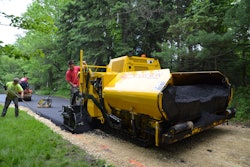
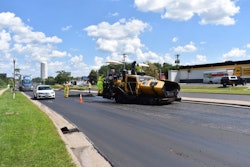
Unlike other ways of repairing asphalt, the infrared method can be used year-round, providing you with increased efficiency and earnings. The process works by heating up a repair area using infrared wavelengths to a temperature of 350 degrees in order to rake, lute, and compact the area. What you’ll have in the end is a seamless and thermally bonded transition between the repair area and the surrounding asphalt.
It’s an efficient process that can transform the way you and your clients work. However, it’s important to be cognizant of the most common infrared mistakes in order to avoid them, ensuring that your process and the results are as smooth and seamless as possible.
1. Not Compacting Properly
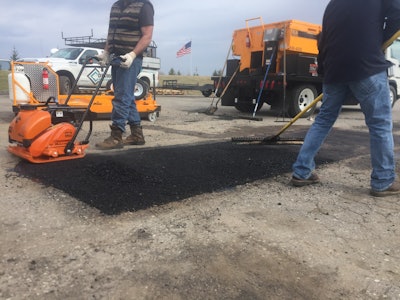
Compaction is one of the most important aspects of an infrared repair. Compacting at the hottest possible point will ensure a tight bond in the repair area. If your repair area cools down too much, you can reheat the area for 1-2 minutes to bring it back up to optimal compaction temperature.
2. Not Compacting the Edges First
When compacting an infrared repair, always compact the edges first. By compacting the edges first, you are ensuring that you are welding the heated edge of the repair area to the heated edge of the area outside the repair.
The edges are the most likely spot for raveling, so “pinching” the edges with a compactor, or roller, first will create a tight bond between the edge of the repair and the surrounding pavement.
3. Not Being the Best Lute Man
A good lute person is key to a successful infrared patch. When luting the area, your lute person needs to be sure to remove all the larger stone and aggregate from the top of the repair area. By removing the larger aggregate, you will create a tighter bond, achieve a better compaction rate, and lessen the chance of future water penetration. If you don’t remove the larger stone, there will be larger voids for water to infiltrate, increasing the chances of your repair failing.
“Over luting” often times is the cause for large aggregate roll up at the surface. A good lute man will quickly level the repair with one or two passes of the lute, minimizing heat loss to time as well as minimizing the need to pull stone from the surface.
When adding asphalt to an infrared repair, you want to use a finer aggregate asphalt such as top mix or sheet mix. Using these types of mix will make it easier for a person to create a tightly bonded and cosmetically appealing repair.
4. Not Using Rejuvenator
A rejuvenating agent is highly recommended when installing an infrared repair replacing the maltenes and volatiles which deteriorate over time due to oxidization. Rejuvenator will aid in minimizing potential raveling and ensure a long-lasting patch. Some infrared manufacturers will debate the fact that you must use a rejuvenating agent, but we absolutely encourage our customers to use a rejuvenating agent for every repair.
One-tenth gallon per square yard is an industry rule of thumb measurement for how much to apply. Job site settings, asphalt quality, and workmanship will contribute to the actual consumption use of rejuvenator. A helpful hint is to apply a uniform misted coating across the surface of a completed repair, add sand or sanded asphalt, and then compact the blend thoroughly into the surface. This practice almost promises a tight, uniform, durable repair.
5. Scarifying -- But Not Thoroughly
It is imperative that a worker scarifies the repair area thoroughly to a minimum depth of 1.5”. Often when raking, a worker does not scarify the entire repair area. If large parts of the repair area are left un-scarified, it makes the rest of the repair extremely difficult and it will ultimately fail. The best method is to scarify 75% of the repair from one side and then move to the other side of the repair to scarify the rest. This method will ensure the entire area is scarified completely.
It does not matter how hot the heated asphalt is – an unraked section will not bond with the newly repaired surface. It will fail every time.
6. Working the Entire Heated Area
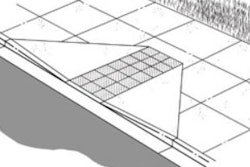
Always "picture frame" the repair area by moving in 3 inches when you begin raking the area. By moving in from the outside edge, you are creating a heated weld between the repair area and the surrounding pavement. The heated weld is what prevents future water penetration and ensures that your infrared patch will be a long-lasting patch.
7. Leveling the Surface Prior to Compaction
Rule of thumb: Prior to compaction the repair area should be left 1/4” above grade so when you do compact the area, it is level with the surrounding pavement. Repair areas that are left even with the surrounding asphalt prior to compaction will end up creating a low spot.
Some job settings will require an adjustment to the 1/4” rule. See recommendation No. 3 – be the best lute man!
8. Not Overlapping Side-by-side Repairs
If you are installing back-to-back infrared repairs, it is vital to overlap the edge of the repair areas. Leave about 2” of your first repair uncompacted and place your infrared machine over the uncompacted asphalt of the first repair when heating your second repair. This allows for a heated bond between repair areas.
9. Overheating (or Underheating) the Repair Area
It’s important to understand the way your infrared machine heats. Asphalt can only absorb heat at certain rates. Throwing too much heat at the asphalt in a short amount of time will scorch the top of the asphalt, while not sufficiently heating to a sufficient depth. Additionally, if you take too long to work the repair area and compact at a low temperature, you will not get the proper compaction rate you need to create a seamless bond.
If your repair area does cool down too much while working, you can reheat the repair area to bring it back up to 325-350 degrees Fahrenheit to obtain the proper compaction rate.
10. Thinking that Infrared is a "Fix-all" for Every Asphalt Repair
Even though you can use infrared for most asphalt repairs, it is always important to evaluate your repair area prior to selecting a repair method. If there is a base failure, then infrared will only be a temporary repair.
If you offer an infrared repair as a solution to a base failure, be straightforward with your customer in telling them infrared will only be a temporary solution and that a complete mill and fill or repave will be needed later down the road.
Michael Blake is director of marketing for KM International, North Branch, MI, a manufacturer of asphalt maintenance equipment including infrared asphalt recyclers and propane-fired skid-mounted hot boxes. Reach him at [email protected]; 810 688-1234 or via www.kminternational.com.