Maintenance or mayhem. When picking between the two, the choice seems simple — no one would intentionally disrupt their productivity. Too often when it comes to properly maintaining earth drills, operators forget the importance of daily and monthly inspections. Forgoing regular maintenance leads to trouble onsite with either declined drilling performance or a complete breakdown.
With maintenance in mind, rental centers and contractors should always choose a reliable manufacturer that produces quality equipment with minimal maintenance. After finding the best drill and manufacturer for their needs, operators must understand checking drills only once a year doesn’t make the cut. Routine preventative maintenance and servicing is crucial to achieve the most uptime.
For rental centers, this means they can get equipment rental-ready faster and ensure the next operator will have a quality product to use. Not only can routine maintenance cut expenses, but it can also eliminate the frustration contractors feel when a machine goes out of service because it wasn’t properly maintained in the first place.
Scheduling service for drills depends on the usage, specifically based on hours. For example, if an operator uses a drill every day for a week, he or she should service the drill once a month. If the drill gets used two to three times a week, he or she should service every three or four months.
Drill maintenance depends on specific parts and features, because portable earth drills can come in varying models, like mechanical or hydraulic drives.
Mechanical maintenance
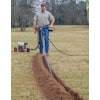
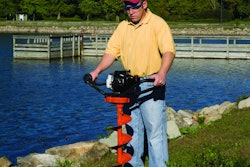
Two-man drills feature the motor directly on top of the drill. In comparison, some manufacturer’s mechanical earth drills include a motor on a carrier connected to the drill handle by a flexible drive shaft. Due to the design, these drills only need one operator. This is beneficial because it can cut labor costs in half. Mechanical drills are less expensive than hydraulic models, and spin faster meaning an operator can drill holes twice as fast, which make mechanical drills popular for fencing applications, sign installation and landscaping.
Mechanical earth drills, like any mechanical machine, need special attention due to their many moving parts and gears. On mechanical drills some important wear parts to check include the transmission or gear box, flexible drive shaft, and clutch, as well as the throttle cable and its bracket.
Transmission or gearbox
Check the transmission oil level every 30 days or after 40 hours of operation. Inspect the transmission or gearbox immediately if the motor begins making unusual sounds and locks up when in use. This is a symptom for low oil in the gearbox. Look for seepage or oil leaks along the top of the transmission especially around the bottom seal and the output shaft at the bottom. If a user experiences these issues, check the fluid in the gearbox and change if necessary. Change the transmission oil after every 40 to 50 hours of use to maintain the correct fluid levels.
When adding oil, hold the transmission top level and remove the pipe plug. Squeeze oil into the transmission until oil just comes out of the hole. Then replace the pipe plug and tighten to 10 foot-pounds of torque. Always use high quality gear oil, or go by the recommended oil in the operator’s manual to ensure the drill operates to OEM specifications.
Flexible drive shaft
For models including a flexible drive shaft, examine every 50 hours of operation. Inspect the shaft housing and look for tears or breaks in the rubber casing. Covering with duct tape or shrink tubing can repair small tears. But replace the housing if there are deep cuts or torn wire braids.
On the core, check for broken wires and kinks. Replace the core if there are broken wires or sharp kinks so the shaft will function properly. However small kinks or twists shouldn’t cause any large concerns.
Follow the manufacturer recommended proper shaft disassembly when cleaning and greasing the flexible drive shaft. Disassembly of the flexible drive shaft includes removing the kill switch and throttle wires, detaching the shaft from the transmission, disconnecting the complete shaft assembly and removing the flexible shaft core and housing. After removing the flexible shaft core, wipe off the old grease with a cloth. Clean the inside of the flexible shaft housing by pulling a clean rag through with a long piece of wire — this might require several passes for removal of all grease. Then apply a light coat of manufacturer-recommended grease to the core and reassemble.
Some manufacturers recommend white lithium grease — a lightweight, high-temperature tool grease. Lithium grease can withstand excessive heat, without damaging the shaft. For example, some lithium combination type greases can withstand 430 degrees Fahrenheit with frequent lube intervals.
Operators should not use regular axle grease when lubricating, because it can’t handle high temperatures and will separate and melt, running to the lowest point in the flex shaft. The flex shaft will burn since it is no longer properly lubricated. Be careful in choosing the right grease for the drill, and don’t over lubricate. Excessive grease can gum up in the flex shaft and burn, which causes excessive heat and reduces the shaft’s life. Not enough grease can dry out the cable, which will break easily or generate enough heat to burn through the outer housing.
Clutch, throttle cable, and throttle bracket assembly
Check the clutch for wear every 30 days or when the flexible shaft is lubricated if applicable to the operator’s drill. When the clutch requires maintenance, operators can’t always detect audible or visual signs, because the clutch continues to run even if no more clutch padding exists. A worn clutch causes a weaker performance when engaging the auger and when accelerating the engine from idle to full speed. If a clutch starts slipping, check the shoes and drum, clean and replace if the padding is missing.
Drills with a centrifugal clutch drive the auger as the engine speeds up increasing to full throttle. Not only does the clutch ensure positive power transfer, it also protects the unit from shock while drilling. If the auger turns while the engine idles, first check the engine for proper idle speed and throttle linkage.
The throttle regulates the power and speed of the engine, and in some earth drills, the throttle lever is under the handlebar next to the transmission box. The throttle lever should pull smoothly without binding the throttle wire.
Some manufacturers include a special throttle bracket assembly. Operators should check that the throttle bracket is fully engaged before the lever bottoms out against the handle bar. In the idle position, the throttle bracket pulls the rivet clip tightly against the sliding clip forcing the governor arm to idle. When fully engaged, the bracket clip slides over the rivet as the governor arm moves. If binding does occur, remove the clip and twist it slightly, then reinstall and check again.
Some models do not use the sliding clip, with these check that the moving arm on the bracket pulls away from the governor arm in the full throttle position. In the idle position it should push against the governor arm.
Inspect the throttle cable and bracket assembly before each use or if the operator notices that the drill isn’t running smoothly. If the problem persists, check for stretched, discolored or broken clutch springs or broken clutch shoes and replace if needed.
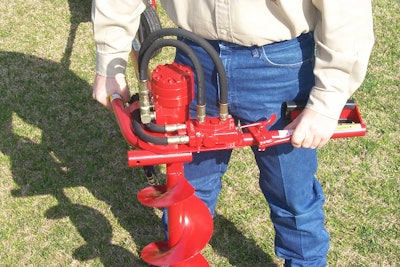
Handling the hydraulic
Hydraulic drills run off of a hydraulic power source, or power pack, that operators connect to the drill through the hydraulic hoses. Built to handle extra tough conditions, hydraulic drills have few moving parts; and the hydraulic drill’s highest cause of damage results from misuse. However, operators still need to conduct regular maintenance and check the hydraulic fluid and oil, filters and the hoses’ quick disconnects for optimum performance.
Hydraulic fluid and motor oil
Before starting the engine, ensure the power pack’s hydraulic oil reservoir is filled to the top of the sight gauge. Remember to keep the hydraulic oil and return line filter clean at all times, and change both after the first 15 hours of operation. From then on, the filter and oil should be changed every 3 months or after 100 hours of operation, whichever comes first.
Along with the hydraulic fluid, check the engine crankcase oil levels prior to each day’s use. Always ensure that all nuts, fasteners and fittings are tight. Loose engine or tank mounting bolts can cause premature coupling and pump wear.
Filters, quick disconnects, hoses and throttle valve
Drills and dirt go hand in hand, and that’s why hydraulic earth drill manufacturers use filters to minimize the risk of soil entering the hydraulic system. Many manufacturers use only an external filter, which generally prevents dirt from entering, but some manufacturers incorporate as many as three filters — an internal filter, an inline filter, and a suction filter in the tank. Having additional filters adds extra reliability and keeps contaminates from entering the hydraulic system — even if dirt does get in the tank.
Operators need to remember to regularly clean the quick disconnects on the hoses before or after using the drill. After a drilling job is completed, and an operator begins to take the drill apart, they need to attach the disconnect from the drill’s hydraulic output hose onto its input coupler and vice versa on its power pack. This prevents dirt from making its way in. If one of the quick disconnect fittings begins leaking, the quick disconnect coupling needs replacement.
In addition to the disconnects, examine hydraulic drill hoses and pipes for leaks, cracks and abrasions and replace if necessary. Keep hose connections tight and fitted for optimum performance.
While fully engaged, a gap should appear between the throttle lever and the handle mount on each side. Adjust the lever by bending it, if the lever touches the handle to achieve full engine power.
With open hydraulic systems, if operators encounter any hydraulic oil leakage; they should shut down the power source and relieve the hydraulic pressure by moving the throttle valve in both directions, which opens the hydraulic oil flow. Tighten the screw-on fittings on the end of each hose. Replace the related hose assembly if the leakage continues. If the throttle valve leaks around the spool shaft replace the seal kit.
Other check points – for both hydraulic and mechanical augers, points and blades
Like the drill, all augers require similar maintenance. Ensure that auger blades and points remain secure on a daily basis and always replace the wear items. For safety reasons, never operate drills with damaged or missing parts, including its auger. Proper maintenance and replacement of wear parts keeps the auger in tiptop shape. And specifying the right point and blade for different soil conditions also improves efficiency and saves some wear on the auger.
Earth drill augers typically come with one of two blade styles —bolt-on and knock-on blades. With bolt-on and knock-on styles, operators should replace worn attachable points and blades before they reach the auger flight. Operators can replace worn parts quickly by using basic hand tools, such as a wrench or ratchet set. With a worn auger flight, operators will either need to repair the auger flighting or replace the entire auger — which comes at a higher expense than paying attention to regular maintenance and worn point and blade replacement.
Torque tube
Premium earth drills might feature torque tubes, which prevent unexpected kickback when the auger hits a rock or underground obstruction by absorbing the shock — keeping operators safe and the drill under control at all times. The tube itself does not require extensive maintenance; however before each use inspect the tube for cracks. Also pay attention to the spring and button attachment system — ensure the button stays securely snapped into place before operation and replace the spring-button attachment if bent or broken. Spring-button attachment systems eliminate the chance of losing pins or bolts that some drills use for attachment purposes.
Smart storage
When putting drills away for the off-season, remember that proper storage contributes to the overall maintenance.
With both mechanical and hydraulic drills, drain the gas or put recommended additive in the fuel, whichever the manufacturer suggests. Always store the drills in a dry place, because the drills’ steel components will eventually rust if it is left outside or in places with a lot of moisture, such as propped up outside against a building.
For both long-term storage or when simply moving from the truck to jobsite, keep the flexible drive shaft as straight as possible to prevent kinks.
Research drill resources
For most mechanical and hydraulic drills, the operator can complete maintenance and repairs with ordinary hand tools, such as a wrench and screwdriver. Operators can consult the appropriate section of the operator’s manual for specific instructions.
Many manufactures offer service or in-house technical consultation. Operators should check with their drill’s manufacturer for details and other resources such as online service videos as well as online parts and maintenance manuals.
For issues that lie outside of regular maintenance and servicing, it’s important for rental centers and contractors to consider earth drills backed by manufacturer warranties. These warranties indicate that the manufacturer believes in their product and will work with customers to examine and resolve any operating issues as well as offer support.
Performing maintenance to prevent mayhem seems like the most logical thing for earth drill operators and rental centers. The cost of not maintaining the drill will exceed the cost of actually taking the time to maintain it. Skip the downtime costs, headaches and inefficiency by sticking to a regular maintenance schedule. Doing so ensures that rental centers and operators will prolong the life of their drills and enjoy overall productivity and efficiency.