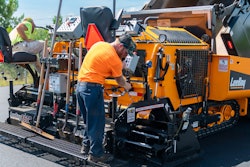
While the paver and rollers are essential to asphalt paving operations, the screed is crucial for both the quality and density of an asphalt road. With this in mind, equipment owners need to make sure their screed is properly maintained in order to ensure the quality of the pavement.
“The screed is undoubtedly the most important machine on a paving jobsite, and in many ways it ought to be looked at as a finely tuned instrument,” says Travis Colwell marketing and communications coordinator at Carlson Paving. “It is the crux of the entire operation. In short, a well maintained and properly leveled screed will achieve uniform mat quality, even density and superior ride uniformity. A screed that is either not well maintained or is not properly leveled will create issues in the mat that cannot be corrected leading to poor quality, cracking of the surface and ultimately premature failure of the roadway.”
Not only can a screed that’s not properly maintained lead to penalties, additional costs and a poor reputation among customers, such a screed will invariable cause uneven and premature wear to components, leading to costly premature replacement which negatively impacts the cost of ownership.
Read Next: How Screeds Improve Paving Performance
“When you think of the paver as a whole, you must break it down into two machines, the tractor and the screed,” says Brian Hall, territory manager with VT LeeBoy. “The tractor does the work and the screed makes the money. If the screed is not properly maintained, it means the difference between bonuses and mediocrity.”
Daily Routines Improve Performance
Performing daily maintenance on your machines is something you’re used to, but don’t neglect daily checks on your screed. Prior to the day’s start and with the screed plates cleaned, operators should stringline the rear edge of their machine to check for flatness and to pre-set the crown in the main extension. Once that is done, stringline the front edge of the main plate to check for lead crown. Not only will this help to improve grade uniformity in the mat for better water runoff, it will also ensure you have the appropriate lead crown to minimize and avoid centerline streaks.
“Asphalt mat quality is the most visible aspect of the job. Every part of the paver can be in top condition but if the screed is out of adjustment and the end product is deficient, then nothing else matters,” Hall says. “To expect to get a quality job after ignoring your screed is like expecting your vehicle to function without tires. Screed maintenance is just like any other type of maintenance: if you ignore it, you pay in the long run. If the crew takes a little time in the morning to ‘zero’ out the screed adjustments and make a visual inspection of the screed condition, you start out the day giving your crew the best chance for success.”
Prior to the day’s start and with the screed plates cleaned, operators should stringline the rear edge of their machine to check for flatness and to pre-set the crown in the main extension. Once that is done, stringline the front edge of the main plate to check for lead crown. Not only will this help to improve grade uniformity in the mat for better water runoff, it will also ensure you have the appropriate lead crown to minimize and avoid centerline streaks.
“In addition to the daily stringlining of your machine to ensure appropriate leveling, contractors should also include quick examinations for alignment issues,” Colwell says. “These checks should include checking the parallel of the extension to the main, the extension angle of attack (or preset the angle of attack prior to starting the job), and extension height (or preset extension height prior to starting the job). By checking that the screed is both aligned and level before the start of the day, contractors can make the necessary adjustments to produce high-quality results for their customers."
Just as start-up inspections are critical to ensuring the screed is in proper condition, so too is end of day cleanup. Contractors should take simple steps to keep the screed clean and ready the screed for the next day’s work. It is important to remove any loose material from the endgates and the screed’s extension covers, removing any excess buildup of material and spraying down the screed with release agent. A clean screed will aid in proper operation of the machine and help achieve the desired mat quality.
Read Next: How to Beat Asphalt Build-Up
“Just as you should keep the paver clean, you should also keep your screed clean, and it’s relatively easy to do,” says Kevin Neisen, product manager at Roadtec. “Make sure the front wall is scraped clean, as well as the end gates. The bottom should be cleaned as well. Each of these should be completed at the end of each shift.”
Not completing the clean-up at the end of the day will only make things worse for contractors the next morning.
“Cleaning is critical, and a hot screed is a lot easier to clean and get everything off than a cold one,” says Jim Holland, vice president of sales, Vögele, at Wirtgen America. “Make sure that all the materials are cleaned off and that you don't have any cold material built up between hydraulic extensions. You need to make sure that's knocked out so the next day you don't have any material that's binding up. Also be sure that any material that’s leaked through between the main and the extensions hasn’t built up between the elements or the  “Uneven wear on screed plates can be an indicator that the crew is not setting up the screed properly before paving,” Jon Anderson with Caterpillar says. “Flatness can be quickly and easily checked in the field by running a stringline across the trailing edge (back edge) of the screed plate. This should be done whenever new screed plates are installed or whenever texture differences that appear as longitudinal stripes appear in the mat."
Daily checks to the screed should include visual inspections of the screed plates for material build up on the screed. If there is any, make sure it is removed, and that the screed plate is a clean, uniform surface. Additionally, make sure to check for any buildup of material inside the screed. Interior buildup can significantly impact adjustments and even cause damage within the screed.
“Having a clean screed is a safety factor,” says Henry Polk, paver product manager at BOMAG. “Screeds with trash and asphalt buildup are fire hazards. Clean screeds are also easier to adjust and maintain.”
Check for Premature Wear
Paving crews know that to consistently produce high quality asphalt surfaces the screed must also be checked for wear and damage on a regular basis.
"Checking the screed for flatness and screed plate wear are critical to placing a smooth and uniform textured mat," says Jon Anderson global sales consultant with Caterpillar Inc.
Screed plates, nose bars, temperature sensors, heating elements, extension tubes, pre-strike-off plates, depth-control cranks and vibration and tamper motors and shafts are all wear parts on a screed. These parts are in direct contact with the mix and are integral to the extension’s function.
You will want to check the thickness of screed plates daily using calipers or a micrometer, taking into account the metal used in the construction of the plates and the type of mix being placed. When screed plates are worn to a minimum thickness specified in the maintenance manual, the screed plates should be replaced for optimal screed performance.
“Uneven wear on screed plates can be an indicator that the crew is not setting up the screed properly before paving,” Anderson says. “Flatness can be quickly and easily checked in the field by running a stringline across the trailing edge (back edge) of the screed plate. This should be done whenever new screed plates are installed or whenever texture differences that appear as longitudinal stripes appear in the mat.
Read Next: 10 Tips to Quality Asphalt Pavements
“When screed plates wear thin, the studs holding the screed plates to the screed will become exposed and cause mat texture problems. This effect is similar to automotive brake pads wearing down to the “wear tabs” that rub on the rotors and make a squealing noise, indicating that the brake pads are worn out and need to be replaced. If you see exposed studs, it's time to replace screed plates! You will notice longitudinal stripes in the mat when this much wear has occurred.”
Extension support components are also critical for ensuring the extension is not only running parallel to the main but also to maintain the specified settings when leveled. Improperly adjusted or worn bushings can lead to movement in the extensions, impacting the mat quality and contributing to excess wear on other components of the screed.
“For rear-mount screeds, the end gates often get damaged by the crew pulling the extension in more quickly than the head of material used,” Neisen says. “It is important to make sure the crew is properly trained on how to properly use the equipment and that they are aware of the jobsite environment. Planning ahead will help prevent instances where resources would need to be devoted to manually shoveling material.”
Adjust for a Flat Mat
At the beginning of each day, contractors not only need to check the screed for any damage, but also to be sure it’s properly adjusted. Properly leveled screeds will help maximize the lifecycle of your plates and runners, whereas a screed out of level will create premature wear, lessen the plate lifecycle and will impact mat quality negatively.
“Before the day begins, the operator must inspect the tow points and depth screws to make sure that all points are set to the center position,” Hall says. “This way, when the asphalt hits the screed, the depths across the screed are equal and there is not excessive down pressure on the back of the screed plate. Occasionally the operator will notice that the extensions are carrying too much or too little of the weight of the screed, leaving a shadow in part of the finished mat. Sometimes this can be adjusted on the fly, but it may mean the screed needs to be brought back to level. This also will affect the amount of asphalt and depth of material installed. Too little depth of asphalt will affect the life of the job and too much will make the contractor run over on the material he figured for the job and cost him money in tonnage overruns.”
Once the screed has been moved or even left overnight, you also need to be sure it has been “zeroed out” again before you begin paving.
“When machines are moved, things potentially get hit and moved and bumped so you just need to check that alignment before you pull off and make sure the screed is zeroed out so you know where your zero position is,” Holland says. “You should do this anytime you move the paver anyway, but you also want to make sure that somebody has messed with the machine overnight.
“Because in theory, if you if you park the machine and you have everything set, if nobody touched it, you should just be able to pull off the next day on the same type of material and go. But sometimes somebody will come out and loosen something and they don't put them back in the same position.”
Which is why you always should check that the screed is level before starting to work.
“A screed can have a positive or negative angle of attack,” Neisen adds. “When you zero the cranks, the screed is level from the front to the back. If it is not level it needs to be adjusted prior to beginning work. A straight-edge is the best way to measure the angle of attack.”
It’s also important to select a screed that is not only easy to level but one that will keep and hold its adjustments for long periods of time.
“A screed that quickly goes out of adjustment means more downtime spent in re-leveling the screed, negative impacts to mat quality and lessen component lifecycle,” Colwell adds.
Each manufacturer has their own procedures to level their screed, but basic principles exist across all platforms:
1. Raise the screed and extend the screed Service Locks on both sides of the machine, then lower the screed so the tow arms are resting on the locks. This Is for safety!
2. Position the left and right hydraulic tow point cylinders to the same position.
3. Use the depth control cranks to square up the face of the screed with the tow arms at 90° Each manufacturer has their own procedures to level their screed, but basic principles exist across all platforms
4. Retract all trailing edge adjusters on the main screed.
5. Check the screed to ensure that there is zero crown (flat). Pull a string line across the width of the main screed approximately 25 mm (1 in) behind the leading edge of the screed plate. Place two spacers of equal size between the string line and screed plate. Use a third spacer of equal size as a gauge to check the gap between the screed plate and the string line.
6. Set the stringline across the width of the main screed, just behind the nose bar (approximately 25 mm or 1 in). Place two spacers of equal size between the string line and screed plate approximately 25 mm (1 in) in from the end of the screed plate. Use a third spacer of equal size as a gauge to check the gap between the screed plate and the string line at the center of the screed plate. Place the string line across the width of the main screed trailing edge about 25 mm (1 in) in from the tail. Using the same spacers, place a spacer under each outboard edge adjuster, use the third spacer to check the plate for the correct gap at each adjuster. Turn the adjusters as required to bring the screed flat, at which point the space between the stringline and the screed plate will be the same.
7. Next, check the relationship of the screed extenders to the main screed plate.
8. Just like on the main screed, retract all trailing edge adjusters and use a stringline and spacers and use the adjusters to flatten the trailing edge of the extenders.
It is important to refer to your screed’s manual for proper tolerances and adjustments to level a screed to the manufacturer’s specifications.
When a screed is being broken in, there is also a greater chance it will come out of alignment.
“On any screed, but especially a new one, there is expansion and contraction of the metal,” Holland says. “When you’re breaking it in, you have heat cycles and things can move so you just need to check that out."
Always Check the Heat
Your screed needs consistent, uniform heat in order to ensure it’s putting down a quality mat. Generally, if there are no mat defects showing during paving, the screed is in good condition but any defects could indicate an issue with the heating element.
“Visually inspect the surface texture of the asphalt mat behind the screed and extenders as the paver takes off from its starting point,” Anderson says. “Look for tearing of the mat surface due to cold areas of the screed plate. Hot mix sticks to cold screed plates. When tearing of the mat occurs due to a cold screed plate, it is a result of the crew not allowing enough time for the screed to heat up, or from one or more of the heating elements not working properly.”
On many pavers, the extenders do not heat up as quickly as the main screed plates, resulting in tearing and dragging the mix behind the extenders only. Most pavers will show the screed plate temperature in real time during initial warm up and during paving.
“Some pavers have monitoring systems built into them so it's easy to check that on our on a regular basis throughout the day and make sure your heating elements are all working properly,” Holland says. “Some papers don't have that so you have to do a manual check daily or weekly depending on what the recommendation is, but you need to make sure that the heating elements are working properly.”
If there is something wrong, the screed may continue to heat up, however, once the operator is notified that the screed is not heating properly, it should be inspected by a qualified mechanic. This early warning system can prevent downtime caused by sudden, unexpected heating element failures.
“An operator can quickly see if the screed is “cold” as it will start dragging the asphalt,” Hall say. “Every crew should keep an infrared thermometer on hand to measure screed temperature if they suspect there is a problem. Check the screed heat in several places with a temperature gun to make sure it is consistent across the plates. A quick solution to electric screed heating issues is to check individual fuses to the heat strips.”
Don’t forget to check the heating elements to prevent cold mix from sticking to the screed at startup. Detailed checks and adjustments should only be done when uneven wear is obvious or mat defects, such as stripes in the mat are occurring. Sometimes it can be difficult to determine if mat defects are a result of poor screed maintenance or poor setup and paving practices.
While there are many things you can’t control on a jobsite, training your crew and maintaining your screed are two major factors that can contribute to the success of the paving operation.