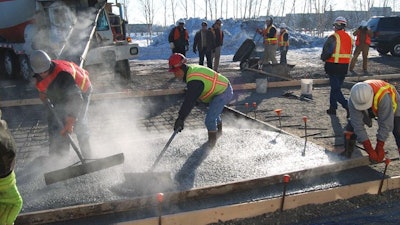
For many contractors, pouring concrete in cold weather is a nerve-wracking experience -— so much so, that they shorten their construction season to avoid problems associated with cold pouring.
But it doesn’t have to be that way. With today’s improved concrete designs and pouring methods any contractor can be confident of producing good results even in cold weather with a little planning.
Concrete’s strength is in part a function of the temperature at which it cures. Normal compressive strength is based on curing concrete at its ideal curing temperature, 72 degrees F for a period of 28 days. Warmer temperatures reduce the cure time. On the other hand, cooler temperatures increase the length of the cure period.
Cold weather is technically defined as a period when, for more than 3 consecutive days, the average daily air temperature is less than 40 degrees F, and the air temperature is not greater than 50 degrees F for more than half of any 24-hour period.
Pouring concrete in these conditions actually can be advantageous for contractors. As long as the differential between ambient air temperature and concrete temperature is minimal, concrete poured under cold conditions will produce higher than ordinary ultimate strengths and better long-term durability.
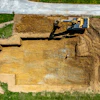
Site preparation
The secret to a good cold weather pour begins with good site preparation. In cold weather this means making sure you have all your insulating and heating equipment on-site and working properly before the pour begins. Straw, tarpaulins and insulating blankets should be all dry and in good condition. If foam sheeting is being used for insulation, be sure to figure out how it will be held in place in case of high winds. Check all heaters for performance and check that they have sufficient fuel for the entire period of the cure.
Hydronic Heaters Cure Concrete's Winter Blues
Concrete should not be placed on frozen subgrade. If freezing is anticipated, the subgrade must be protected and its temperature brought up to above freezing. Usually this means using about 6 in. of straw cover to insulate the pour area. The straw should be held in place with tarpaulins or plastic sheeting. Be careful not to compact the straw too much or you will reduce its insulating abilities.
These precautions extend to include forms at grade and above grade as well as reinforcing steel brought up to above-freezing temperature prior to the pour. Forming components and reinforcing steel must be free of ice, snow and frost. The forms themselves should be warmer than 32 degrees F but not warmer than the concrete that will be placed against them. Insulated blankets and plastic foam panels can be used to insulate the forms. In the case of post holes, make sure there is no ice accumulation at the bottom of the holes that can cause movement of the posts after thawing.
Spotlight: Heating and Concrete-Curing Equipment
In some instances you will want to construct enclosures to protect curing concrete from wind and too rapid evaporation.
In the mix
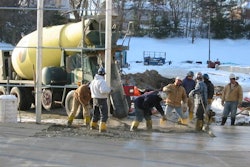
Good communications between your concrete supplier and your pour supervisor are another key ingredient in successful cold weather concreting. The plant needs to know the temperature at your site, especially if the batch plant is some distance away.
Your batch plant has three methods of ensuring that the concrete arriving at the work site is suitable for the weather conditions.
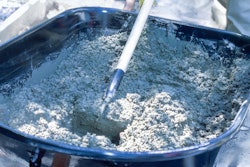
First of all, the plant will simply raise the temperature of the water used in the mix. As long as the aggregates are free of ice, this method works quite well for moderately cold days. Water temperatures ranging between 140 and 180 degrees F can be used, but temperatures above 180 degrees F will compromise the mix. To prevent the possibility of concrete flash setting, at no point should the cement be allowed to contact the hot water; instead, the aggregate should be mixed into the water prior to the addition of cement. Alternatively, aggregates and cement could be added to hot water by ribbon loading the batch.
Finer aggregates may need thawing if there is ice present in the aggregate. Care needs to be taken if the aggregate is thawed in the mixer so that excessive amounts of water are not present due to ice melting.
Controlling the amount of air entrapped and entrained in the concrete is critical during cold weather pours. When your batch arrives at the work site, it should contain no more than the specified air for the project. The concrete supplier needs to pay close attention to the slump of the mix, aggregate size, the proportion of cement, admixtures, gradation of sand, mix water temperature and mixing time to ensure the concrete is within specification.
Decorative Concrete: Adjusting Mix Designs as the Temperature Changes
Another way of modifying concrete for cold weather use is to add more cement to the mix. The additional cement content will provide additional heat during hydration. While Type 10 (1) cement will achieve this goal, the use of Type 30 (III) will achieve even higher early strengths.
Cold weather will cause little damage to fresh concrete once it has achieved a compressive strength of 500 PSI (3.5Mpa). The sooner this compressive strength can be attained the less likeliness that the pour will fail. To ensure early compressive strength, batch plants can modify the mix by adding accelerators to speed up the curing process. The most commonly used accelerator is a calcium chloride water solution or a calcium chloride and a water-reducing admixture. Calcium chloride is not antifreeze, and protection after the pour is still required for a successful result. Calcium chloride helps speed up the hydration process of concrete by acting like a catalyst to help free calcium oxide within the cement, allowing faster initiation of the hydration process and quicker achievement of the critical 500 psi (3.5 Mpa) compressive strength.
After the pour
Here’s where all your careful preparations pay off. Set your protective materials in place as soon as possible. Pay special attention to corners, edges and narrow areas, as these will tend to dry and freeze first. Check the effectiveness of your insulation by taking the temperature of the concrete. Placing a thermometer between the insulation and the concrete will allow you to determine the effectiveness of the insulating layer. If the temperature begins to drop, use additional material or material with a higher “R” value.
In some cases you will be able to construct heated shelters for your pour area. In these cases you can set up properly vented heaters to keep the pour area warm while avoiding direct contact of fresh concrete with carbon dioxide associated with non-vented heaters or open flame. Carbon dioxide combines with calcium hydroxide in fresh concrete and forms a layer of calcium carbonate, which will result in dusting on the pour surface.
The American Concrete Institute recommends a maintained temperature of 70 degrees F for three days or 50 degrees F for five days to gain sufficient strength for a cold pour to perform up to specification. With careful planning of a work site and the right mix from your supplier these parameters should be attainable for most contractors from late fall to early spring on the construction calendar.
American Concrete Institute's Guide to Cold Weather Concreting
John Kulczycki is a London, Ontario-based freelance writer.