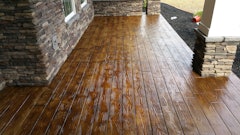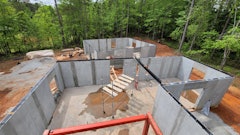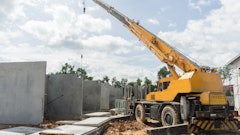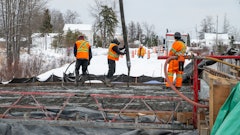
Placement Lay-Outs will be dictated by overall sequencing of project construction and key milestones in the schedule. Try to maintain uniformity in placement size and configuration. How the end user will be using the floor should be considered when determining joint lay-out, (racking, dock areas, high traffic areas, show room). Try to avoid long, narrow placements to minimize curling potential. Reducing construction joints across aisles should be a key focus along with flatness specifications.
Site access & logistics
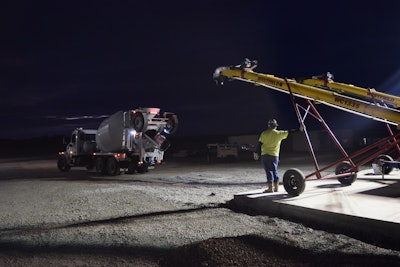
Travel routes and staging areas to a large degree must be built into the overall constructability of the building. You must have input at the earliest stages of the project to insure adequate access for slab placements. If you are just doing the slabs those decisions will often times be made before you ever show up. Travel routes will require occasional maintenance, flagging and adequate lighting. One way routing of concrete trucks is preferable if site conditions allow.
Staging areas are required to position and prepare concrete trucks for discharge, wash-out, concrete testing and the on-site addition of admixtures or fibers. Typically concrete trucks are prepped and tested as close to slab placement as possible without hindering traffic flow. Access for personnel and equipment to two sides of placement is preferable.
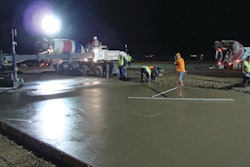
Lighting – How much is enough? OSHA requirements, contract language and specifications will establish minimum foot candle illumination requirements but it is really much simpler. You can’t finish what you can’t see. Safety is the prime consideration in planning area lighting on a construction site. Keep in mind that minimum lighting will impact production rates.
Break areas and bathroom facilities should be easily accessible to all personnel involved with the slab placement.
Slab Preparation Before Placement
In an ideal world every placement would be 100% ready, inspected and signed off before concrete is released. The reality of access and pending weather events necessitates a little more flexibility. The first step is prioritizing what work must be complete before placement starts and what can be successfully completed while the placement is ongoing. Before releasing concrete these are the some of the items that definitely need to be complete;
- Edge forms and block-outs installed to grade and braced.
- Sub-base proof-rolled and elevation confirmed.
- Insure that all work by other trades is complete and location/elevation verified.
- Reinforcement, at least 80% complete provided that the installation of the balance doesn’t impact concrete placement.
- Vapor barriers in place, lapped and edges taped.
- Expansion joint material installed.
During the concrete placement;
- Touch up grading and compaction of sub-base.
- Monitoring and adjusting formwork elevation and straightness.
- End of placement bulkhead.
- Chairing of rebar and installation of dowel baskets.
- Slip sheets non taped.
- Protective wrapping of columns, walls and work in place.
Pre-Placement Checklist and Sign Off if used correctly is a powerful tool. It requires accountability and provides a job site record.
Concrete Service and Place/Finish Capabilities
Scheduling, rapid communication between all pertinent parties and fall back options play a huge part in the daily placing of concrete. Concrete placements should be forecast and scheduled weekly and go/no go decisions made at least 8 hours ahead of placement start time. During the placement there must be open communication between batch plant, concrete crew lead, QC and testing. Pertinent data to communicate should include start time, slump, temperature and delivery rates. Concrete service should be matched to place/screeding method and crew capabilities.
Placing & Screeding Methods
Discharging directly from concrete trucks is the most efficient means of delivering concrete to the point of placement provided there is adequate access. Pumps, conveyors and buggies are used when site conditions, placement reinforcement or embedded items preclude truck dumping.
Pumping is the preferred alternate due to widespread availability and placing options. Conveyors have the advantage of being able to place mixes too harsh to pump and high volume production rates. Georgia Buggies were in use when I started over forty years ago and still have their place on the job site for placements of 50 cubic yards or less.
Placing and screeding methods selected will impact slab configuration and access required. Slab placement width to a large degree will determine strike-off methods. Form to form screeding such as truss or roller screeds are seldom wider than one bay or 50’. Wet screeding by hand or machine will be limited by set time of the leading edge of the concrete placement. Typically wet screed placements will have a maximum width of 150’. Screeding method employed will be dictated by flatness requirements, placement width and equipment availability.
Screeding methods can be basically be broken down into (3) distinct types;
- Mechanical, automated laser controlled screeds.
- Form to form mechanical vibrating or roller screeds
- Hand controlled wet screeding utilizing non-mechanical straightedge or powered vibrating straightedge.
Getting the Finish Right
Burnish & flatness – The days of just running a trowel machine over the slab until it turns blue are over. You need to understand the burnish requirement for the slab. Exposed slabs will often have different burnish requirements than polished or covered. Carbon steel trowel blades are great for producing highly burnished floors but have the potential to scratch the surface and leave the surface too dense for satisfactory polishing. Plastic trowel blades are much more forgiving and do not mark-off or scratch the surface as easily. It is my opinion that except for rare situations bump cutting of the surface behind trowel machines should be eliminated. Bump cutting of floor will negatively impact cosmetic appearance of floor slab with increased aggregate shadowing and pin holes. Modern strike-off methods and floor panning techniques will consistently achieve FF60/FL40 floor flatness numbers without bump cutting.
The quality of slab edge finish and attention to detail defines a great slab placement. The goal is to blend slab edge burnish, levelness and cosmetic appearance with the main slab. Machine floating/ troweling techniques, power edge trowels and team craftsmanship make the difference.
Ambient weather conditions and weather protection for concrete placements
Concrete mix designs are expected to conform to various protocols in regards to temperatures variances and without getting technical that is 50-90 degrees for fresh concrete. The differential between concrete and ambient/base temperatures should be 30 degrees maximum, twenty degrees preferred. Methods to modify concrete placement set and finish:
- Slump
- Concrete temperature
- Admixtures
- Environment
Slab shrinkage and damage during construction phase due to site conditions and sequencing should be understood by all. Costs to modify concrete mix, site conditions or other for hot or cold weather conditions should be discussed and agreed upon by all pertinent parties.
Mix design set characteristics and finishability
Mix designs are formulated by Ready-Mix producers to project specifications and approved by the Engineer of Record. The ability to place & finish the proposed mix are usually secondary concerns and set times are seldom discussed. It is the responsibility of the place/finish contractor to understand the mix design being placed.
Placeability will have an impact on the method of placement chosen. The ability to spread, strike-off and finish should be the primary consideration when reviewing mix designs and test panels by the field crews. You should strive for a uniform fluid mix design that holds together, displays minimum bleed water, seals up at the specified slump and sets within a satisfactory time frame.
Pumpability may or may not be a factor for slab on grade placements but it is important to remember that many of today’s mix designs for slab on grade are difficult to pump due to top side aggregate size, cement content and the addition of fibers. It is recommended that if an alternate mix design is required to insure pumpability that it is approved prior to intended use.
Finishability - The basic non-environmental factors that affect finishability at the field level are;
- Sufficient cement paste to provide acceptable burnish and finish using conventional equipment.
- Coarse aggregate gradation and content will affect mix design workability and amount of bleed water at the concrete surface. Natural sand or manufactured? Acceptable finishes can be achieved with either but normally natural sand is preferred due to sand particle shape being easier to finish.
- Fibers are the greatest thing since sliced bread although the practice dates back to putting horse hair in plaster. The use of fibers does impact the surface cosmetics.
- Admixtures – Keep it simple. I’m not an expert but I am enough of a cook to know that the more ingredients in the recipe the harder it is to execute properly.
- Uniformity of placement and slump control. Slabs finish the way they are placed.
There is many options available for designing a concrete mix design and to discuss them all would be beyond the scope of this article. Slab on grade mixes are designed to reduce or mitigate slab shrinkage and movement. Some very basic guidelines for conventional exposed slabs; minimum amount of cement required to produce the acceptable finish and strength requirements, largest aggregate size for proposed slab thickness. I recommend that shrinkage tests be done well before slabs are to be placed.
Placing concrete smarter pays off in safety, quality and productivity gains.

