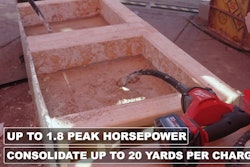
Internal vibrators, sometimes referred to as “spud” or “porker” vibrators are the most common tools used to achieve concrete consolidation in foundations, columns and walls. In addition to consolidating freshly placed concrete and ensuring concrete completely flows into corners of the formwork and around reinforcement, vibrators blend different concrete lifts together into a single solid mass of concrete and minimize surface voids (bug holes) and lift lines on exposed concrete surfaces.
When concrete is first placed into forms, it is honeycombed or contains up to 20% by volume of entrapped air bubbles created by the mixing and placing operations. These entrapped air bubbles are the “bad” air bubbles that must be removed by proper vibration to achieve maximum concrete density or good concrete.
During the process of removing the “bad” air, proper placing and vibration techniques will also minimize lift or placement lines and surface voids.
Stages of Concrete Consolidation
Consolidation using an internal vibrator occurs in two stages: 1) leveling and 2) de-aeration. During the first stage, concrete is temporarily liquefied due to the rapid oscillatory motion transmitted to the concrete by the vibrator as illustrated in Figure 1. Due to the energy imparted to the concrete, coarse aggregate particles become suspended, large voids between aggregates fill with mortar and concrete settles due to gravity. During this stage, concrete flows into corners of the forms and around reinforcement.  Figure 1. Rapidly recurring compression waves radiate out perpendicular from the vibrator. These waves reduce the internal friction so the concrete behaves more like a liquid. Wave energy dissipates with increasing distance from the vibrator.
In the second, or de-aeration stage, the remaining entrapped air bubbles rise to the surface and escape, especially the large bubbles as illustrated in Figure 2. It is not possible to remove all the entrapped air bubbles; however, vibration should continue until the cessation of large air bubbles occurs.
Use the largest and most powerful internal vibrator to systematically vibrate the concrete area through the full depth of the lift. Be sure to penetrate the previous lift and limit the distance between insertions so the area visibly affected by the vibrator overlaps the adjacent just-vibrated area. Continue vibrating until the coarse aggregate particles become embedded, a thin film of mortar forms on the top surface and along the form faces, and large air bubbles stop escaping from the surface. Figure 2. Rapidly recurring compression waves drive entrapped air bubbles out to the form faces and up to escape the concrete.
Also, listen to the pitch or tone of the vibrator. When the vibrator is first inserted into the concrete, vibrator frequency drops but then increases and finally becomes constant when the concrete is basically free of entrapped air bubbles.
Many times, untrained operators only level the concrete and fail to complete the de-aeration phase of consolidation resulting in unwanted surface blemishes. It is important for operators to understand the stages of vibration and indicators of well-consolidated concrete.
Don’t Worry About Over Vibrating
In addition to the “bad” or entrapped air bubbles in concrete, purposely entrained air bubbles or “good” air is commonly added to exterior concrete to increase the freeze/thaw resistance when the concrete is exposed to winter conditions (water and freezing temperatures). Air-entrained concrete is produced by adding air-entraining admixtures during batching and the microscopic size bubbles form during mixing. Entrained air bubbles are considerably smaller in size than entrapped air bubbles.
Workers commonly under vibrate concrete from fear that over vibration may reduce the entrained air content or damage the microscopic air void system decreasing the freeze/thaw resistance of the concrete.  Figure 4. Relationship between slump, duration of vibration and entrained air content.R. S. Brewster, Effect of Vibration Time upon Loss of Entrained Air from Concrete Mixes
As shown in Figure 4, the greater the slump, air content and vibration time, the more entrained air is lost. However, research has shown that most of the entrained air loss is the larger bubbles that do not contribute to the freeze/thaw resistance of the concrete. Basically, some of the larger entrained air bubbles are lost with the entrapped air bubbles and the freeze/thaw resistance of the concrete is not significantly affected.
Therefore, workers should vibrate between 5 and 15 seconds to ensure the second phase of consolidation or de-aeration is achieved. Doing so will reduce the amount and size of surface voids including bug holes and in general, improve the overall quality and appearance of the concrete. Instead of worrying about over vibrations, workers should worry about under vibration.
Best Practices
Some best practices to minimize surface defects and blemishes associated with consolidating concrete include:
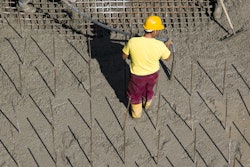
1. Use a minimum of two vibrators for wall placements. The first worker and vibrator should follow the concrete placing hose to facilitate the concrete placing operation. This worker is not concerned about insertion spacings, penetrating the previous concrete lift or achieving the second phase of consolidation or de-aeration. When the pump hose moves, so does the worker and vibrator.
The second worker is not at the point of concrete deposit. This worker is concerned with the vibrator insert spacings, penetrating the previous lift about 6 in. and vibrating at each insertion between 5 and 15 seconds to ensure complete consolidation including the de-aeration phase. This worker is primarily responsible for vibrating all the concrete to minimize honeycombing, lift lines and surface voids and in general, responsible for the final surface appearance of the concrete.
2. Best practice also includes a form watcher monitoring forms for both safety and tolerance issues. This form watcher is using string lines and a measuring tape to measure and monitor out-of-plane deflection of the wall form.
3. To improve appearance of the final as-cast concrete finish, especially architectural concrete, reduce the lift height (less than 20 in.) and extend the vibration time but not beyond 15 seconds. These modifications will provide a shorter distance and more time for the “bad” air to escape.
4. For areas congested with reinforcement or conduits, consider prepositioning vibrators in areas difficult to access before closing the forms. If needed, vibrators can also be placed in rigid or flexible tubes prepositioned before placing concrete. During concrete placement, either vibrators or vibrators inserted thru tubes can be pulled up and eventually removed as the concrete height rises. When using tubes, pull the tube and vibrator together but the head of the vibrator must extend slightly beyond the bottom or end of the tube.
5. Install inspection and/or vibrator access openings in forms that can be easily closed and sealed as concrete rises.
6. If concrete delivery is delayed, keep the top zone of the placed concrete in the form alive by periodically vibrating to a depth of 6 to 12 in. After concrete arrives, check placed concrete by inserting a vibrator or rebar to ensure the top zone is still plastic. Then place a short lift of fresh concrete (8 to 10 in. thick) on the existing concrete and vibrate through by reducing the insertion spacing and penetrate into the previous lift a minimum of 6 in. to blend the lifts together. Then resume normal concrete placing operations.
For more information, consult:
ACI 309R-05 Guide for Consolidation of Concrete, American Concrete Institute, www.concrete.com
ACI 309.1R-08 Report on Behavior of Fresh Concrete During Vibration, American Concrete Institute, www.concrete.com
Kim Basham is president of KB Engineering LLC, which provides engineering and scientific services to the concrete industry. Basham also teaches seminars and workshops dealing with all aspects of concrete technology, construction and troubleshooting. He can be reached at [email protected].