When people hear the term “slump,” most think about posture; think of concrete slump as "concrete posture."
In technical terms, slump is a measured indication of the workability, or flow, of a mix. The drier the mix, the lower or “tighter” the slump. Conversely, the wetter or “looser” the mix, the higher the slump. The slump measurement process is defined by ASTM C143 – Standard Test Method for Slump of Hydraulic-Cement Concrete.
The Procedure to Determine Concrete Slump
Tools Needed
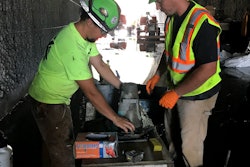
 Step 1. Once ready to begin the test, ensure that the slump cone is clean and secured to the base plate.Sakrete
- Slump Cone Mold—The mold is 12-in. in height and known as an Abrams cone.
- Scoop—To place the concrete sample into the mouth of the cone.
- Steel Tamping Rod—This is a 5/8-in. diameter, smooth-surfaced, 24-in. long rod with hemispherical (rounded) tips.
- Baseplate—Or some similar non-absorbent surface.
- Tape Measure—Or a ruler to record the test result.
- Sponge or Brush & Water—To dampen the cone and base before the test.
Preparing the Concrete Slump Test
- Obtain a sample using ASTM C172 – Standard Practice for Sampling Freshly Mixed Concrete methods.
- Begin slump test within five minutes of collecting and remixing the sample.
- Ensure the test base is smooth, non-absorbent, and placed on a level surface.
- Once the slump test has started, it must be completed within 2 minutes and 30 seconds.
The Procedure, Step by Step
Pro Tip: While you can certainly perform the slump test procedure by yourself, it will go a lot smoother with a helper.
- Secure slump cone to the base plate using the cone tabs or by standing on the foot holds. The cone MUST remain still throughout the test.
- Using the scoop, fill 1/3 of the cone with the concrete sample.
 Step 3. You'll fill the cone in three stages. At only 1/3 full, use the steel tamping rod evenly across the entire sample.Sakrete
 - Rod the material 25 times with the steel tamping rod, taking care to distribute rodding evenly over the entire cross-section of the sample. While rodding, you may touch but do not hit or “thump” the base plate.
Pro Tip: A good technique is to angle the rod to match the slope of the cone and rod starting with the perimeter. Continue in a circular pattern working your way to the center.Step 4. Fill the Abrams cone to two-thirds full and rod again. You will fill the entire cone afterward.Sakrete - Fill the cone to 2/3 full.
- Rod the second layer 25 times, making sure to penetrate the previous layer by about an inch. Continue rodding in a circular fashion, working to the middle—the same pattern as discussed in step 3.
- For the final layer, fill the cone to slightly overflowing.
- Rod the final layer 25 times with rod penetrating, but not through, the second layer. Distribute rodding evenly over the entire cross-section of this layer. If the mounded material sinks below the lip of the mold, stop rodding, refill, then continue rodding, picking up where you left off in the 25 stroke count.Step 8. Now that your Abrams cone is slightly overfull, use the steel tamping rod and level off the top.Sakrete
- Strike off the excess concrete from the top of the cone, using the tamping rod as a screed in a rolling or sawing motion.
- Clean excess concrete overflow from the base of the cone. Use caution to avoid disturbing the cone during this process.
- Holding the cone firmly, unlock or step off the cone tabs. Slowly lift the cone vertically in a steady motion, without any rotational movement, straight up to clear the sample. The lifting action should take 5 to 10 seconds.
Pro Tip: The key is not to jerk the cone or pull up at an angle. These movements will result in a false reading. - Invert the cone mold—small side down—and set it next to, but not touching, the concrete sample on the base.Step 12. After lifting the cone, measure the difference in height of the Abrams cone to the height of the slumped concrete. Place it inverted near, but not touching, your sample.Sakrete
- Place a straight edge, preferably the tamping rod, across the slump mold base, with one end suspended over the pile of concrete. Using a tape or ruler, measure the distance from the bottom of the straight edge to the displaced center of the slumped concrete. Record your results to the nearest 1/4 of an inch.
Pro Tip: For those unsure of how to judge the displaced center, place a coin onto the center of the concrete after final rodding and strike off. Once the mold is pulled, measure to the spot with the coin.


The recorded results are the slump of the concrete.
Unless otherwise specified, ready-mixed concrete is delivered to the job-site at a slump of 4 ±1 in. but can be batched to meet exact specifications for the job.
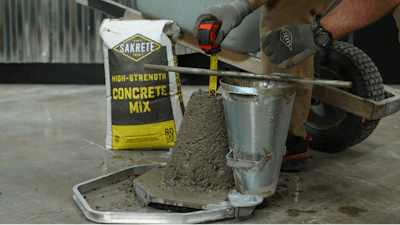
Sampling Bagged Concrete is Different
Bagged concrete has its own set of rules as defined by ASTM C387 - Standard Specification for Packaged, Dry, Combined Materials for Concrete and High Strength Mortar. This standard stipulates the slump range of bagged concrete (without water-reducing admixtures) to be between 2 and 3 inches.
This is a much tighter or lower slump than you’ll see out of a ready-mix truck chute. However, looks can be deceiving. The smaller coarse aggregate used in bagged concrete mixes makes it much easier to consolidate than most truck-delivered concretes. Resist the urge to make your bagged mixes match ready mix consistency!
If standard concrete is mixed to a higher-than-specified slump using excess water the set time will be substantially delayed, and—even worse–the end strength of the concrete will be adversely affected.
Make sure to follow procedures to the letter when working with concrete. Whether ready-mix or bagged, concrete may appear to be a simple mixture, but there’s a lot of science going on under the surface.
About the author
Dirk Tharpe has spent his professional life in the ready-mixed concrete, masonry, and concrete repair goods industries. He is a concrete expert and sales trainer for Sakrete.