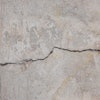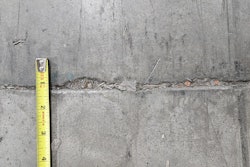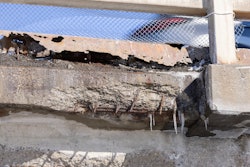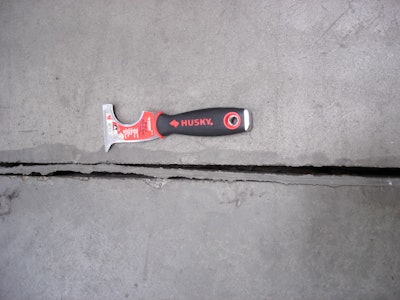
Spalled concrete joints are the primary problem for a concrete floor. Though the joint is necessary to control cracking, they do provide opportunities for damage by impact from work done on the slab, improperly filled joints, the saw cut timing, damaged saw blades, poor finishing, etc.
This is part of a three-part series on spalled concrete joint repair. I cover the causes of concrete joint deterioration and more in Part 1.
What's Your Type?
The width and the severity of the joint damage, along with operational demands, will dictate the type of joint repair material to use. Joint repair materials fall into one of two types – semi-rigid or structural. From there, other considerations that may come into play are aesthetics, access time to the repaired joints, and the type of demands being placed on the floor.
A generally accepted industry guideline is that joint deterioration of less than 1-in. wide can be repaired using a semi-rigid joint filler. Deterioration wider than 1 in. will dictate either structural re-building/re-nosing of the joint or the use of a higher shore A hardness semi-rigid filler modified with sand or similar manufactured aggregates to enhance the filler’s rigidity and durability.
NOTE: Cementitious-type repair materials may be suitable for some applications with little to no traffic but are generally not recommended for long-term durability, as they tend to shrink or become compromised over time.
Semi-Rigid Fillers
A semi-rigid filler can only protect joint edges from damage when it is properly installed. These are designed to “fill” the joint, not to seal it. Accordingly, the filler is placed to the full depth of the saw cut channel and relies on the base of the saw cut for structural support.
In non-saw cut joints, such as thru-slab construction or “cold” joints, or saw cut joints deeper than 2 in., ACI recommends installing the filler to a minimum depth of 2 in.
The thought is that 2 in. of properly adhered filler is sufficient to support crossing loads without deflecting. Improper joint filler installation depth is the leading cause of joint failure in projects we troubleshoot. If the filler is installed shallow in the joint — i.e. over a compressible foam backer rod or debris — the filler has no structural support base to rely upon and will often collapse or get “punched down” into the joint under wheeled traffic. Once the filler’s profile sits below the floor’s surface, it is no longer providing joint edge protection, and joint edge deterioration begins to occur through impact damage.
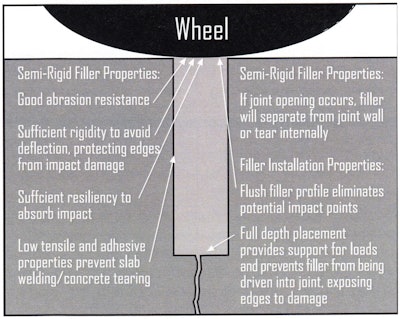 How a semi-rigid filler works in a concrete joint repair.Metzger/McGuire
While inadequate filler depth is sometimes caused by the lack of knowledge or experience by the installer, it is just as often a result of the installation contractor intentionally trying to reduce labor or material costs on the job. If the defective installation is not detected early, joint deterioration is the likely result, and removal and replacement of the shallow filler is often required.
By design, semi-rigid joint fillers have relatively low adhesive properties. This is to prevent the filler from restraining slab movement during the concrete drying shrinkage process and potentially “tearing” the concrete edges off the slab panel.
During the slab shrinkage process, the joints open and widen as the slab panel’s mass shrinks. If inadequate joint preparation is performed, the filler will more easily break bond with the joint sidewalls and can get pulled or torn out of the joint under lift truck traffic.
Even when joints are properly prepared, loss of adhesion can still occur if joint dimensional opening exceeds the lateral movement capability of the filler. This process is known as joint filler tearing or “separation.” Separation can occur either adhesively (filler to joint wall) or cohesively (tearing within the filler itself).
ACI reports note that joint filler separation is normal and expected and not a “failure” of the filler if the filler is installed too early after slab placement and before a substantial amount of drying shrinkage has occurred. ACI recommends deferring joint filler installation for a minimum of 28 days after slab placement, and optimally 60-90 days or longer if possible.
Separation voids less than 0.030 in. in width (credit card width) are typically more of an aesthetic concern. Voids exceeding 0.030 in. should be monitored and remediated if signs of joint edge deterioration begin to occur along the exposed joint edge.
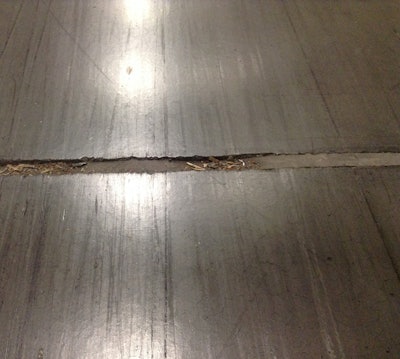 Example of a concete joint filler punched down due to improper depth. Metzger/McGuire
Semi-Rigid
Where floor aesthetics are a primary concern — say a stained/polished concrete floor in a retail store, showroom, or educational setting — semi-rigid polyureas or structural polyurethanes/polyureas are often the best choice. Such products are available in a wide range of colors from most manufacturers and tend to have better long-term color stability than similar epoxy-based products.
Epoxies
Where long term serviceability and durability are the main concern — say a high-volume distribution center or heavy-duty manufacturing facility — function often trumps fashion, and epoxy-based products are generally chosen for their long-term track record of durability.
Polyurea-based
If rapid access to the repairs is essential to a facility’s operation, polyurea based products provide the fastest cure and access times — often within an hour or two.
Lower temperature settings like freezer/cooler floors will also commonly demand polyurea repair products, as they have a wider range of application temperatures and faster cure times than epoxy-based products.
In all cases, special consideration may be required for food/drug safety or odors from repair products being objectionable to facility workers. LEED v4 compliant non- or low-VOC emitting products are typically desirable, sometimes required, and readily available. 100 percent solids, VOC-free products also tend to lead to more resilient products and longer-lasting repairs.
This was part 2 of a three-part series on spalled concrete joint repair. Check out part 1, "Understanding Spalled Concrete Joints." Part 3 discusses preparation and installation.
