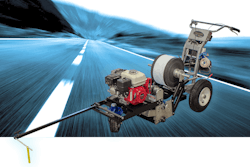
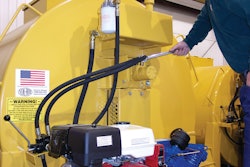
The importance of starting the season prepared and with the confidence cannot be stressed enough. Downtime is very costly during the busy season. So here are some steps, broken down by component, you can take at the start of the season (and periodically during the season) to ensure your striping equipment is in tip-top condition and ready when you are.
Engine. Oil change and spark plug replacement are in order. The paper air filter should also be changed. The foam air pre-filter should be cleaned with soap and water and then dried. Before reinstalling, take a teaspoon of engine oil and work it into the foam pre-filter with your fingers to distribute it evenly and completely. Don't over saturate the foam filter as it will contaminate the paper filter and render it less effective. If you feel you have added too much oil, use a shop rag or paper towel to remove the excess. Adding this small amount of oil to the pre-filter will greatly increase its effectiveness and dramatically increase the life of the paper filter. If you work in an arid or dusty environment it is a good idea to clean and re-oil the pre-filter periodically in the season.
Fuel. If you have an extended off-season, hopefully you added a fuel stabilizer like STA-BIL if you left fuel in the tank and system. Another good practice at season end is to shut off the fuel valve and let the engine's carburetor run dry. Whether these have been done or not, you may want to remove the float bowl yearly and inspect the inside of the bowl. Be on the lookout for bad gas (distinct odor, darker color, or gummy residue), which should give you some concern for the carburetor's close tolerance parts like the jets. Next look for any gritty substances or sediment in the bowl as a result of poorer quality fuels. Also look for the possibility of two separate liquids in the bowl (water and gas). If it is not that obvious simply look for signs of pitting or corrosion as a result. I once saw a float bowl that had a pinhole leak in it as the corrosive result of water left in the float bowl over the off-season. If you find water in the bowl, it is more than likely in the larger fuel tank. Drain and discard properly. Now add fresh gasoline.
Visually inspect the pull cord for frayed, thin or weak areas. Replace it now rather than deal with it on a jobsite in the dark.
Drive assembly. Most of today's direct-drive systems feature self-adjusting clutches and have gear housings that are lubricated for life and require no maintenance at this time other than a visual and audible inspection. If you have a hydraulic driven pump, now is the time to change the hydraulic oil and filter.
Hoses, filters, strainers, fittings, guns, siphon tubes. Visually inspect all hoses for tears, bubbles, wrinkles, cracks, and dryness. Inspect all filter screens for tears, deformities, and dried paint. Inspect filter gaskets and ensure that the filter bowl threads are free of excess paint. Inspect the inlet strainer for blockages, wear, or damage. Replace or clean all as needed. When in doubt, it is best to replace.
Clean up the siphon tube by removing dried, built-up paint on the outside. Verify that there is no paint build up on the inside. Remove the siphon hose and inspect both the inside of the siphon hose and also the 90-degree inlet at the bottom of the pump. Re-install the siphon hose, tube, and strainer. Reposition them properly in the 5-gallon bucket or 15-gallon hopper and re-tighten the clamps. It is best to align them away from your sightline (to the guns) to minimize viewing obstructions. Visually inspect the guns and see that the trigger moves freely and retracts and reseats the gun's needle smoothly. Take a wrench and check that all high-pressure fittings are tight. Make sure all high-pressure fittings are "high-pressure fittings." Cast iron, black pipe, or bronze fittings are completely unacceptable and dangerous due to their insufficient and limited pressure rating. Install a new airless tip and guard.
Pump assembly. Start by inspecting the wet cup to ensure there is no excess paint weepage. Clean out the wet cup and add new throat seal liquid. Flush out the storage fluid if the striper has been in storage. (See the side bar for more info on storage fluids). Once the storage fluid is completely removed, prime and fill the system with clean test fluid. Remove all the air from the system by recirculating fluid back to the bucket. It is now time to pressure test the system and evaluate the pressure system components. If the machine does not have a gauge, you should either add a removable test gauge now or have a service center do this portion of the testing. First, adjust the pressure about half way and shut the prime valve off. The pump should stall/stop. Stall the pump on the upstroke and then on the downstroke using the striping gun without a tip. Slightly submerge the gun beneath the fluids surface to minimize splashing. Actuate the gun and confirm that in either direction the pump does not move or creep. If it does it may indicate worn pump components, a bad prime valve, a faulty gun, or a system leak. Address issues as required. If there are no issues, increase pressure to three-quarters and then to full while repeating the stall testing. As you adjust to maximum pressure, make sure the machine does not exceed its maximum operating pressure, and stalls once it is reached. Visually inspect the entire pressure system for leaks. Relieve pressure, flush, and add the appropriate short term/long term storage fluid.
Many contractors choose to repack the pump whether it needs it or not in the off-season, just to know they are starting the season with new wear components. This is inexpensive insurance.
The gun actuation cables I am familiar with have a Teflon liner, which is a very slick surface. Using WD-40 to lubricate "sticky" cables is only creating an environment for dirt to attach itself to the cables and ride inside. This pretty much guarantees short cable life. If the cable routing is unobstructed and clear with nothing hanging up, and the cables still drag, it is time for replacement.
Frame, tires, and remaining components. Visually inspect the frame and take a wrench to confirm that all nuts and bolts are tight. Check the gun actuation cable, the caster release cable, and throttle cables to insure smooth, unrestricted operation with no drag. Make sure the cable routing is smooth with no sharp bends. Adjust as needed. Make sure that the cables show no signs of being kinked, frayed, or bent or show obvious wear. Now is a good time to route cables away from your sightline as best you can for unobstructed view to the guns.
Next check that the gun holder is working properly. Examine the aluminum castings for stress or impact cracks that may fatigue and break during the season. Make sure the gun height and location adjuster and rods are clean, smooth, and free of dried overspray for fast and easy operation. Use an appropriate cleaning solvent. Take proper safety precautions such as using solvent-resistant gloves and safety goggles.
Grease all fittings and lubricate the alignment pin, lubricated threaded contacts, and ball hitch (if outfitted).
Inspect tires for wear and replace as needed. If tires pass the visual inspection, adjust tire pressure to the proper operational pressure. Depending on the volume of work you performed last season or the speeds you operate, you may want to inspect and repack the wheel bearings. Looseness, noise, and bearing drag are all indicators of dry, loose, or failed bearings. Repack as needed, but if you repack one set of rear axle bearing it is best to do both real wheels. Adjust both sides precisely the same and double-check that they freewheel and then roll identically so that the machine tracks perfectly straight. Speaking of tracking, check the front caster wheel for looseness in the pin mechanism. Replace or re-fit as required. Check the front axle bearings for looseness and excess movement, then ensure they are tight. We earlier added grease to the front axle bearings via the grease fitting. Feel the vertical swivel bearings for looseness and excess movement. Remove the dust cap on top and visually inspect for moisture or corrosion or anything out of the norm. If satisfied, reinstall the cap.
On a known flat surface (shop floor) pick a centerpoint of the handlebars assembly and push the machine with one finger to verify that it tracks straight and doesn't drift. Again verify that you have eliminated all obstructions (or at least everything you could) to provide clear viewing of the guns. Inspect the parking brake and adjust or replace as needed.
Finally, evaluate the grounding wire, the connection to the frame, and the clamp for proper operation. Also make sure the grounding chain is still in place and dragging on the ground.
At this point, you have done a very thorough preparation for the season or the year ahead. You may want to look over the Instruction Manual and see if the particular manufacturer has any additional service recommendations or requirements. If not, the machine should be in great shape.
Mike McGowan, market development specialist for Graco Inc., would like to thank the following people for their help with this article: Bob Zaffino, The Paint Project, Medfield, MA; Jesse Epperson, Silverado Repair Services, Haltom City, TX; Jeff Pieper, J&L Specialties Services, Bossier City, LA; Tony Franco, Trantex Inc., Houston, TX; Rocky Molina, Pathmark Traffic Products, San Marcos, TX; Mark Schadegg, CJ Spray, St. Paul, MN; Jim Pellicciotti, Graco Inc., Phoenix, AZ; Joe May, Graco Inc., Rogers, MN.


