Pavement’s October/November issue features a hands-on look at “How Preformed Thermoplastic Can Extend Your Season” – and here are a few more tips to help you out.
How to Know When Preformed Thermoplastic Has Bonded
It’s important to be able to watch as preformed thermoplastic is being heated, so producers often recommend use of hand-held torches, though infrared equipment where you can see beneath the heater also works. Ennis-Flint’s no-preheat product contains Indents that serve as heating indicators evenly spaced on the surface of the material. As the material melts, these indents begin to fill in and close indicating that adequate heat has been applied. Additionally the edges should be adequately heated and will appear tapered as they have melted to the pavement surface. When properly heated based on these visual cues, the glass beads should be embedded 60% into the melted material for optimal performance.
Once the material has been installed and cooled both Swarco and Ennis-Flint recommend a “chisel test” where you cut or hammer a “V” into the marking and peel it back. “If it’s bonded properly the asphalt pavement will actually stick to the back of the preformed marking,” says Pamela Mencer, marketing manager/customer service preformed thermoplastics, for Swarco America. “If the marking comes up without the pavement you need to reheat it to improve the bond.” For markings installed on concrete the material should separate from itself when peeled so if you can see the concrete when you peel it back then it hasn’t bonded and you need to reheat it.
To repair the “V” just push it back in place and heat it again until it remelts. Ennis-Flint’s Zina Brooks, marketing manager, adds, “While the application process is relatively simple, Ennis-Flint provides free on-site training to make sure applicators understand first-hand the differences in the application methods for preformed thermoplastic.”
Why You Shouldn’t Be Concerned about Thermoplastic & Snowplows
While some contractors are hesitant to user preformed thermoplastic in regions that rely on snow plows, the product has been used in those markets for years. “Thickness is not an issue,” Brooks says. “You just make sure that the leading edge where the plow would hit is thoroughly melted so there’s a smooth taper onto the pavement rather than a ridge. You just apply a little more heat on the ridge until it smoothes out.”
9 Preformed Thermoplastic Installation Tips
- Make sure to take two propane tanks on site (minimum 40 lb. tanks preferred)
- Infrared heaters can be effective in installing preformed thermoplastic but it’s important to be able to see beneath the unit’s heating element.
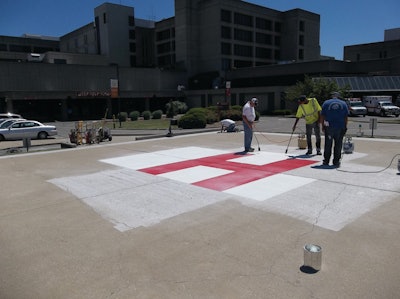
- Infrared heaters are especially effective when heating large areas, such as decorative crosswalks, where you are putting down a large volume of material.
- Test application of preformed thermoplastic first, especially on freshly sealed pavement
- In cold weather handle material carefully as it might be less flexible.
- Remove salt and/or deicing chemicals prior to installing marking.
- Make sure to remove all moisture from the pavement prior to installing the marking.
- Feather edges of material to protect the marking from snowplows.
- Always use the chisel test to check bonding to pavement