Roughly five years ago at a seminar we were conducting, a student asked me what the next new trend or hot topic would be in the field of decorative concrete. I mentioned colored polished concrete.
Fast forward to today. Polished concrete has hit a home run! It is no longer considered a niche or passing trend, rather a viable flooring alternative that can look aesthically pleasing, but also stand up to the test of time, offering the consumer a relatively low annual maintenance solution to other flooring alternatives.
Although currently there are no industry standards specifying concrete tolerances specific to polished concrete, manufacturers as well as installers are coming up with their own set of standards to obtain a quality polish job. On new concrete installations that will ultimately receive polishing, certain performance criteria need to be met so the polishing company can perform a uniform quality job.
On new concrete installations, the concrete mix design is critical. Using a cement-rich concrete (typically 3,500 psi) provides a dense surface free of voids for the polishing process. Many times we will also use water-reducing admixtures to keep a low water cement ratio without jeopardizing the workability during the concrete placement. Wet curing of the new slab is an excellent way of curing but many times is not practical. If this is the case, dissipating liquid applied curing compounds are a good way to cure the slab. Any remaining curing compound that does not dissipate over time is usually easily removed during the coarse-grinding phase of the polishing process.
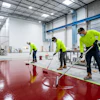
Of equal importance to the appropriate mix design is how the concrete is placed and finished. The flatness and levelness of the concrete substrate is crucial not only for a uniform polish, but also how the project is bid. Floors that have excessive highs and lows will require a tremendous amount more grinding, increasing your labor costs as well as the costs of your diamond tooling.
According to industry standards, finished concrete shall have a minimum Floor Flatness rating of at least 40. The industry standard for terrazzo is no more variance than 1/4 in. in a 10-ft. span, which can also apply to polished concrete. If the slab is being machine troweled with walk-behind machines, it is imperative to not leave indentations or boot marks behind since they are not easily removed during the polishing phase.
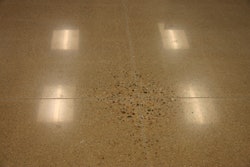
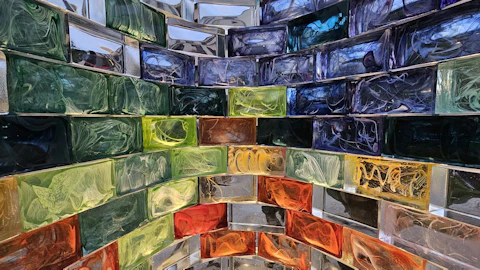
The main methods of coloring polished concrete consist of integrally coloring the concrete mix or staining or dyeing the surface after the fact. By far the easiest and most controllable method is to integrally color your concrete. Most integral color is either in the liquid or powder form and added at the ready-mix batch plant and then mixed for a specified time. Color loads for integral color should never be smaller than 3 cu. yds. for color consistency. Colored aggregate or crushed glass can be added to the concrete mix or hand seeded into the top layer of the mix. The polishing process will reveal the underlying aggregate.
Acid staining or dyeing is a great method of achieving color on polished floors. Different applicators have different methods and time frames of applying the stains and dyes. We have had excellent results with applying dyes around the 400-grit phase. Let's review the process:
- Coarse grind with 40-grit metal bond (if necessary)
- Grind with 80-grit metal bond
- Apply densifier
- Grind with 150 metal bond
- Remove scratch pattern from 150 grit with 100/200 resin bond
- Remove scratch pattern from 100/200 grit with 400 resin bond
- Apply color stains or dyes
- Polish with 800-grit resin bond
- Polish with 1,500-grit resin bond
- Polish with 3,000-grit resin bond
There are certain situations that the consumer may not choose a 3,000-grit polish. Most Home Depots or Lowe's, for example, typically are polished to 800 grit. There are many levels of polished floors that stop short of truly being "polished concrete," but have their own unique and distinctive look.
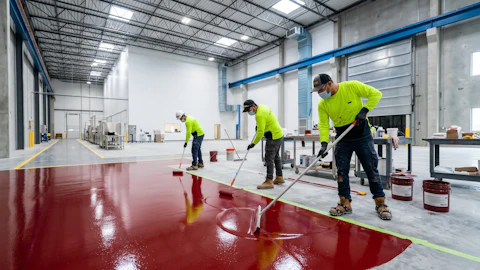
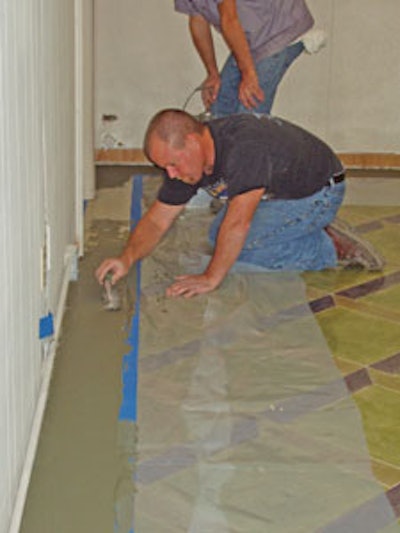
For the professional polisher it is often debatable if some type of topcoat is needed, with some claiming that it defeats the purpose of polishing relative to the ongoing maintenance. Especially when using dyes, we feel that it is necessary to apply two thin coats of reactive penetrating sealer to help lock the color in. If applied properly — over a clean surface in multiple thin coats (1,500 to 2,000 sq. ft. per coat per gallon) — this provides an extremely hard surface and helps preserve the finished floor. Because most of the material penetrates the surface and is applied very thin, scuffing or scratching is usually not a problem.
Dealing with edges up against walls is always an issue. If the polished surface is to terminate directly against the wall, there are walk-behind machines to address this. Most of the time, tooling by hand with grinders and diamond pads is necessary. Another way to address edges is to use different mediums and create a border making the edge an architectural feature. We have had great results saw-cutting a border in and then using cement based skims or colored epoxy.
If you are considering pursuing the polished concrete market, make absolutey certain you do your homework. The purchase of equipment can be a large investment. Talk with manufacturers of polishing equipment and ask why their equipment and services are better than others. Make sure you have a market to support the hefty investment. Polishing machines can also be used for other applications, such as adhesive and coatings removal or to prepare surfaces for decorative overlays, to name a few.
Good luck!
Bob Harris is the founder and president of the Decorative Concrete Institute, Douglasville, Ga., which provides hands-on training seminars in architectural concrete. For more information, call (877) DCI-8080 or visit www.decorativeconcreteinstitute.com.