Concrete's popularity for floors, countertops, benches, sinks and beyond is growing. With advancements in techniques, equipment, and chemicals and dyes, contractors are taking these traditionally gray surfaces and transforming them into beautiful creations.
Concrete is a highly durable surface. One way to enhance its beauty and make it a truly decorative creation is by grinding, polishing and/or chemically treating the surface. The most common methods to produce decorative polished concrete include deeper grinding to expose more aggregate, dyeing the concrete and polishing the surface to a high shine or gloss level.
Benefits of decorative polished concrete
Limitless design. When polishing concrete to a decorative finish, there are endless style options. Contractors and artisans can create unique, one-of-a-kind surfaces using a variety of materials mixed into or introduced on top of the concrete, adding color with dye or stain, or creating patterns with saw cuts or stencils. The concrete is truly a blank canvas.
Environmentally friendly. Concrete is an environmentally friendly building material. Using new or existing concrete means fewer additional materials or adhesives have to be used; therefore, less waste is produced. Polishing concrete also helps increase light reflectivity, which decreases the amount of lighting needed in a space.
Cost efficient. Since polished concrete does not use surface coatings, this lowers costs traditionally associated with flooring installations. The result is a smoother surface with reduced cleaning costs. Polished concrete also increases the surface density and abrasion resistance so it is easier to clean.
New vs. existing concrete surfaces
New concrete surfaces. All types of materials and/or colors can be included in the concrete mix. When concrete is ground and polished, these various elements will show through, creating a beautiful surface. Since pouring concrete takes place early in construction, it is important to work with the architect during the schematic design stage. This ensures everything needed for the final finish is included in the specification.
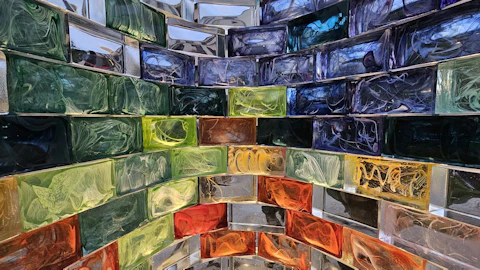
There are two different processes for adding color to concrete. The first method is integral color, which creates a uniform color throughout the slab. The second method involves introducing color to the surface during the polishing process, which allows for the use of multiple colors. In addition to color, contractors can also add decorative glass, metal or rock into the mix or on top of the the placed concrete.
Existing concrete surfaces. If the concrete floor already exists, there are plenty of ways to make it unique. Contractors can add color to the surface with dyes or stains. The concrete will absorb the color better in some areas and less in other areas, so expect a mottled look. This can be enhanced with multiple color combinations.
Decorative concrete sawing is another way to enhance a concrete surface, both old and new. Contractors can create a tile appearance or geometric designs. These cuts, or joints, can be followed by a beveled or V-shape blade, which cleans up spalled joints and creates a stronger, cleaner edge. Contractors can then fill joints with polyurea, a semi-rigid product that keeps dust and debris out of joints but is also flexible enough to move with the concrete. Polyurea is available in standard colors or can be custom matched.
Another product that is gaining popularity in the polished concrete industry is polishable overlayments. These are cement-based, self-leveling toppings that offer concrete a uniform look. Contractors can add small aggregates and/or crushed glass for a unique, decorative finish. Overlayments are a good solution for concrete that requires too much patching, has cracks or trenches, or even needs a spalling cap.
Techniques 'how to'
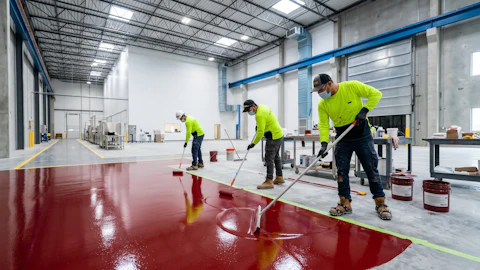
Once the determine the type of decorative finish, it is time to start working toward the end result. There are specific steps to follow when creating a decorative polished concrete floor to ensure the result is durable, highly reflective and resistant to abrasion. The process outlined below takes place after the existing slab is prepared or the new concrete is placed.
Grind. Coarse grind the concrete with either 20- or 30-grit diamonds to expose the aggregate. A full set of diamonds should be used to obtain a flat floor. This also removes the softer, unstable surface layer on older surfaces. A flatter floor makes for higher light reflectivity.
After the initial grind, the floor will start to take shape because the aggregate, color and/or other additives in the concrete mix will be exposed. Next, grind the concrete with 60- then 120-grit diamonds to remove scratch marks.
Fill. When grinding with the 120-grit diamond, you can choose to apply a grout to fill any air pockets or spots where the aggregate popped out. When applying the grout, make sure to work in small sections so the grout does not dry out. While it is still wet, run the machine with 120-grit diamonds through it. This will enable the grout to fill all the holes.
Densification. After the grout is completely dry, apply a densifier. Densifier hardens the surface and reduces dusting. There are multiple types of densifiers, including potassium-based, lithium-based and sodium-based. Using a potassium densifier is preferred at this stage. The surface is still open and the larger potassium molecules in the densifier will remain closer to the top of the concrete. If using a lithium densifier, it should be used at a later stage in the polishing process when the surface is closed up. If applied now, the concrete would soak up the lithium more requiring more densifier.
Liberally apply the densifier to saturate the concrete, but not enough to form puddles. One coat should be sufficient, unless the concrete is very soft or porous. After the floor is damp/wet, wait up to 12 hours for it to dry. After the densifier is dry, it is time to polish.
Polish. Remove the excess cured/dry densifier with 50-grit resin-bonded polishing pads. After the excess densifier is removed, if the gloss/shade of the floor is not consistent, apply a thin, or "enhance," layer of densifier and allow it to dry. Then polish with progressively finer resin-bond floor polishing pads until the desired surface gloss is achieved.
Protect. After the floor is to gloss specifications, it is time to apply a protective sealer or impregnator. Impregnating the concrete increases surface tension and restricts the absorption of water, oil, fats and dirt. After two to three coats of sealer, buff off any residual sealer with nylon buffing pads.
Decorative concrete surfaces provide a brilliant, durable and environmentally friendly finish with endless possibilities. From product showrooms to real estate and areas where aesthetic properties are a top priority, decorative concrete surfaces have found a niche.