Want a masterpiece polished floor that amazes everyone? If so, you need to make sure the canvas—the installed concrete slab—is appropriate because polishing does not necessarily eliminate, or may actually accentuate, unwanted features after polishing. To avoid revealing such features when polishing, consider these proven techniques based on our experience at over 100 polished concrete floor installations. The means and methods described here will assist contractors in meeting project specifications and satisfying architects and owners.
Minimize These Features of the Canvas
Many different features of the concrete canvas can turn into defects after polishing, but we offer proven techniques to minimize or eliminate such defects that fall into four major categories:
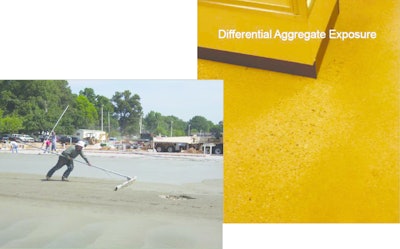
- Differential aggregate exposure – Figure 1.
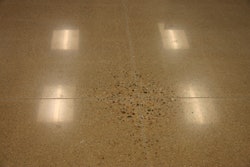
- Difference in surface finish density – Figure 2.
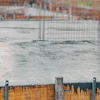
- Effect of saw cutting – Figure 3.
- Influence of curing – Figure 4.
Minimizing or eliminating defects in these four categories will result in a dramatic improvement in the final polished floor. And here is how.
Differential Aggregate Exposure
The overall aggregate size and the blend of coarse to fine particle content should be carefully considered for concrete materials that will be polished after installation. If a smaller nominal maximum size aggregate and a higher sand content is desirable to achieve a more uniform fine aggregate exposure when polished, the designer should consider closer joint spacing to accommodate potential higher material shrinkage and minimize long-term joint widening.
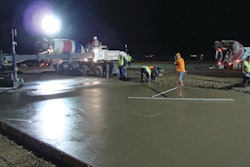
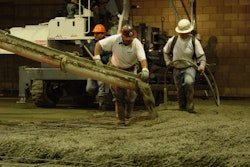
Placing concrete in piles stacks the aggregate at these locations. Workers then use a come-along or power screed to move concrete from the top of the pile to distribute across the subgrade. However, what is being distributed is not concrete with a uniform aggregate distribution. Thus, when the floor is polished, the result is differential aggregate exposure at the surface. Aggregate stacking most often occurs when placing concrete by buggy or by pump when the pump hose is left in one spot. To minimize aggregate stacking during concrete placement, it’s preferable to place the concrete directly from the truck. If pumping is necessary, make sure the pump hose is not left in one spot during concrete discharge.
Uniform consolidation is important, as leaving a vibrator in one place too long separates the aggregate from the paste just enough so that these locations are visible during polishing. Make sure the vibrator handlers understand this will ultimately be architectural concrete and they need a uniform, consistent vibration plan. This should include vibrators of the same size and frequency, vibrator insertion spacing, and vibration time.
Bump cutting removes paste from high spots and deposits it in low spots. Thus when polishing over the high spots, aggregate at this location is exposed sooner than when polishing over the low spots that has more paste covering the aggregates. Minimize or eliminate bump cutting from the finishing process. Use pan floats to obtain the floor flatness needed for polishing.
Footprints push aggregate lower, bringing more paste to the surface and this difference can be seen during polishing (Figure 6). Minimize walking on the slab at an early age where the footprint can cause this issue. When hand screeding, pulling either a straight edge or vibratory strike off, walking ahead of the screed will depress the aggregate, potentially leaving differential aggregate exposure when eventually polished. Therefore, it is preferable to use a strike-off method that does not require standing in plastic concrete.
Use a roller tamp to seed the coarse aggregate below the surface. Directly after the initial strike-off, roll a 36 inch minimum width, double roller tamp, prior to channel floating. At the slab perimeter, use of a jitterbug will provide uniform coarse aggregate embedment.
Difference in Surface Finish Density
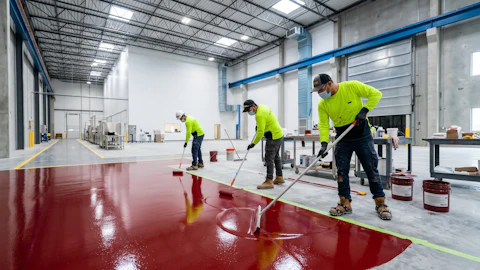
Minimize hand finishing at pour edges, near walls and around columns and penetrations as these will polish differently than surfaces that are machine finished. At pour edges, use a beveled form edge with supporting stakes below the top form surface. Machine finish over the form edge as shown in Figure 7. Use a walk-behind edge finishing machine, with rotating guard ring, if necessary to get close to concrete slabs placed adjacent to walls. Always try to ride-on machine finish as close as possible to columns, penetrations and construction joints.
Avoid a burnished steel trowel finish that increases the potential for mottling and difficulty in uniformly polishing the slab. Perform machine troweling with plastic (Teflon) blades which provide a more uniform surface finish than steel trowel blades.
Finally always check the machines for mortar because if it falls off and gets finished in to the concrete they will leave scratches that will be visible when polished.
Effect of Saw Cutting
Form contraction joints with an early-entry power saw using a dry-cut blade. Use a vacuum (Figure 8) attached to the saw to remove saw cut residue. The early-entry saw minimizes out-of-joint cracking due to delayed sawing, but the residue must be removed, and allowed to accumulate below the skid plate, or it will discolor the concrete when cured. This picture-frame discoloration of the concrete panels typically cannot be removed by polishing. Adhering the loop fabric side of a Velcro fastener strip to the bottom of the saw skid plate will also minimize scratching from any debris that is not removed from vacuuming.
Influence of Curing
Use moisture-retaining cover cure blankets (poly-backed cellulous covers absorb and retain the most moisture). Saturate the concrete surface for 30 minutes, then slowly unroll the blankets while continuing to saturate the absorbent side. Wrinkles must be eliminated in the cover with a broom or roller, or they will create surface discoloration that cannot be removed when polished. Adequate water below the blanket is necessary to remove all wrinkles and air voids. Salts will be brought to the surface through bleed channels during the curing period. Therefore, while removing the curing covers, clean the surface. Scrub immediately, and as often as necessary, to remove all laitance and residue in a soluble state, prior hardening of materials that can discolor the slab surface.
Protection Woes
The canvas is perfect—it’s ready to be polished but wait, are those oil stains resulting from scissors lifts and forklifts that weren’t diapered? And where did those scratches come from? While the concrete contractors might install a great canvas he can’t control the work of other trades. The general contractor or construction manager must step up to protect the floor and enforce work limitations or restrictions for all trades. A slab protection plan should be developed and distributed for adherence by all sub-contractors and vendors working around or near the exposed concrete slabs. The protection is important to ensure the canvas, once placed, remains suitable for polishing.
Establish Means and Methods at the Pre-Construction Meeting
The design team usually presents the important specification aspects of the particular work at the pre-construction meeting. Then they listen as the contractor presents his means and methods to accomplish the specification requirements. Present the means and methods discussed here to show the design team and the owner, you are ready for their important job.