In the time that I’ve been involved with decorative concrete, we have experienced tremendous growth in the industry. The consumer demand, as well as the skill and craftsmanship of those who install it, are leaps and bounds ahead of where they were just 15 years ago. As a former installer and now trainer I’ve seen a lot of stamped concrete both good and bad. In my opinion, one of the biggest things that separate high-end decorative contractors from the rest of the pack is the ability to know what can be repaired and how to go about it.
Fixing Problems
While we all prefer things to just go as planned during the pouring and stamping process, we do still live in the real world and we all know how unpredictable a concrete project can be. Things like temperature, sun and shade lines, or getting caught in the rain, as well as a number of other issues, can come up. There might not be anything you can do to control the weather, but you can learn how to fix some things after the fact.
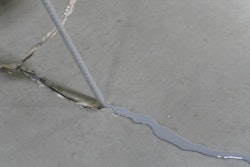
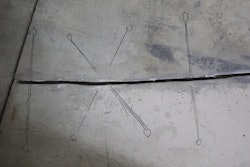
Surface Cracks
Surface cracks have always been a battle for the stamped concrete contractor. Especially in the spring and fall when days are warm, and the nights are cool. Knowing how to control the surface from crusting over can certainly go a long way in avoiding this, but some days it just doesn’t seem to matter how hard you try; you still end up with a few cracks on the surface of your concrete. Here are two things you can try next time this happens to you.
 It may seem counter-intuitive to the process, but using a ball-peen hammer to get rid of those annoying little cracks.Deco-Crete Supply
After you’ve washed the release off your concrete grab a ball-peen hammer. Using the ball end of the hammer, start to tap on and around the cracks in a motion that would close up the crack. If you have never tried this before, you will be pleasantly surprised at how many of those annoying little cracks you can get rid of using just this method alone. This always works best the day after pouring, and keep in mind that after the concrete cures out for a few days this will no longer work.
More on this technique:
 Take a small amount of the same color hardener (if you used one) for your base color and run it through a bucket sifter. This should remove the large sand. Mix the fine powder with water until you have a puddy.Deco-Crete Supply
Let the slurry completely dry before antiquing or sealing. If you had used integral color for your base, it will be hard to find a color hardener that will match your integral color exactly. The best thing to do is to get the closest one you can find and have a second or even third color to lighten or darken things up as needed. you will need to experiment with the dosage to get the best color match.
One thing to remember is that the ball-peen hammer technique requires less time and effort than the slurry technique. Fix as many cracks as you can the next day with the hammer and only resort to the slurry when you have to.
Blowouts or chips around the edges of grout lines
 With small patches, using your hand or a small trowel will smooth out the spot. The challenge here is in the color. Be sure to get the patch to look as close to the concrete as possible.Deco-Crete Supply
Using something cementitious to patch these little guys up is the only real way to fix them. The challenge is getting the patch to look as close as possible to the color of the concrete. With color hardener, this is really easy. Just take a hand full of the same color hardener you used for the pour and follow the sifting and mixing instructions we went over in fixing surface cracks. You will need to treat things differently though when it comes to finishing off the patch. We will be dealing with a larger area to repair and just wiping the excess off with a rag is not going to look very good. For smaller blowouts and chips, smoothing the patch out with your fingers or a small trowel should solve the problem. Texturing the patch may be required for larger repairs.
In the case of integral color follow the tips for color matching described in the crack repair section.
Color Variations
Color variations can be caused by a multitude of different things and once again some of them are out of your control. The first thing we need to do is decide if the problem is in the concrete itself or just on the surface.
 Remember to dilute your muriatic acid with water. Start with 10 parts water to 1 part muriatic acid.Deco-Crete Supply
More detailed instructions can be seen in the following videos:
If the color variations are in the concrete itself, more drastic measures will need to be taken. These variations can be caused by not applying enough color hardener, improper dosing or mixing of integral color, or sometimes inconstant curing. No matter what the cause, the repair will involve some sort of re-coloring. For minor variations, you might be able to hide it with some antiquing agent. More drastic variations will probably require a stain or overlay. The products best for the job will depend on what part of the country you live in. A stain that works great in southern California might not hold up long-term in Minnesota. Make sure to work with your local supplier for the best long-term solution for your area.
Texture
Of all the things that can be repaired on a stamped concrete slab, the texture is not one of them. You only have one shot at this, and you need to nail it the first time. One of my favorite lines from Jason Geiser is “Never sacrifice texture.” On hot and sunny days this might mean letting some of the details go until after you’re done stamping or even the next day.
 A job well done.Deco-Crete Supply
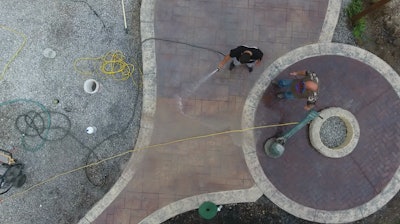
Restoring Stamped Concrete-
Stamped concrete, like all concrete, will need to be maintained and mother nature will take its toll over the years. While simple cleaning and maybe even resealing may be done by the end-user, there is still a lot of work out there in the field of stamped concrete restoration.
Stone Popouts
One thing you will frequently notice especially in freeze-thaw conditions is stone popouts. Although there’s not a whole lot you can do to avoid this, they can easily be repaired. Follow the same process described in the blowouts and chips section.
Watch the below video for more on this process:
Resealing
Resealing is the most common form of stamped concrete maintenance. In most cases, this needs to be done every three or four years. Resealing stamped concrete can be a tricky business so make sure you know what you are getting into. Proper cleaning and prep work, using the right sealer, and application techniques are all essential for long-term success when resealing stamped concrete.
A quick refresher on sealing concrete:
Antiquing
There might be times that the end-user has let the sealer completely wear off and some or all the antiquing is gone. This is really an easy fix and it's a better problem to deal with than if the slab was oversealed. Apply some antiquing agent after the slab has been cleaned, let it dry for 24 hours, and continue on with resealing.
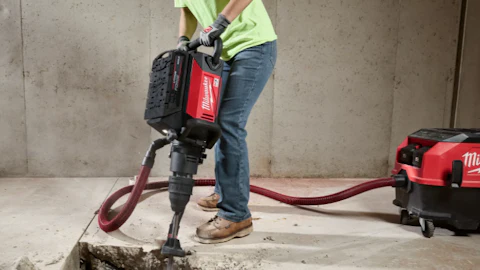
Sandblasting
If things have gotten to a point where there is a heavy buildup of sealer from over-applying. Or if the wrong type of sealer was used, just cleaning and resealing will actually add to the problem. The only way to permanently fix this is to remove all the old sealer and start over. The best way we have found to accomplish this is by sandblasting. This does a great job of removing the existing sealer in a fairly short amount of time without damaging the texture. Sandblasting will remove most or all of the antiquing however and will need to be reapplied before sealing. The other benefit of sandblasting is that it opens up the pores on the surface of the concrete just enough to let the new coat of sealer bond even better.
With the stamped concrete industry still growing every year, the repair techniques for installers are also still evolving. The tips in this article are a great place to start but are certainly not the end of the road.
Jeff Hershberger is a training and store expansion lead for Deco-Crete Supply.