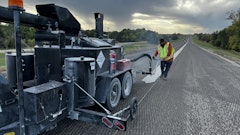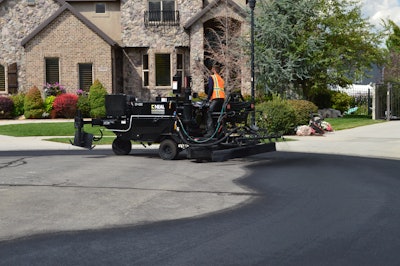
From parking lots to roadways, asphalt serves a critical role in infrastructure. But it must contend with some of Mother Nature’s harshest treatment. Sealcoating may be asphalt’s best ally for longevity. Here are a few quick tips for successful and profitable jobs.
Why Sealcoat?
Before any contractor takes on sealcoating, they need to understand why it’s important and how it works to protect asphalt.
Water and ultraviolet rays are asphalt’s two worst enemies. They degrade the surface, causing small cracks and voids that make way for water to damage the underlying base materials. If not protected, material failure is imminent and will rear its ugly head in the form of potholes.
The only way to prolong asphalt life and keep this from happening is with proper and regular sealcoating. Sealcoat material fills the voids in asphalt and creates a protective barrier from water and sunlight. It can even extend asphalt’s life by as much as four times. But, it must be done right and at the right times.
How: The Mix
Starting with the proper mix is critical to producing quality results. Using “black water,” as watered-down mix is commonly referred to, will never render results that last, and it will quickly give a contractor a bad reputation.
Ensure the mix includes at least 3 pounds of sand per gallon of water to provide the right grip needed for safe use by both vehicle and foot traffic. It’s also important to use quality materials and be sure the mix is adequately blended. Always follow the material manufacturer’s mix-to-water ratio recommendation.
When
Proper sealcoating conditions are similar to those needed to paint a house. The temperature needs to be at least 50 degrees Fahrenheit and rising, and there should be plenty of bright sunlight. It is not recommended to sealcoat when it’s colder than 50 degrees or during overcast at this temperature.
Also, consider how long the area will need to dry and how long the space can be closed to traffic. If your client demands a small window to sealcoat and stripe, you’ll need to be sure you’re not applying material on a cool, cloudy day. Heat and sunlight are your best allies for speeding up drying times.
How Often
While prep work, the mix and knowing the right time to sealcoat is pretty straightforward, knowing how often to sealcoat is a little more fluid. The weather, precipitation, freeze/thaw cycles and traffic can all have an impact and will vary from year to year. Sealcoating typically needs to be done every two to five years, but it’s a good idea to be proactive with clients. If conditions were particularly harsh, check in with clients and go out and inspect the area to see if services are needed sooner.
Whether operators are novice or veteran, when sealcoating basics are kept top-of-mind they help seal the deal for a successful job.
Maury Bagwell is the lead engineer at Neal Manufacturing, a division of Blastcrete Equipment LLC, which is based in Anniston, Alabama. He has more than 25 years of experience in manufacturing, sales, product design and engineering. His primary responsibilities include product development, engineering and quality control.





![Lee Boy Facility 2025 17 Use[16]](https://img.forconstructionpros.com/mindful/acbm/workspaces/default/uploads/2025/09/leeboy-facility-2025-17-use16.AbONDzEzbV.jpg?ar=16%3A9&auto=format%2Ccompress&fit=crop&h=135&q=70&w=240)

