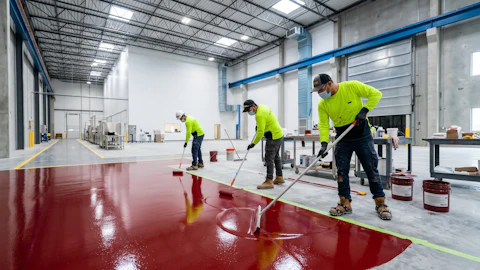
Rarely are specifications for interior concrete floors clear-cut, even on commercial projects. In most cases, clients will welcome your design ideas and even expect them. After all, they are choosing a craft product for a unique look — and you are the craftsperson.
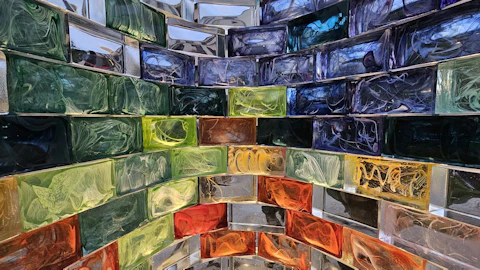
Design ideas are out there in this world waiting for you to grasp. It is just a matter of being alert and collecting good designs when you see them so you have ideas to draw from. I keep a stock of patterns, layouts and sketches, and add to my collection constantly with clippings from magazines, design books or ideas I get from being out and about.
For example, when traveling I get ideas from the terrazzo or marble flooring I see in airports. If I am in a retail store and see interesting designs in a floor of any kind, I will take notes. Start paying attention and taking notes to document what you see in your daily travels. Use Mother Nature as a source of inspiration whether it is an awesome sunset or the color changes of the leaves during the fall.
You would be surprised where you can pull from for ideas. Take for example the Disney movie Beauty and the Beast. If you freeze-frame certain segments during the movie you will be surprised to find some of the most exquisite floor designs.
In a nutshell, good flooring designs will come from everywhere. In one instance, I told a student to go to Borders and buy a book on quilting to glean ideas from. The student came back to class the next day thrilled because he had found three books with quilting patterns on the discount rack. Good ideas can also be found in hardwood flooring books, faux painting manuals and even books with vinyl flooring patterns. Oh, yeah — check out your material suppliers’ brochures for design ideas.
Obtaining good designs or artwork is just half of the equation when considering using them on your floors. We commonly use three techniques to transfer artwork or images to the substrate on a regular basis: overhead projecting, gridding and transfer pouncing.
Overhead projecting
Overhead projecting is a simple but effective way of transferring your design to the floor. You will need to copy your image or artwork to transparency paper so that it can be used with the overhead projector. You may need to increase the size of the artwork to the largest scale onto the transparency paper so that it does not become distorted when you project the image. Remember, the larger or higher up you project from, the more resolution that can be lost. Once we have figured out our proper projection location and appropriate size, we simply turn out the lights and start to trace the image to the floor.
Gridding
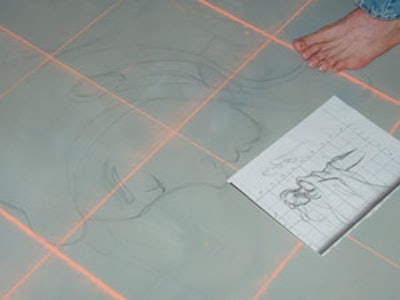
Gridding is an ancient technique that many artisans use on a regular basis. This technique requires a series of grids to be drawn over your artwork. You will need to determine your own scale of grids to draw relative to the actual scale on the floor. An example would be as follows: Draw 1-in. grids (boxes) across the entire surface of your artwork. We usually label the vertical boxes with letters and the horizontal boxes with numbers, although it really does not matter. Using your predetermined scale, 1 in. might equal 1-ft. grids on the floor. Simply chalk a grid pattern at 1-ft. intervals. Using the paper grid, simply transfer the artwork from the designated grid onto the corresponding grid on the floor. For the initial grid transfer, the use of chalk is effective to draw the design because it is easily removed if you need to realign the design.
Transfer pouncing
Transfer pouncing is a great technique we use frequently that I am surprised is not more commonly used in the decorative field. This technique requires you to transfer your design to a template usually made of plastic or paper. We have had good results using our friend the overhead projector to once again project our image to plastic. After tracing the design to the plastic template, I like to lay the plastic on a sheet of plastic foam, which prepares us for the next step. Using a soldering iron with a fine tip, burn holes every inch or so through the plastic. By conducting this process over the foam, it enables the hot tip of the soldering iron to pass through the plastic into the foam leaving a clean hole in the plastic. It is difficult to achieve clean holes when trying to burn over something rigid like concrete or wood. Once all of the holes have been burned, take your template and position it on the floor. It is a good idea to put tape on all four corners of your template so that it does not move during the pouncing process. Take an old sock and fill it half way with orange chalk or baby powder and start to pounce the sock over your holes. Once complete, carefully remove the plastic stencil. If you drag the stencil during the removal it could smear the dots. We then connect the dots using a pencil or chalk.
As you can see, there are many sources of inspiration and techniques to use that can help you take your decorative concrete work over the top. Use each and every day as a learning experience and try some of these techniques. You may be surprised how easy yet effective they are.
Good luck!