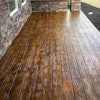
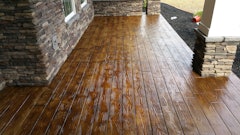
Chemical stains and dyes produce a unique look to each concrete floor to which they are applied.
This uniqueness is a benefit and a large part of the attraction to concrete floors. That said, it is vital to produce a sample of what the floor will look like after it is stained and sealed. There are so many factors that affect how the chemical stains react with the concrete – quantity of cement in the mix, the age of the concrete and concrete finishing methods, to name just a few – that a sample must be made on the actual floor you are going to be staining.
Certainly, your website and portfolio can attract a prospective client, but that is no guarantee you can match identical colors since every load of concrete is different. Most manufacturers of chemical stains or dyes provide color charts displaying their colors. Review color charts and color chips with the client. Keep in mind that color charts are photos of the color that have been laminated onto paper and not actual concrete. Color chips and color charts are simply starting points.
Sampling can turn into a time-consuming as well as costly endeavor. Have a signed contract before you spend your efforts in the sampling phase. Some contractors have a formula for sampling, such as the first series of samples is part of the original contract with additional samples costing $300. Typically, it is not as much of an issue on residential applications; however, on large commercial applications I have actually sampled for days before the architect or owners approve a specific color.
Choose an area of the floor to construct the sample that will ultimately not be visible and not a part of the finished work such as a closet or an area that will receive some other flooring material such as carpet. Make sure and construct a sample large enough for the client to get a better perspective of what the end result will look like. Not only are you sampling for the ultimate color, but also to find out how the stain takes to the floor. Samples do not provide an actual perspective. For this reason, I will always conduct a water absorption test prior to any staining. Mist water on the surface - if the slab darkens and readily accepts the water, chances are you have a surface that is a good candidate for staining.
Make sure you prepare the floor in the sample area in the same fashion as the actual installation, such as sanding, buffing, scrubbing, mechanical abrasion, etc. This way you will not encounter any hidden secrets when it comes time to work on the actual floor. Finish the sample off with your proposed sealer and floor finish. Sampling in this manner provides expectations for you and your client.
Document the formulas used during sampling and keep accurate notes in your job file. I keep a record of every project complete with the sample formulas. If you successfully installed a project that is subject to the general public, such as a restaurant, years ago, you may not remember the color formulas used on that project.
Once a final sample has been agreed upon, obtain written approval from the client so they cannot come back to you suggesting that the color is too dark or light.
It takes time to properly go through the sampling procedure. But it is extremely important that your client knows what to expect, so they need to see a representative sample. If you have an office to conduct some of your own sampling, start showcasing some of your work and invite clients to your office to show what you are capable of.

