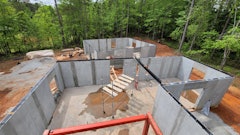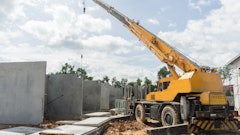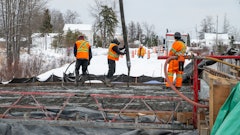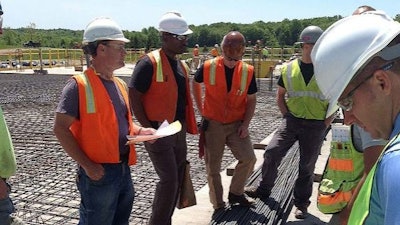
A successful project starts during the bidding process. Defining the Request for Proposal (RFP) with a clear vision of the scope of work, job site conditions and work restrictions will go far in minimizing confusion and potential conflict. Honest and accurate schedules, milestones and expectations must be communicated and clearly understood by all parties. One of the biggest bones of contention between contractors we have seen through the years is “we didn’t build it the way it was bid.”
Developing the Request for Bid Proposal
The scope of work should be clearly defined and easily understood. Ensure during the bidding process that adequate time is allowed for the bidders’ questions and discussion. Do not assume anything; remember you have been looking at plans and documents much longer than the bidders and have an intimate understanding of how you want the project to proceed.
Responsibilities should be detailed regarding subbase remediation, weather protection, housekeeping, safety and slab protection.
“Apples to apples” is critical when evaluating competing bid proposals. You must dictate the scope of work you want priced and completed. Oftentimes contractors want to pick and choose what they want to bid and will qualify their bid based on factors that fall outside your intended scope of work. Accepting exclusions and conditional proposals only muddies the water and can lead to misunderstandings, delays and additional cost.
Construction schedules, milestones, critical path, and job site work restrictions should be clearly stated in the RFP. Claims for delay, extended general conditions and extra work can be frustrating, difficult to unravel and can lead to animosity and fractured relationships. Delays to schedule caused by weather or other uncontrolled acts should be covered and what the schedule recovery process will be should be clear. Recourse for contractor related delays and recovery options should be clearly understood.
Awarding the Job
Fast tracking and hitting the job running is great, but do not fast track the award process. Take the time to adequately evaluate the competing bids and after you have narrowed the bidder list down, do your due diligence and interview process. Obviously, you must determine the contractor’s financial viability and work history, but you also need to understand the contractor’s capabilities and plan of attack.
Do not just talk to the estimators and office people. You should interview the contractor’s field team and review their proposed means and methods. A simple question to ask is, “Can we work together and are we in agreement on how the job is going to be built?”
One last point on the award process. Allow enough time between bid award and start of work. Every contractor loves getting the call saying you got the job, but nobody wants to hear, “Oh, by the way, we need you onsite next week.”
The submittal process can be time consuming and developing concrete mix designs can take 30 days or longer in some cases. Many projects today require personnel background checks, medical testing and safety orientations that must be completed prior to personnel being allowed on-site. It takes time to get a scattered workforce scheduled and paperwork completed.
Preconstruction Planning
Depending on how involved or large a project is, having a preconstruction meeting with all trades is recommended. This is a great opportunity to introduce all the players, discuss administrative processes, job site rules and restrictions and schedule. Again, make sure the contractor’s field team is involved, at least down to the superintendent level.
Long lead time items required should be discussed. The concrete contractor is going to want to know site access points, material and equipment laydown areas and general phasing of the project.
Slab placement lay-outs need to be reviewed and approved by all parties. Method of placement, production rates and access required should be discussed and finalized. Ideally slab work will flow logically with minimal jumping around. Continuity of work is important. Review slab joint layout as it pertains to end use of the facility. Try to keep contraction (control) and construction joints to a minimum in high traffic areas.
Slab mock-ups and test placements are terms that are often used interchangeably, but they serve two different purposes. Slab mock-ups are typically small placements of less than 10 cubic yards to evaluate concrete mix design and slab finish. These are typically not part of the building footprint, and several mock-ups may be required to confirm mix properties and final finish.
It is important that the final approved mock-up remain in place during the slab placing operations as a reference point for slab finish comparisons. Test placements are typically large enough to review production means and methods, concrete delivery rates, Ff/FL results and slab setting characteristics. Test placements are typically part of the building footprint located in the least critical area of the building. Full size production placements should not start until all parties are comfortable with test placement results.
Team building is important and should start during the preconstruction phase. Encourage your concrete contractor to attend weekly jobsite progress meetings as soon as the bid is awarded. Get them on board and contributing input to the building plan. Pre-placement meetings are crucial to getting off on the right foot. They should be scheduled prior to test placement and should not be more than two weeks ahead of scheduled start of production placements. You will want to invite design team, testing agencies, concrete contractor and his sub trades, ready-mix producer and all general trades that have work or coordination issues with the concrete placements. Agendas can come from either the concrete contractor, general contractor, or a representative from the facility end user.
No matter who conducts the meeting it is important that at a minimum the following items are discussed and reviewed:
- Schedule and slab placement layout
- Start times, work restrictions and production rates
- Concrete mix design, floor finishes and Ff/Fl requirements
- Contractors means and methods and any special needs
- Environmental concerns, weather protection and slab protection
- Slab plan details and specifications
- Testing procedures and requirements
- Contraction (control) joint installation and curing
- Specialty floor treatments or coverings
- What ifs: Batch plant and equipment breakdowns and delays, out-of-joint cracking and substandard workmanship or materials
Construction Phase, Prepping and Placing Slabs
Who or what is driving the job? Most projects are schedule driven and have a critical path. Through the years most slab projects we have been involved with seem to hinge on one or several of the following activities:
- Building pad completion
- Steel deliveries and erection
- Critical equipment delivery dates
- Roof completion
- Weather
Typical all-trade daily reports may be adequate to capture pertinent detail related to slab placements on small or repetitive placements, but we recommend that a separate slab placement report be used for any significant placements. Important data that should be recorded for a slab placement:
- Placement size, configuration, and details
- 24-hour weather data
- Actual start of placement, placement complete and slab finished
- Concrete rate of placement
- Placing slumps
- Record of any delays longer than 30 minutes
- Subbase condition or other under slab
- Rejected concrete
- Obvious defects
Pictures and video are great, and we suggest at least 10 pictures taken throughout the place, finish, saw and cure process daily. The more information the better; do not try to rely on memory six months later.
Standards for quality will have been established with mockups and test placement and continuing adherence to expectations needs to be monitored throughout the slab placement sequence. There can be a tendency to let standards slip after the first several placements are complete and non-crew scrutiny decreases. Resolve quality issues as they come up.
Slab protection guidelines should be communicated to all trades and spill clean-up procedures established. Disputes and disagreement will come up during slab placements. It is a natural part of team dynamics. The important thing is how issues are handled. Be forthright and clear in communicating expectations and try to anticipate potential conflict.
Most of the conflicts and disputes during slab placements can be traced to jobsite conditions (subbase remediation, weather protection, etc.), schedule constraints/demands, coordination with other trades and “not in my bid” differences. If you have ground rules in place for managing these situations your project will run smoother. Change orders can be straightforward, provided administrative protocols are in place. Extra work and back charges can sometimes become something of a gray area, especially if informal trading of work is allowed. Field directives and communications should be formalized and recorded.
Developing a Punch List and Managing the Warranty Period
The purpose of doing a punch list is to identify work in place that does not conform to plans and specifications or is not up to standards established for the project. We have found that the easiest way to manage this activity is to be proactive, identify and correct these issues as they come up during the construction cycle. This will simplify and expedite the final walk through and minimize the number of issues to be corrected at the end of the project.
Typical slab punch list items:
- Concrete splatters, excess mortar on walls, floors, columns, and imbedded items
- Out-of-joint cracking. Crack widths < 30 mil wait & watch, >30 mil repair. We do not advocate removing slabs just because of a crack. Dependent on slab design and location of crack, floor durability and longevity will not be compromised. If the owner or end user refuses to allow any out of joint cracking in the slab, this needs to be communicated clearly during the bid stage.
- Slab curling at joints, columns, and walls. A certain amount of shrinkage and curling can be expected in most slab designs, and unless floor usability is compromised this item should not be addressed. In areas where curling is problematic grinding is usually the best correction.
- Spalls, aggregate pop-outs and cosmetic blemishes
Warranty terms and length are typically spelled out in the contract documents. Communication with facility managers should be maintained while the warranty is in effect, and periodic inspections should be conducted. A final warranty walk through should be done prior to the end of warranty period, and a representative from the concrete contractor should be present.
A successful project will depend on team dynamics, communication and a clearly defined path forward. Partnering is essential and is built upon trust and honesty. Placing concrete will always be challenging due to the many variables encountered during the construction cycle. When a true team effort is put forward the reward will be greater productivity, enhanced safety and a concrete project that makes everyone proud.

